Damascus questions

Joined
Jan 24, 2001
Messages
137
Hey Y'all,

As most of you know I recently got into forging and I have been itching to weld up my first billet of damascus. But I got some serious questions.

I just got about 18 ft of big bandsaw blade from one of them woodmizer sawmills. It is about 1 1/2 inches wide, but only about 1/16" thick. I am assuming that it is L-6, unless someone can tell me different. I heard this makes good contrast steel sandwiched with 10xx steel. I have 1084 and 1095, which would be better? Also the 10 series steel that I have is 1/8" thick, so should I go with 1 piece of the thinner saw blade between or put 2 in there to equal the thickness of the 10 steel? If I should make the thicknesses equal should I try to weld the pieces of bandsaw before I weld the rest of the billet or should I just put them together and weld all at once?

Also will 20 mule team borax work as flux if I heat it in the oven for a while to get all the water out?

If I have some extra kaowool, should I put a piece on the bottom of the forge to catch the flux so it don't eat my forge liner? Or maybe a hard firebrick in there?

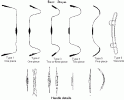
On another subject here, has anyone here ever forged a steel bow? I like archery, and I read articles on this website called the Archer Antiquities. Recently I read an article about steel bows that were made in india. They have pics I could post or I could post a URL to the article if anyone wants. I was thinking about maybe trying to do one of these, sooner or later, and I was wondering how would you go about heat treating something like this?:)

Thanks in advance for any replies.

Chuck
 
The 1/16 saw blade should be L6 or 15N20, either one will work well in the billet. The thickness will be Ok also. L6 dosen't compress as fast as the 1084. I use 3/32" L6 and 1/8" 1084 and it turns out nice. If you're doing it by hand on an anvil I would keep the number of layers down to something you can handle. With 3/32 & 1/8 steel I usually go for around 20 layers for the first weld, but I use a power hammer. Also, if you have some 3/16, 1084 you should use a piece or it for the top and bottom of the billet. This will keep the thin stock from blistering and causing bad spots in the billet.

I usually make my billets 1" X 4" and 20 layers. This makes the billet 1"X4"X 2" high. This makes enough damascus for two or three knives.

I just use my borax right out of the box. Some do it different.

Also, some people cut and fold the billet after welding. I cut the billet into four pieces and then stack and weld. This way with ever weld the layer count is multiplied by four. First weld 20, second weld 80, third weld 320.

I have a friend in north that has a steel bow that he forged out of 1084. It's a real rocket launcher for sure.

Hope this helps.
 
Hey Chuck, I don't do much damascus forging, but I do know from what little I've done that flux will eat through kaowool like cotton candy. I would recommend using the brick in the bottom of the forge. I've had flux to even eat into a brick, but bricks are easier to replace.

On a note about working with kaowool, you don't want to breath the stuff. I have my forge lined with kaowool, but I covered the kaowool with a couple of layers of ceramic slip. (You can get it from a ceramic store.) I've also heard of people taking pearlite and mixing it with furnace cement and coating their forge with that.

-chris
 
Micky covered the high points Chuck. It took me forever to get a good weld but after the first one it was no problem. Make sure you grind every scrap of scale and gunk off of each layer before you start. After stacking I find it a lot easier to tack weld the ends to hold the whole mess together leaving one longer one welded to a rod for a handle.

I've tried every flux method I've read about. I still just heat and dunk in the box of 20 mule team. A better method to try after you've gotten the hang of stacking, is Bruce Bump's method of stacking inside a piece of square tubing. He welds a cap on both ends and doesn't need flux. After you've finished, just grind whatever tuning is still showing, off. That's the neatest thing I've ever tried and makes pattern development a lot easier.

Make sure you get it hot enough and beat the He!! out of it in mutiple heats. That was my problem. I tried to get it all welded in one pass.

Back to Bump's wisdom....kill a chicken and hang it's foot on the western side of the forge...or was it east?

Good luck!

:rolleyes:
 
Hey y'all,

Thanks so much for the replies, I think that the info y'all gave me should get me going. I'm gonna go for 7 layers to start, I think that should be OK.

Another question; Should I be wearing some kind of welding goggles if I am doing this? Would a pair of UV blocking sunglasses work?

Anyone want to comment on heat treating a steel bow???

Thanks y'all.

Chuck
 
Sorry Chuck, I was going to comment on the bow but at my age my mind wanders. I have made a few. The heat treat is easy. Medium blue using the draw tempering method. I've never don it in an oven but I can look the temp up for you if that's how you will do it. Watch your profile. That's the most important part. It needs to flex evenly.

Yes, wear goggles either with UV protection built in or sunglasses under them. I have sunburned my eves several times. It's amazing how MUCH UV the forge puts out!

North side Peter
Thanks Gouge!!!!:D :D

Looked it up anyway Chuck!
570 degrees, purple

600 degrees, bright blue

650 degrees, pale blue
Remember you can always temper softer but you have to Re-HT to harden so start on the hard end first!
 
Hey Chuck, if you can try and find some 10xx steel that's closer to the thickness of the woodmizer blades. We use the woodmizer blades layered with high tensile metal strapping. If you look for some make sure that the strapping is high tensile and that works out to be something like 1095. It will be slightly thinner than the woodmizer blades. If you aren't sure about the strapping just try hardening some to test it. I went in with a friend and bought a 100 lb. roll and it was quite econmical.

Using the high tensile metal strapping in the mix with the woodmizer blades allows you to have more layers in your starting billet which of course translates to fewer welding heats. Getting 40 layers or so welded together isn't the hard part, drawing out the 1 1/2" billet is the problem!
 
Peter, thanks for the bow ht info. I will try to put it to good use soon. Did your bow have much curvature or was it more like a longbow? These bows I am looking at have a curve to them almost like a eastern reflex bow. I will attach an image to this post.

Guy that is an excellent idea about using the strapping material to increase the layers from the get go. Any preffered sources? MSC? Enco? etc.

Thanks guys,

Chuck
 

Attachments

  • afb1.gif
    afb1.gif
    7.4 KB · Views: 167
an arbalete (crossbow maker) was demonstrating how to make the realy big ones requiring a windlass to draw. it was a two-piece steel bow that looked like it had a semi-circular section but seemed to have ridges on the belly side. he tempered both halves in molten lead (i suppose similar to what musket makers do to make the springs for the locks). jeeze, the projectile looked like a mini bazooka round. looks like it will go through any body armor, even those we have now.
 
Hey Chuck, a good trick I learned from Jim Hirsoulas Book was to use kitty litter (100%) clay in the bottom of the forge to soak up the flux. Put a goodly layer down , and rake the stuff out and replace with fresh after the forge cools, brick might be better but this is easy to get.

Spring bow, temper at 900 or deep blue. another alternative might be to make the boiw and take it to a spring shop. They are already set up for long pieces:D
 
Gidday

I use a product called thermo coat 2000 it is a grey licquid with minerals and stuff in it. You paint it onto the linning of the forge and it gives some protection ceramic shops sell it as a safety feature to prevent the wool fibers comming loose in kilns.

After the Thermo coat I put in a layer of kity litter. Then a fire brick. The one I use is quite soft and I scrape out a hollow to catch the flux. But I also paint the brick with a mould wash to protect it from the flux. The brick lusts for a couple of sesions but it gets eaten by the flux as well.

One tip wich may be dribble may be true, If you are going to forge thin stock in layers get your anvil up to heat first. We have forges
brick banding strap a number of times. It seemed that if we started on a cold anvil, The side that was on the cold surface would not weld on the first layer or 2. Once we had this problem with the billet
it kept causing problems with latter folds. When the anvil was hot the first weld went all the way to the bottom layer. (Hang another chicken)

I have usede 2 kinds of borax both were powder never tried to dry
them once it hits the hot metal melts and goes into the forge the water soon goes.

I just use a spoon to sprinkle it over. If the billet is too cold when you put the flux on it will not melt. If you then put the loose powder on the billet into the forge that can also blow around and
attack the linning. If you have not already started get a good apron
to catch the hot slag that will spray out in all directions. Holes in the pants and shirt make the cook unhappy.

My friend does use 2 layers to one to get the layers even .

Expect to loose about 70% of your metal onto the floor as fire scale.

Purhaps you could make a couple of rams heads to get the anvil hot.

I make a coule while the forge and anvil are getting up to welding heat. Good luck

just one last tip don't let your stock get too thin and wide before you fold. It is easyer to fold then eaven up the stack when thick.
If you hit the edge of the billet when too thin it will fold and sometimes open the welds.
 
Hey Chuck, wow you've gotten a wide array of answers and suggestions! I was going to order a 100 lb. roll of high tensile strapping from Mcmaster but my friend works at a canoe shop and he has a contact with their supply guy who picked up a roll for us on one of his runs. Cost us 80 bucks delivered so it was a real bargain because we didn't have to pay shipping. Shop around, but if I remember right when I was looking online it was about the same everywhere, but some shops don't carry it in the wider widths that compliment the bandsaw blades.

They also usually carry the stuff in smaller rolls which are much more expensive per foot but you don't spend as much in one shot. If you end up buying a big roll be prepared to build something to put it in. You don't want to cut the restraining bands on 800 feet of spring steel strapping without putting it in something first!:eek:
 
A tip for the new guys on a budget.
I have been to the local steel supplier and they have given me the strapping from around the bundles of steel. If I want it in bulk they
will sell it to me at scap petal prices.
 
Wow!

I have gotten a wide array of posts here. Thanks for everything guys! Between the posts I've recieved here in the past few days, and my knifemaking books and videos, hopefully it will all go OK. I have even had an offer of a walk thru over the phone! Thanks. I am still working on grinding the pieces clean and getting them stacked up (I am about a slow somebody). I probably need to get a welding apron or something too. Usually I do all my grinding and forging in shorts and flip-flops, This is gonna require a little more hide protection I think. I sure am glad I talked to you guys before I went out there and started splattering hot borax all over myself.:eek:

Thanks again all! Also thanks for the bow HT ideas too.

Chuck
 
Back
Top