- Joined
- Jan 9, 2014
- Messages
- 527
Earlier this year we, -my dad and I that is- decided that our next model would be a folding knife. Having only made fixed blade knives until now we were both excited and somewhat intimidated by this new endeavor. When designing a new model we usually come up with a list of requirements and then create a basic design based on that. Once we have made first prototype, we usually have a number of significant changes we need to make so we go back and re-design. Once we have made the agreed upon changes we make another prototype. Then we re-evaluate and usually end up repeating the cycle a few more times. With each prototype the tweaks become smaller and smaller until we converge on a design we really like.
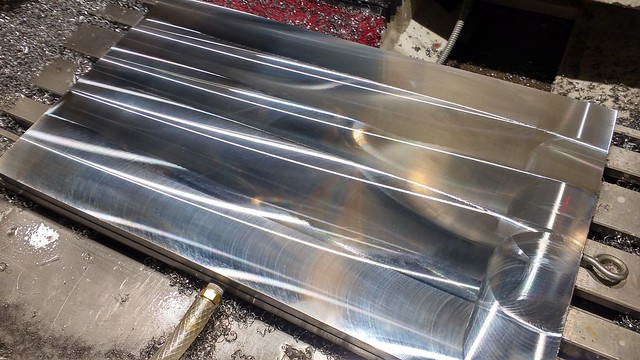
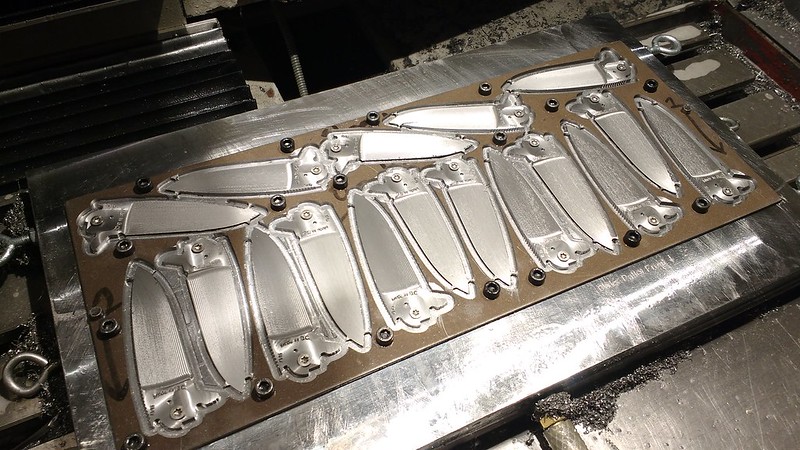
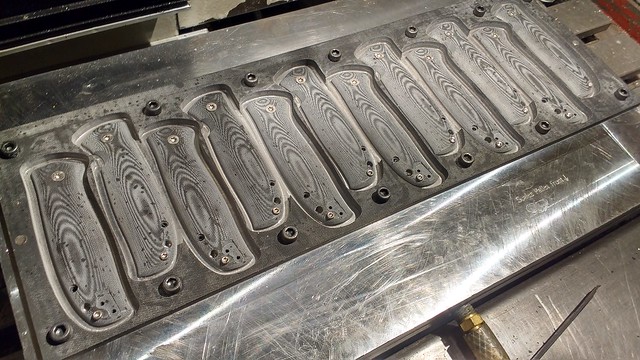
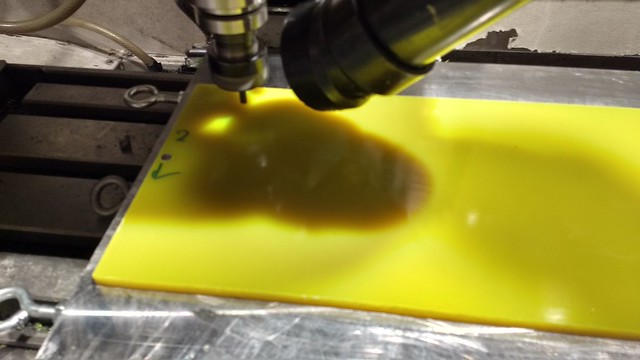
We make our knives using CNC milling and multiple hand finishing steps. The CNC side of the process has three main steps. First we design a 3d model of the knife in our CAD program (computer aided design). Then we import that design into a CAM program (computer aided manufacturing). CAM is where we create tool paths to mill out the knife. Once we have a good tool path, the CAM program creates G-code which describes the tool paths for the CNC mill to follow while milling the knife. Finally we run the Gcode on the CNC mill to cut the knife out. Of course after the blade or scales are milled we have hand finishing to do, and heat treating in the case of the blade.
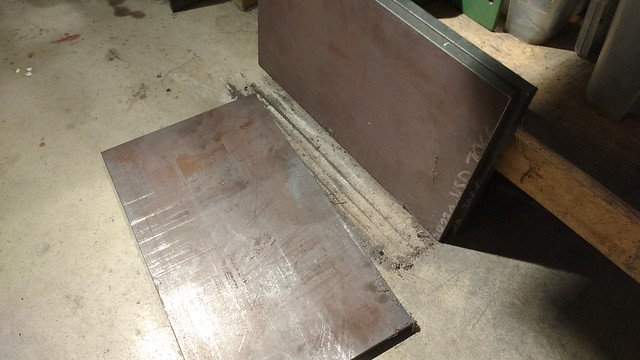
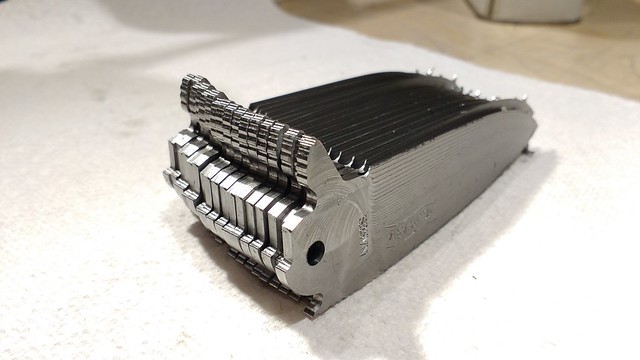
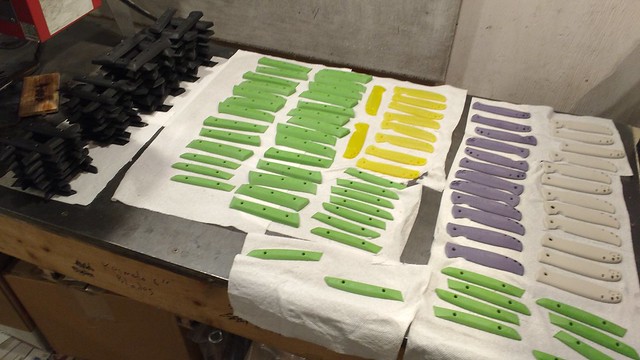
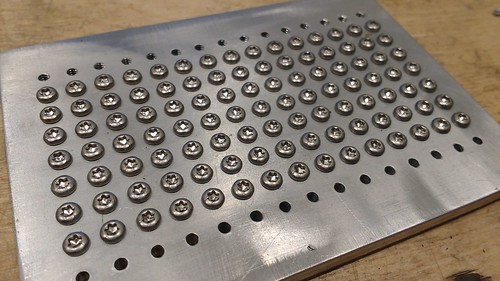
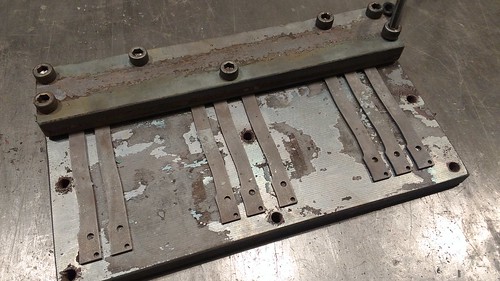
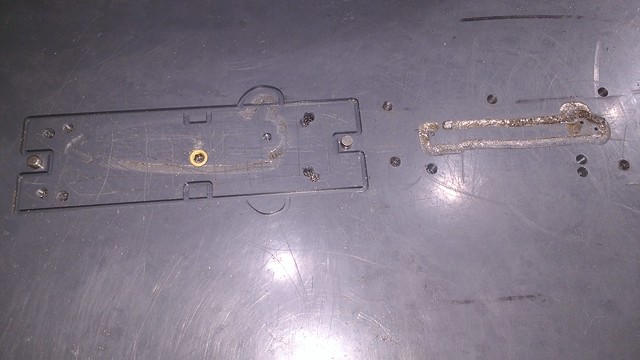
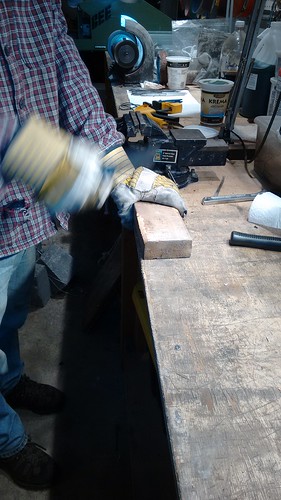
One of the trickiest aspects of prototyping is holding down the materials we are cutting our parts from. For our production models we have dedicated steel fixtures which make work holding easy. Prototypes on the other hand, are constantly changing, so creating a steel fixture for each one is unpractical. We've started using 1/2" PVC sheet to make prototyping fixtures. It is cheap and easy to work with and accurate and strong enough for temporary use.
Temporary PVC vacuum fixture for lockbars and blades
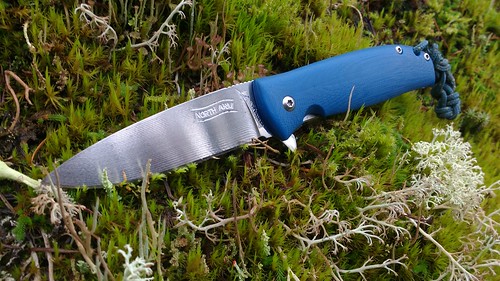
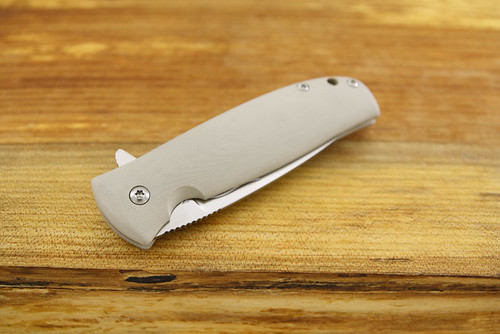
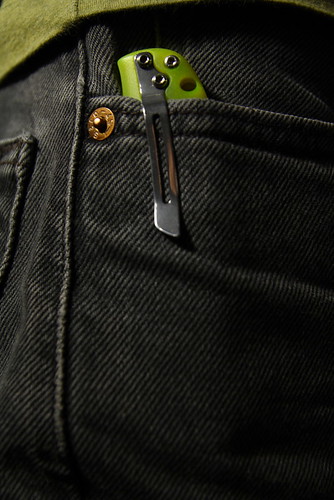
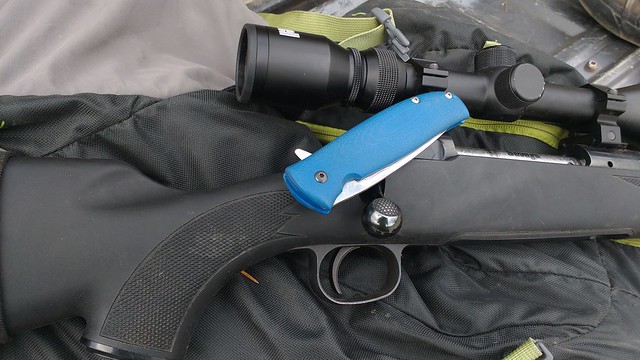
After a few preliminary discussions about the folder, we had a basic idea of what we wanted to make. An EDC flipper with a blade around 3-3.25 inches, contoured and comfortable g10 scales, stainless hardware all around, and it had to be lightweight and practical to carry. In terms of a locking mechanism we thought a liner lock would be the way to go. As you'll see in the photos, we came up with a way to make the knife sleeker and less heavy by avoiding a true "liner"; instead, we have inset a stainless lock bar into the g10 scale. This approach has proven to be quite successful so far")
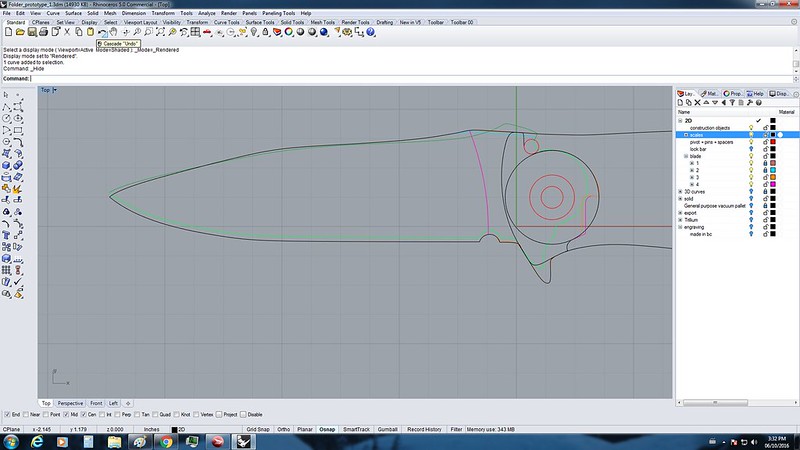
With our criteria in mind, I started doing some CAD (rhinoceros 3D) drawings one weekend in early august. I found I was having so much fun designing this first rough prototype, that I ended up finishing most of the CAD work on it by the beginning of the week! This being our first folder, it was totally different from any of our other designs, and therefore an exciting new project.
Prototype 1
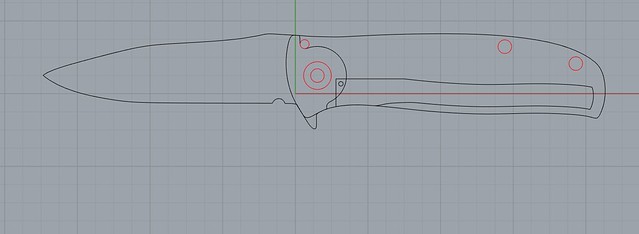
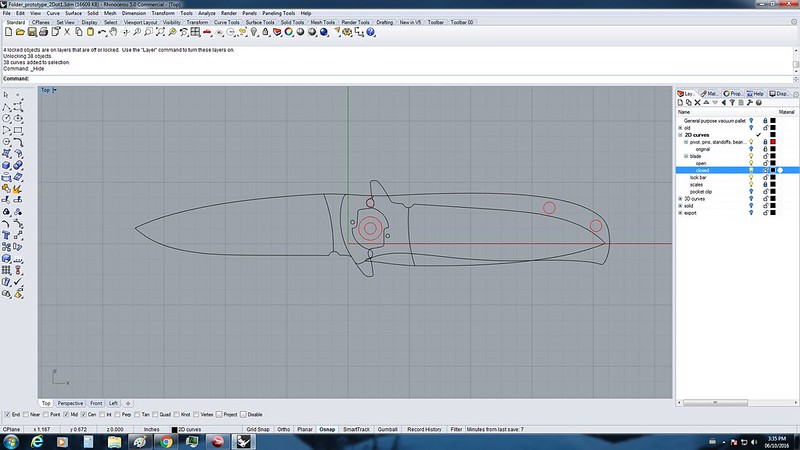
Here are two CAD screenshots of prototype one. We start all our designs with just simple 2D curves.
Different blade shape ideas
complete profile
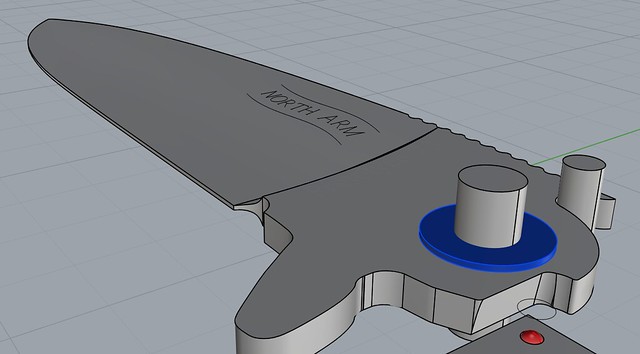
3D CAD rendering of the design
And here are photos of prototype one "finished"

After assembling the knife we found that we really liked the scales. The rest of it, however, was pretty rough. We used a mix of random hardware we had around the shop. The blade was too busy with unnecessary curves and kinks on the spine and the flipper tab was uncomfortable. Most of all, the moving parts of the knife needed a lot of attention. It was rough on it's bearings, the detent was weak, it was rubbing against the stop pin and didn't lock up properly. So, with new goals and ideas, I went back to CAD and started working on prototype two.
Prototype 2.0
Dad and I discussed what we wanted to change about the blade; we decided on a much simpler and more smooth spine curve and just a bit longer. I drew some more ideas and came up with a blade shape we both liked. Fixing some of the interference and roughness problems meant moving the pivot and stop pins slightly as well as redesigning the whole pivot area of the blade. One of the beautiful things about CAD is the ability to visualize parts moving in relation to each other, which has helped a lot in designing this knife so far. We actually didn't change the basic shape of the scales at all, I think it is the first time I've designed a handle and had it come out just how I imagined the first time around. We did enlarge the thumb relief to push in the lock bar, and continued to tweak this over the next few prototypes.
This is the 2D profile of what we came up with for the next version, showing the blade in both the open and closed positions.
Once we are happy with the basic shape, we create 3D curves like the ones below
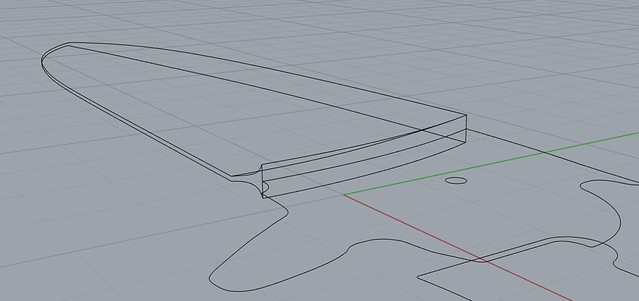
Those curves can then be used to create solid objects
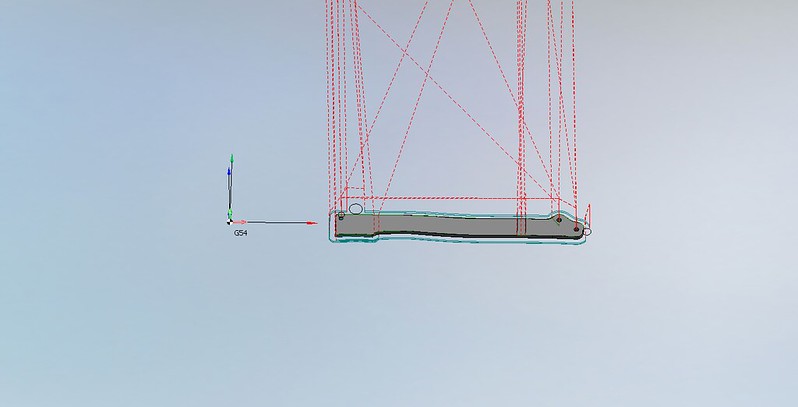
Once we have solid objects we can export those to our CAM software, where we create machining operations and toolpaths to cut out the part with the CNC mill.
This is a screenshot of the lock bar in CAM. All the different colored lines are paths for different tools.
Here is an assembled version of proto 2.0 This one has a pocket clip and more appropriate hardware.
We liked the overall shape quite a lot now but the mechanical function was still pretty rough. Also, that pocket clip is way to huge! We concluded that the detent was still much to weak and that the bearing surfaces on the blade were probably not smooth enough to allow for smooth action. I also accidentally snipped the tip off the blade when removing it from the heat treating pouch :grumpy:.
Prototype 2.1
The next prototype (version 2.1) was no different in shape except for the flipper tab being slightly more rounded. The main improvements were small tweaks in the milling which greatly improved the mechanical function. This was the first version that felt like it had a nice smooth blade travel. It also flipped and locked up reasonably well. The detent however was still too weak. This version had no pocket clip. We had ordered some different ones (we aren't making them ourselves yet) but they hadn't arrived yet. They were held up at the Canadian border, a common issue for us because we order almost all of our supplies from the US. One of the struggles of making anything in Canada, and especially Vancouver, is we simply don't have much of a manufacturing industry. Getting things like specialty stainless hardware or milling cutters locally can be quite challenging, if not impossible.
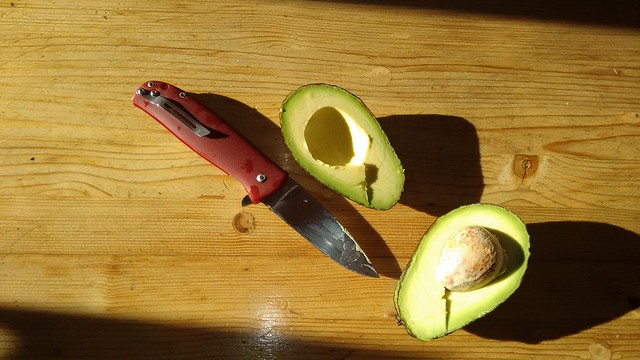
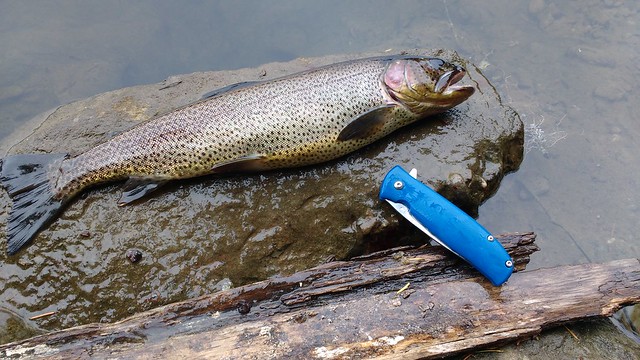
One of my favorite parts of designing a new knife is practical testing
Prototypes 2.2 and 2.3
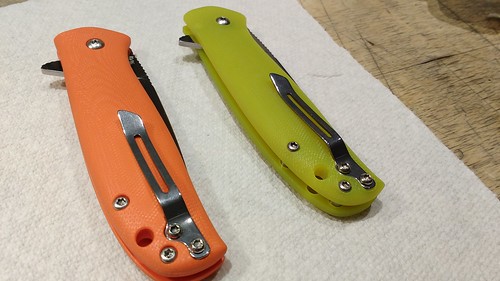
So far we were quite surprised by how well the design and prototyping process were going. By proto 2.2 and 2.3 we were already into the "minor tweaks" stage of the process. We created in quick succesion so I'll do them as a single section. We added a new, sleeker, pocket clip, and some subtle jimping along the spine for 2.2. It was also the first with a hardened and spring tempered (s35vn) lockbar. This gave the lockbar a nice crisp action. For 2.3 we added a lanyard hole and changed the flipper tab again as well as a more major change. The most notable change on 2.3 was one which is not visible from outside the knife. We used a 3/32 detent ball instead of a 1/16. This finally fixed the weak detent issue which plagued the previous prototypes.
Finished version of 2.2
Once 2.3 was assembled we liked almost everything about it. It was very smooth. The detent was just strong enough. It flipped and locked up nicely. The one complaint we still had was the flipper tab was still not quite right.
Prototype 2.4
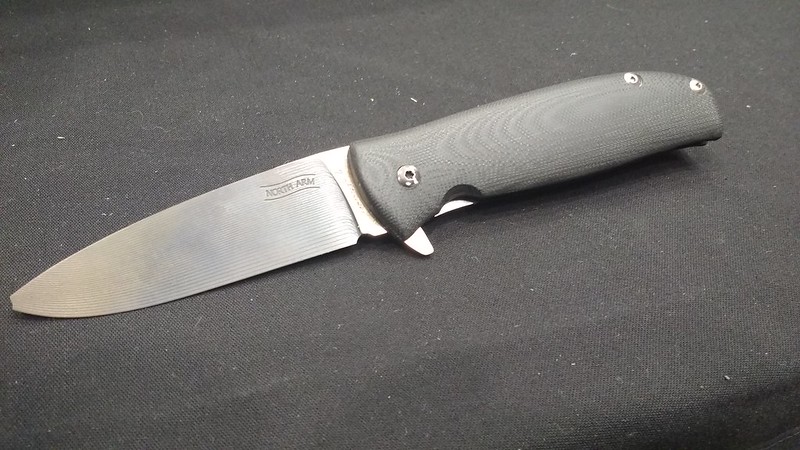
2.4 happens to be the current version, and hopefully the last prototype! We changed the flipper tab shape and added very subtle jimping to it. Everything else stayed the same as 2.3.
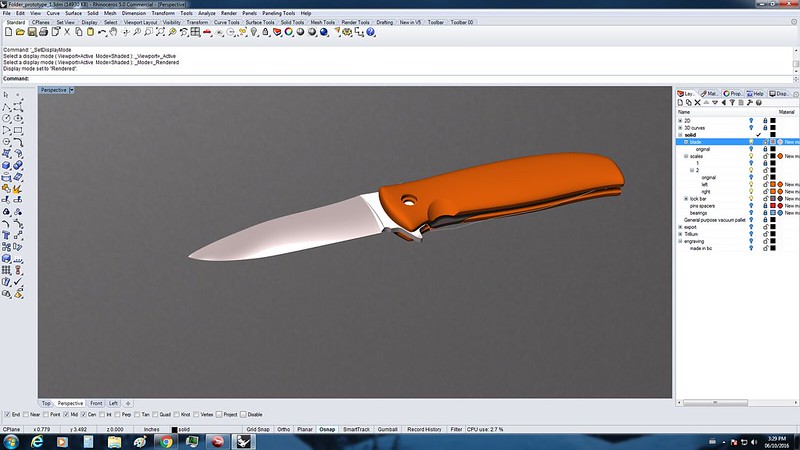
CAD screen shot of complete model
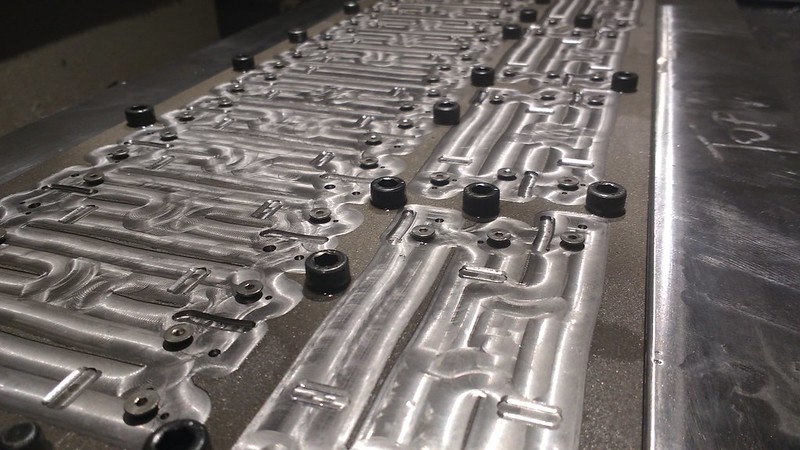
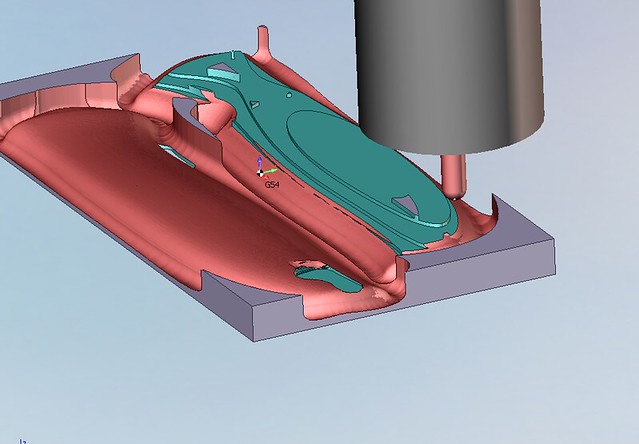
CAM screenshot of a milling simulation for the scales
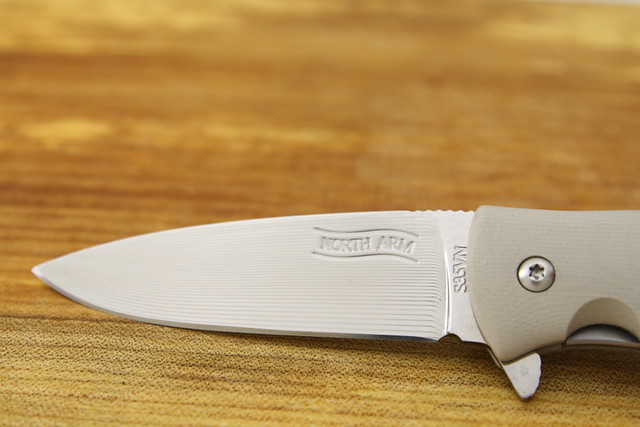
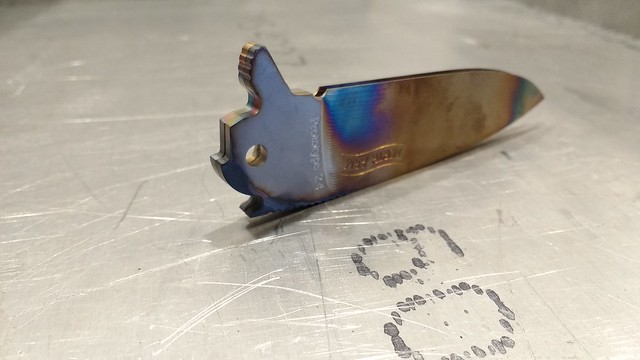
a couple 2.4 blades fresh out of HT
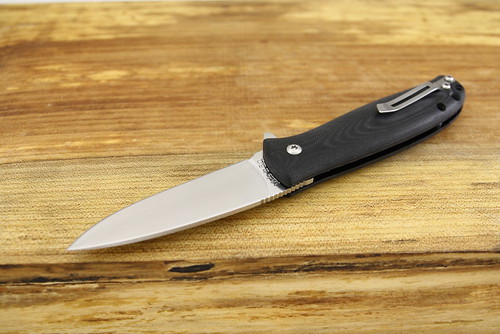
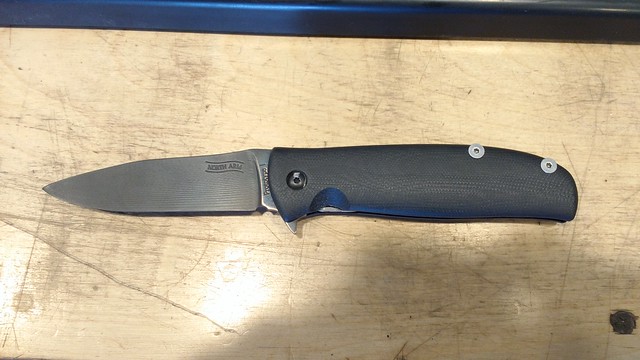
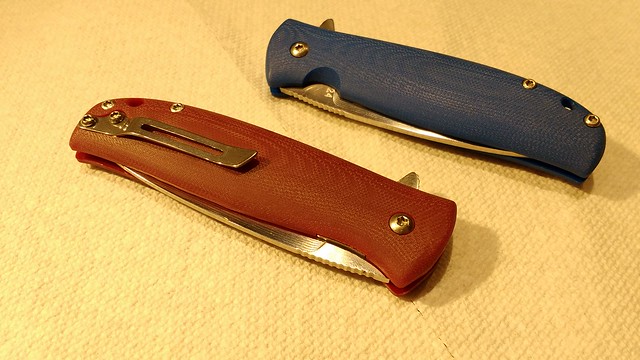
Complete assembled 2.4 prototypes.
We really like prototype 2.4. It is what we have been imagining throughout the process and fulfills our original list of criteria. We made 3 of them because we are fairly confident we have worked out all of the kinks. We are each carrying one and the third is in the pocket of a good, knife-nut friend, for beta testing
There are some minor tweaks we still need to make but they are not design changes. More like small tweaks to how the knife is milled to fix a couple very minor remaining issues. We can do this while we are proving out our production fixturing, which we will being making this week.
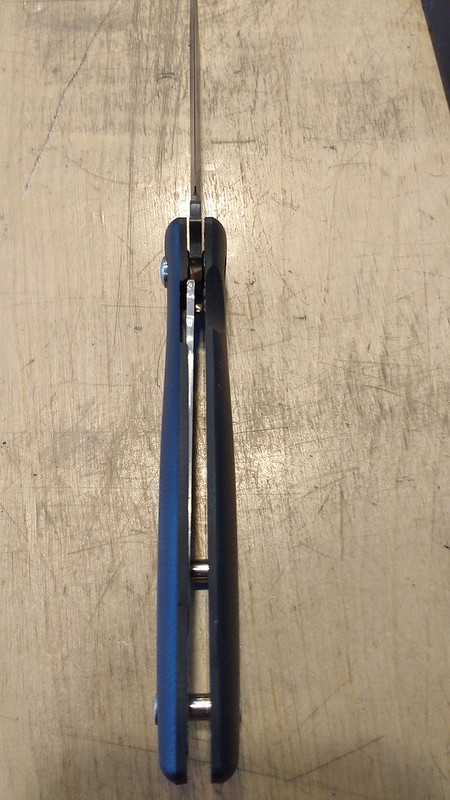
All the prototypes from 1 on the left to 2.4 on the far right.

The next step was to do some destructive testing on the knife to learn it's weak points and make sure there wasn't anything surprising. After the above photo was taken, we sacrificed proto 2.3 for said testing. 2.3 was the one to use because it was the most similar to the 2.4.
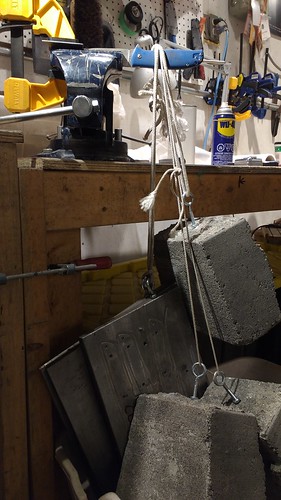
First we tested both the stop pin and lockbar strength by hanging gradually increasing weights 1 inch from the pivot with the knife blade clamped in a vise. BladeHQ has tested folders using a similar method in the past; we wanted to mimic their test so we could accurately compare results. The photo below shows the setup for testing the stop pin. The lockbar was tested the same way but with the knife flipped over in the vise.
stop pin test
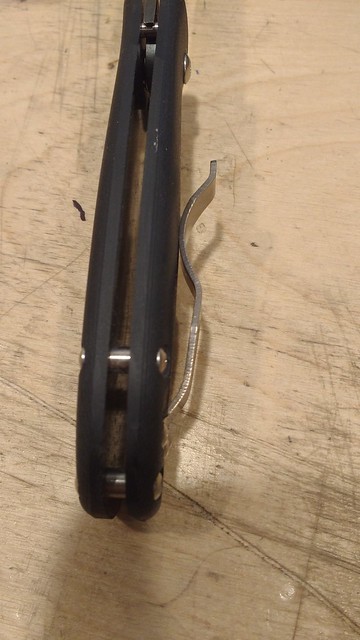
We stopped at 130 pounds with that setup because we ran out of weight. Also we noticed the lockbar starting to buckle; it did spring right back to shape when the weight was relieved though, because it is spring tempered!
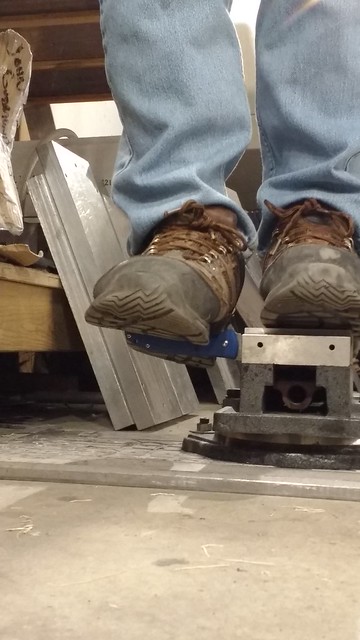
We also tested the stop pin by standing on the blade
The lock bar and stop pin were also tested by violent impacts on the spine and edge as shown in the photo below.
So far we were happy with how the knife performed. None of this is within the intended scope of use for a light folder like this, but it stood up to the abuse quite well. We did notice some minor vertical blade play after the above tests.
after testing
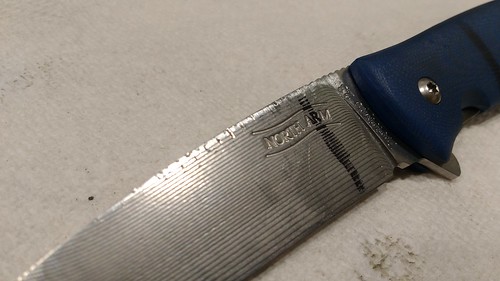
As if poor old "2.3" hadn't been through enough, we decided to put it through a final test. This would be the most abusive one. We wanted to test the lateral strength of the blade, pivot, and handle, ie. prying. I know, I know. No knife should ever really be used to pry. However, we wanted to perform this test to see what the weak point in the system was. Using only G10 for the entire handle and frame of the knife isn't very common so we wanted to see if it would fail. For this test we simply clamped the blade into the vise, an inch from the pivot. Next we starting pulling on the handle.
 [/IMG]
Now, I expected the g10 to crack or deform. I was impressed how much force was required to induce failure. The blade and handle were at about 45 degrees to each other when we finally had a failure. We were both surprised that it was in fact the blade which had snapped!! Below is what the aftermath looked like.
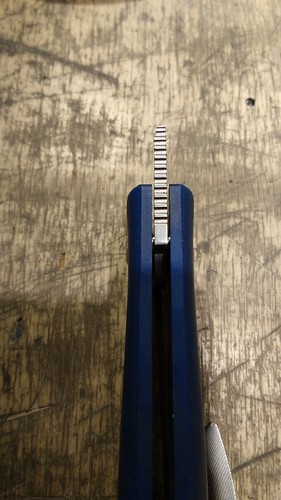
The stub of blade which remaining in the handle actually still flipped and locked up fine and didn't seem to have any lateral blade play. The worlds smallest flipper. We got a good chuckle out of that!
The testing helped confirm that knife was ready for normal folder use and gave us some valuable info on which the weakest parts of the knife are. It also reminded us just how strong G10 is!
That brings us up to date. We are aiming to have the folder ready for mid november. We have a very busy next 3 weeks before our final big show for the year and are hoping to debut the knife there. I will post updates here as they happen and when I have time. Next is a few solid days in CAD and CAM to create programs for production fixturing and programs to mill the different components of the knife. I hope you have enjoyed the process so far, and I apologize if it is a little wordy! I know a lot of you like the detailed WIP threads so I thought I'd try to explain as much as I could. Future posts will come in more palatable chunks
Thanks for reading and stay tuned!
Mike and John
We make our knives using CNC milling and multiple hand finishing steps. The CNC side of the process has three main steps. First we design a 3d model of the knife in our CAD program (computer aided design). Then we import that design into a CAM program (computer aided manufacturing). CAM is where we create tool paths to mill out the knife. Once we have a good tool path, the CAM program creates G-code which describes the tool paths for the CNC mill to follow while milling the knife. Finally we run the Gcode on the CNC mill to cut the knife out. Of course after the blade or scales are milled we have hand finishing to do, and heat treating in the case of the blade.
One of the trickiest aspects of prototyping is holding down the materials we are cutting our parts from. For our production models we have dedicated steel fixtures which make work holding easy. Prototypes on the other hand, are constantly changing, so creating a steel fixture for each one is unpractical. We've started using 1/2" PVC sheet to make prototyping fixtures. It is cheap and easy to work with and accurate and strong enough for temporary use.
Temporary PVC vacuum fixture for lockbars and blades
After a few preliminary discussions about the folder, we had a basic idea of what we wanted to make. An EDC flipper with a blade around 3-3.25 inches, contoured and comfortable g10 scales, stainless hardware all around, and it had to be lightweight and practical to carry. In terms of a locking mechanism we thought a liner lock would be the way to go. As you'll see in the photos, we came up with a way to make the knife sleeker and less heavy by avoiding a true "liner"; instead, we have inset a stainless lock bar into the g10 scale. This approach has proven to be quite successful so far
With our criteria in mind, I started doing some CAD (rhinoceros 3D) drawings one weekend in early august. I found I was having so much fun designing this first rough prototype, that I ended up finishing most of the CAD work on it by the beginning of the week! This being our first folder, it was totally different from any of our other designs, and therefore an exciting new project.
Prototype 1
Here are two CAD screenshots of prototype one. We start all our designs with just simple 2D curves.
Different blade shape ideas
complete profile
3D CAD rendering of the design
And here are photos of prototype one "finished"
After assembling the knife we found that we really liked the scales. The rest of it, however, was pretty rough. We used a mix of random hardware we had around the shop. The blade was too busy with unnecessary curves and kinks on the spine and the flipper tab was uncomfortable. Most of all, the moving parts of the knife needed a lot of attention. It was rough on it's bearings, the detent was weak, it was rubbing against the stop pin and didn't lock up properly. So, with new goals and ideas, I went back to CAD and started working on prototype two.
Prototype 2.0
Dad and I discussed what we wanted to change about the blade; we decided on a much simpler and more smooth spine curve and just a bit longer. I drew some more ideas and came up with a blade shape we both liked. Fixing some of the interference and roughness problems meant moving the pivot and stop pins slightly as well as redesigning the whole pivot area of the blade. One of the beautiful things about CAD is the ability to visualize parts moving in relation to each other, which has helped a lot in designing this knife so far. We actually didn't change the basic shape of the scales at all, I think it is the first time I've designed a handle and had it come out just how I imagined the first time around. We did enlarge the thumb relief to push in the lock bar, and continued to tweak this over the next few prototypes.
This is the 2D profile of what we came up with for the next version, showing the blade in both the open and closed positions.
Once we are happy with the basic shape, we create 3D curves like the ones below
Those curves can then be used to create solid objects
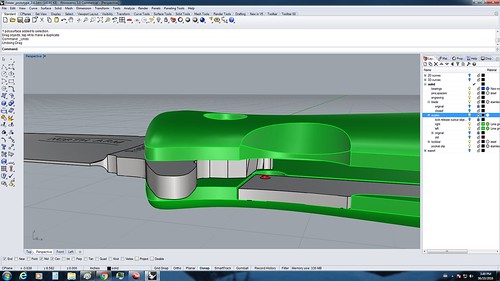
Once we have solid objects we can export those to our CAM software, where we create machining operations and toolpaths to cut out the part with the CNC mill.
This is a screenshot of the lock bar in CAM. All the different colored lines are paths for different tools.
Here is an assembled version of proto 2.0 This one has a pocket clip and more appropriate hardware.
We liked the overall shape quite a lot now but the mechanical function was still pretty rough. Also, that pocket clip is way to huge! We concluded that the detent was still much to weak and that the bearing surfaces on the blade were probably not smooth enough to allow for smooth action. I also accidentally snipped the tip off the blade when removing it from the heat treating pouch :grumpy:.
Prototype 2.1
The next prototype (version 2.1) was no different in shape except for the flipper tab being slightly more rounded. The main improvements were small tweaks in the milling which greatly improved the mechanical function. This was the first version that felt like it had a nice smooth blade travel. It also flipped and locked up reasonably well. The detent however was still too weak. This version had no pocket clip. We had ordered some different ones (we aren't making them ourselves yet) but they hadn't arrived yet. They were held up at the Canadian border, a common issue for us because we order almost all of our supplies from the US. One of the struggles of making anything in Canada, and especially Vancouver, is we simply don't have much of a manufacturing industry. Getting things like specialty stainless hardware or milling cutters locally can be quite challenging, if not impossible.
One of my favorite parts of designing a new knife is practical testing
Prototypes 2.2 and 2.3
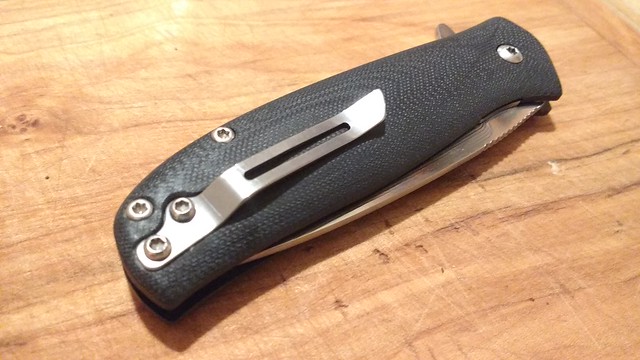
So far we were quite surprised by how well the design and prototyping process were going. By proto 2.2 and 2.3 we were already into the "minor tweaks" stage of the process. We created in quick succesion so I'll do them as a single section. We added a new, sleeker, pocket clip, and some subtle jimping along the spine for 2.2. It was also the first with a hardened and spring tempered (s35vn) lockbar. This gave the lockbar a nice crisp action. For 2.3 we added a lanyard hole and changed the flipper tab again as well as a more major change. The most notable change on 2.3 was one which is not visible from outside the knife. We used a 3/32 detent ball instead of a 1/16. This finally fixed the weak detent issue which plagued the previous prototypes.
Finished version of 2.2
Once 2.3 was assembled we liked almost everything about it. It was very smooth. The detent was just strong enough. It flipped and locked up nicely. The one complaint we still had was the flipper tab was still not quite right.
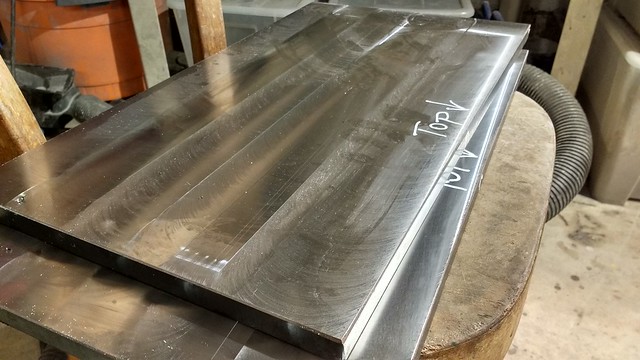
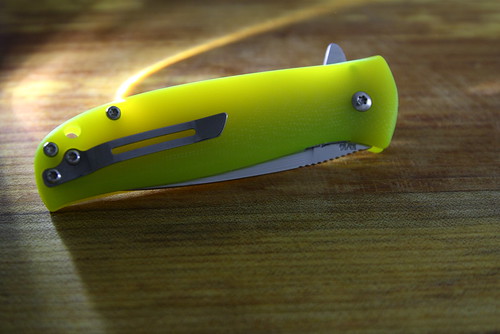
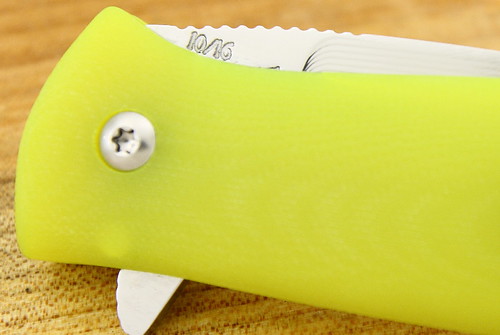
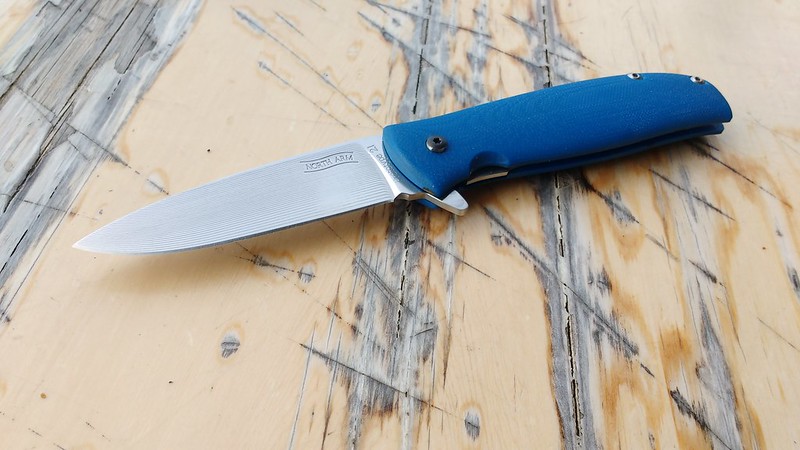
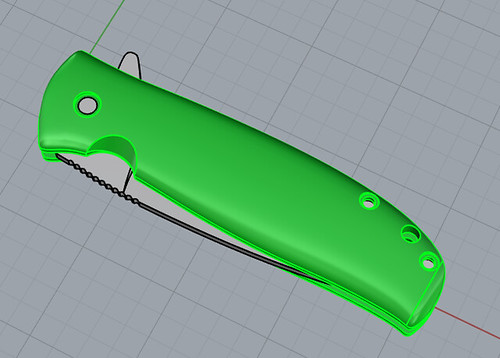
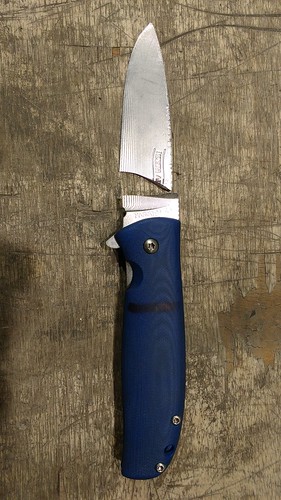
Prototype 2.4
2.4 happens to be the current version, and hopefully the last prototype! We changed the flipper tab shape and added very subtle jimping to it. Everything else stayed the same as 2.3.
CAD screen shot of complete model
CAM screenshot of a milling simulation for the scales
a couple 2.4 blades fresh out of HT
Complete assembled 2.4 prototypes.
We really like prototype 2.4. It is what we have been imagining throughout the process and fulfills our original list of criteria. We made 3 of them because we are fairly confident we have worked out all of the kinks. We are each carrying one and the third is in the pocket of a good, knife-nut friend, for beta testing
There are some minor tweaks we still need to make but they are not design changes. More like small tweaks to how the knife is milled to fix a couple very minor remaining issues. We can do this while we are proving out our production fixturing, which we will being making this week.
All the prototypes from 1 on the left to 2.4 on the far right.
The next step was to do some destructive testing on the knife to learn it's weak points and make sure there wasn't anything surprising. After the above photo was taken, we sacrificed proto 2.3 for said testing. 2.3 was the one to use because it was the most similar to the 2.4.
First we tested both the stop pin and lockbar strength by hanging gradually increasing weights 1 inch from the pivot with the knife blade clamped in a vise. BladeHQ has tested folders using a similar method in the past; we wanted to mimic their test so we could accurately compare results. The photo below shows the setup for testing the stop pin. The lockbar was tested the same way but with the knife flipped over in the vise.
stop pin test
We stopped at 130 pounds with that setup because we ran out of weight. Also we noticed the lockbar starting to buckle; it did spring right back to shape when the weight was relieved though, because it is spring tempered!
We also tested the stop pin by standing on the blade
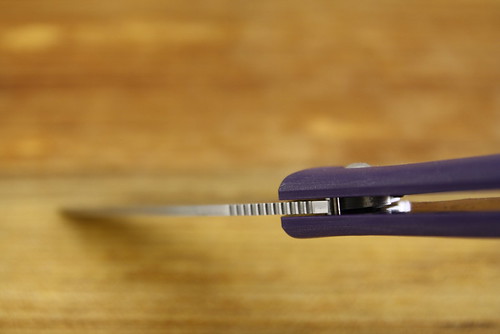
The lock bar and stop pin were also tested by violent impacts on the spine and edge as shown in the photo below.
So far we were happy with how the knife performed. None of this is within the intended scope of use for a light folder like this, but it stood up to the abuse quite well. We did notice some minor vertical blade play after the above tests.
after testing
As if poor old "2.3" hadn't been through enough, we decided to put it through a final test. This would be the most abusive one. We wanted to test the lateral strength of the blade, pivot, and handle, ie. prying. I know, I know. No knife should ever really be used to pry. However, we wanted to perform this test to see what the weak point in the system was. Using only G10 for the entire handle and frame of the knife isn't very common so we wanted to see if it would fail. For this test we simply clamped the blade into the vise, an inch from the pivot. Next we starting pulling on the handle.
Now, I expected the g10 to crack or deform. I was impressed how much force was required to induce failure. The blade and handle were at about 45 degrees to each other when we finally had a failure. We were both surprised that it was in fact the blade which had snapped!! Below is what the aftermath looked like.
The stub of blade which remaining in the handle actually still flipped and locked up fine and didn't seem to have any lateral blade play. The worlds smallest flipper. We got a good chuckle out of that!
The testing helped confirm that knife was ready for normal folder use and gave us some valuable info on which the weakest parts of the knife are. It also reminded us just how strong G10 is!
That brings us up to date. We are aiming to have the folder ready for mid november. We have a very busy next 3 weeks before our final big show for the year and are hoping to debut the knife there. I will post updates here as they happen and when I have time. Next is a few solid days in CAD and CAM to create programs for production fixturing and programs to mill the different components of the knife. I hope you have enjoyed the process so far, and I apologize if it is a little wordy! I know a lot of you like the detailed WIP threads so I thought I'd try to explain as much as I could. Future posts will come in more palatable chunks
Thanks for reading and stay tuned!
Mike and John
Last edited: