Hitachi white #2, carbon diffusion

Joined
Sep 29, 2015
Messages
407
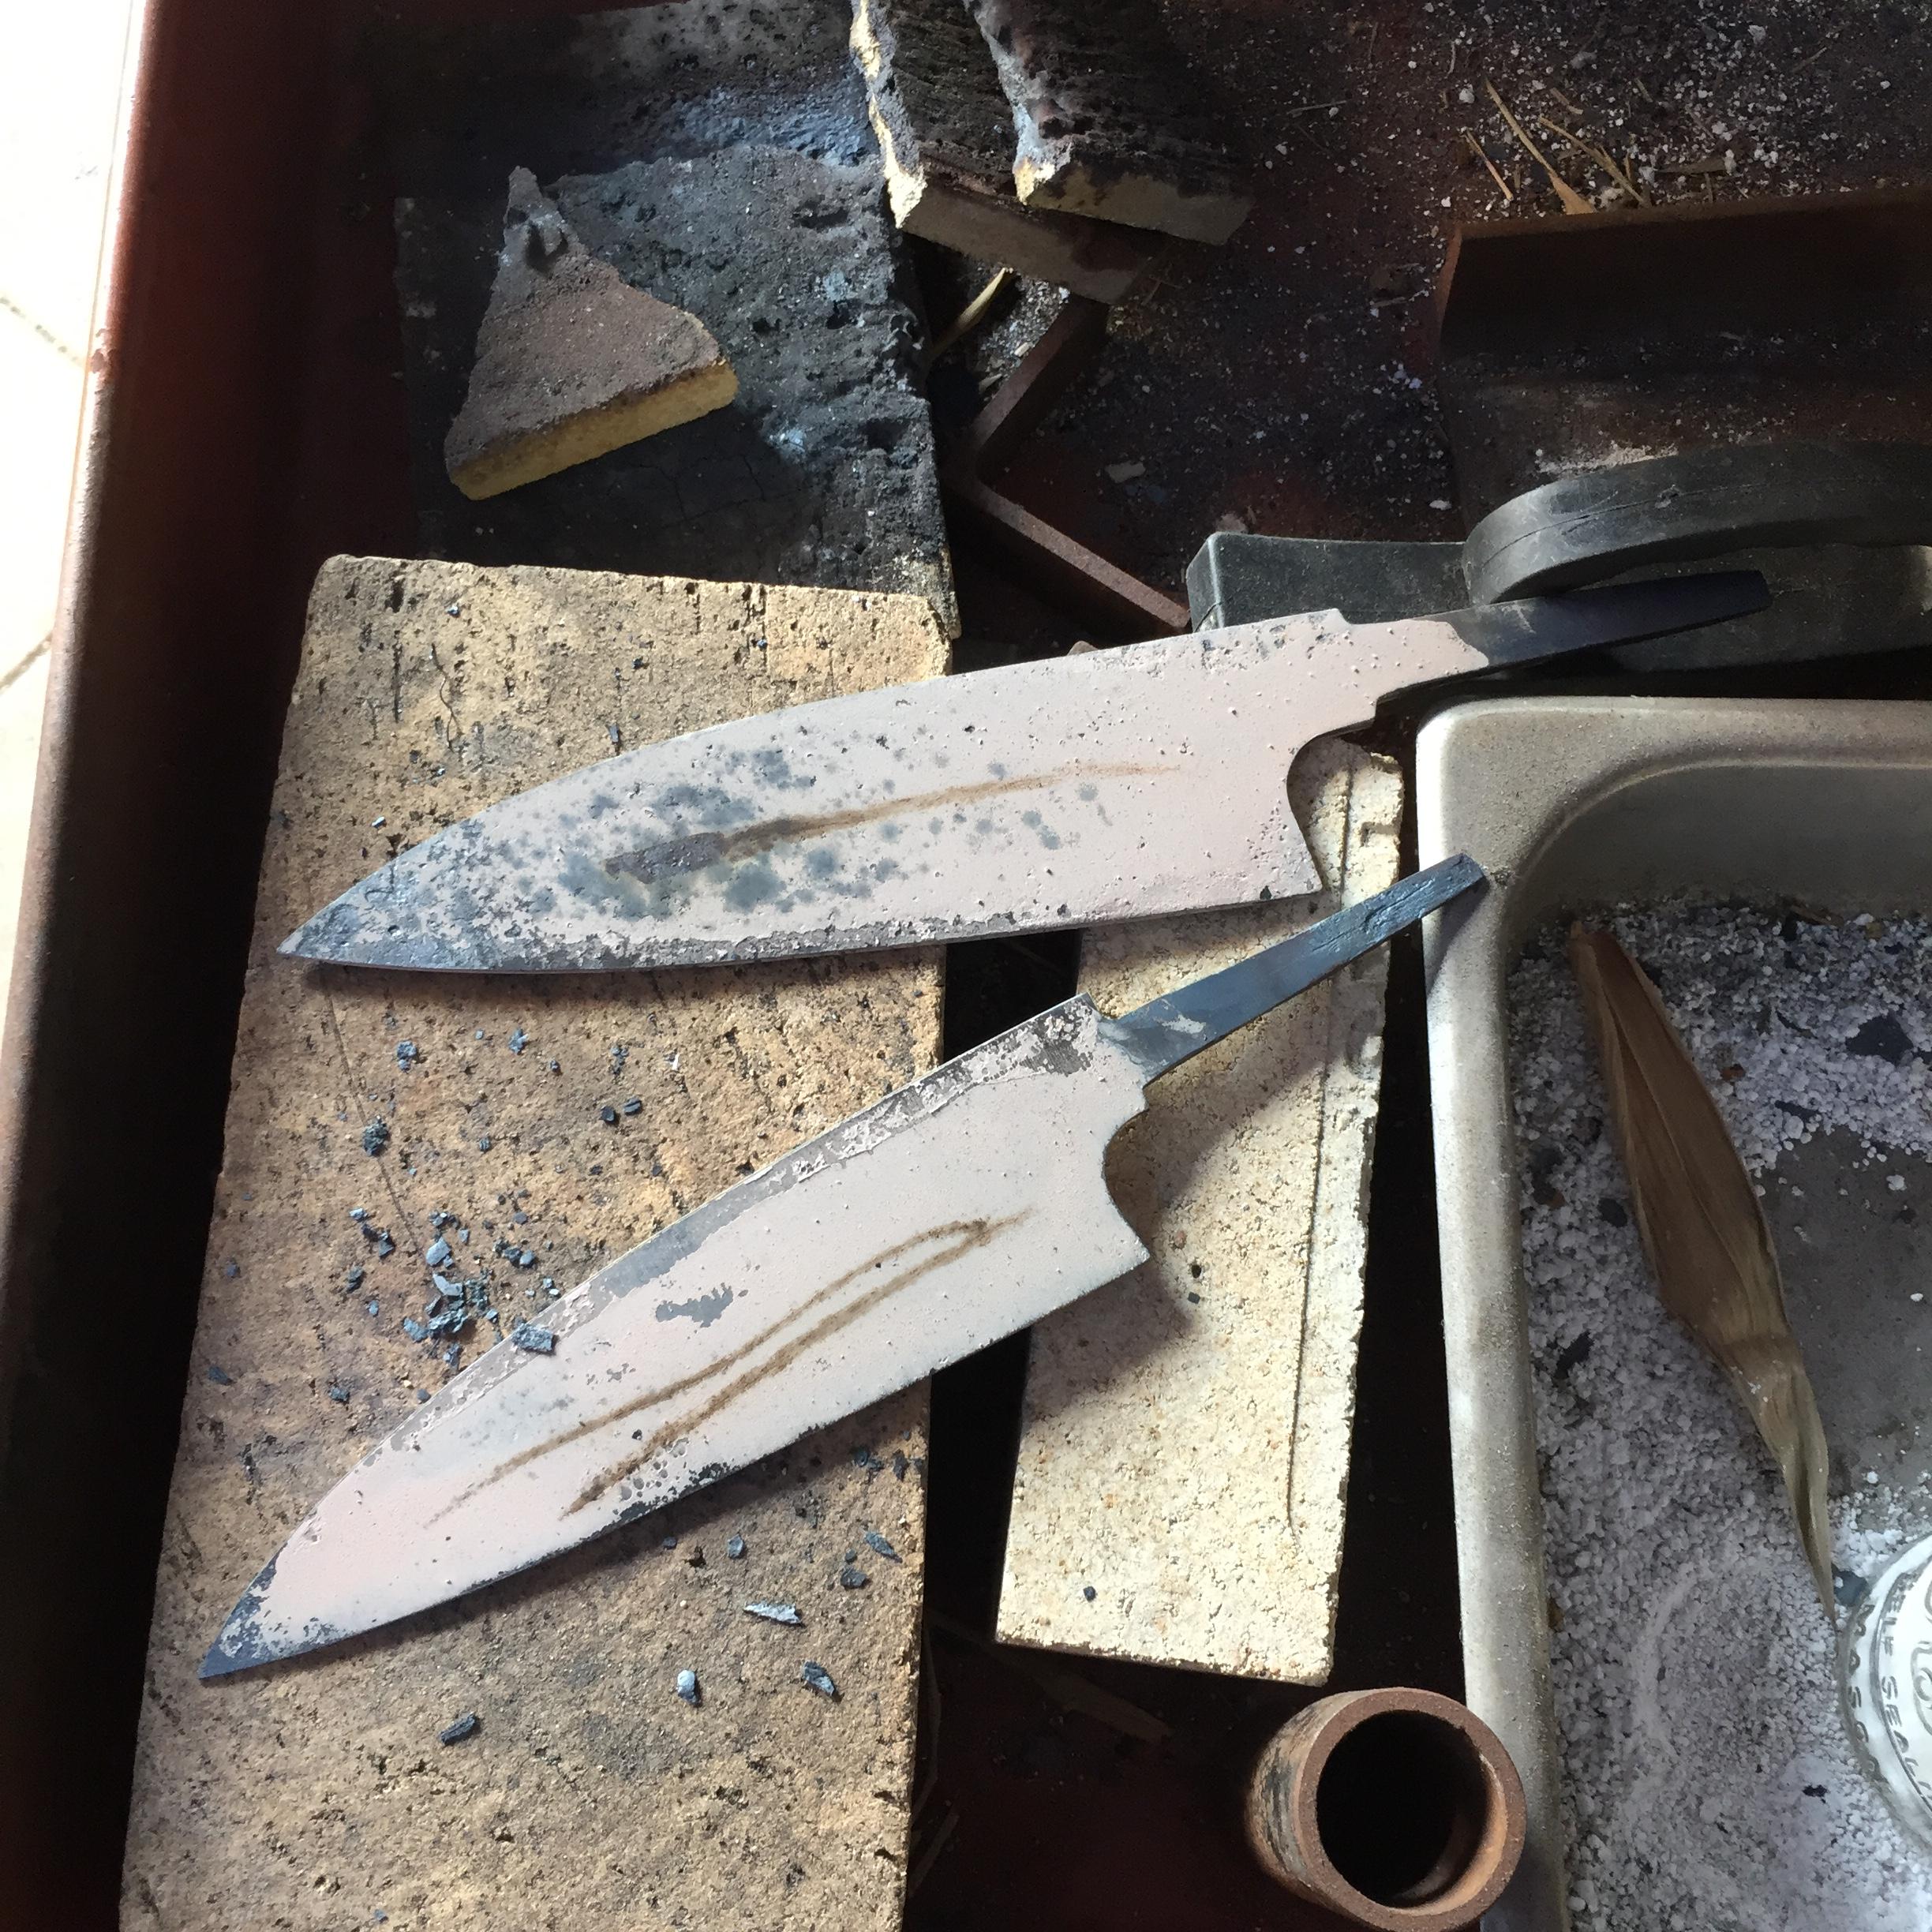
I just finished quenching 2 white steel #2 blades I've been working on.

Before heat treatment I normalized the blades each blade 3 times. For that proscess I used what I saw in a video by Murray Carter, setting the blades in ashes to insulate the heat while cooling. I did a 5min soak in the gas forge, paying extream attention to the color of the steel (I have been practicing this for almost a year now). I was afraid to do a full water quench and crack such a hard to get steel, so I did a interrupted quench. The quenching solutions were warm salt water and warm canola oil. I quenched for 1 second in the water then finished in the canola oil. No pings and no pops.

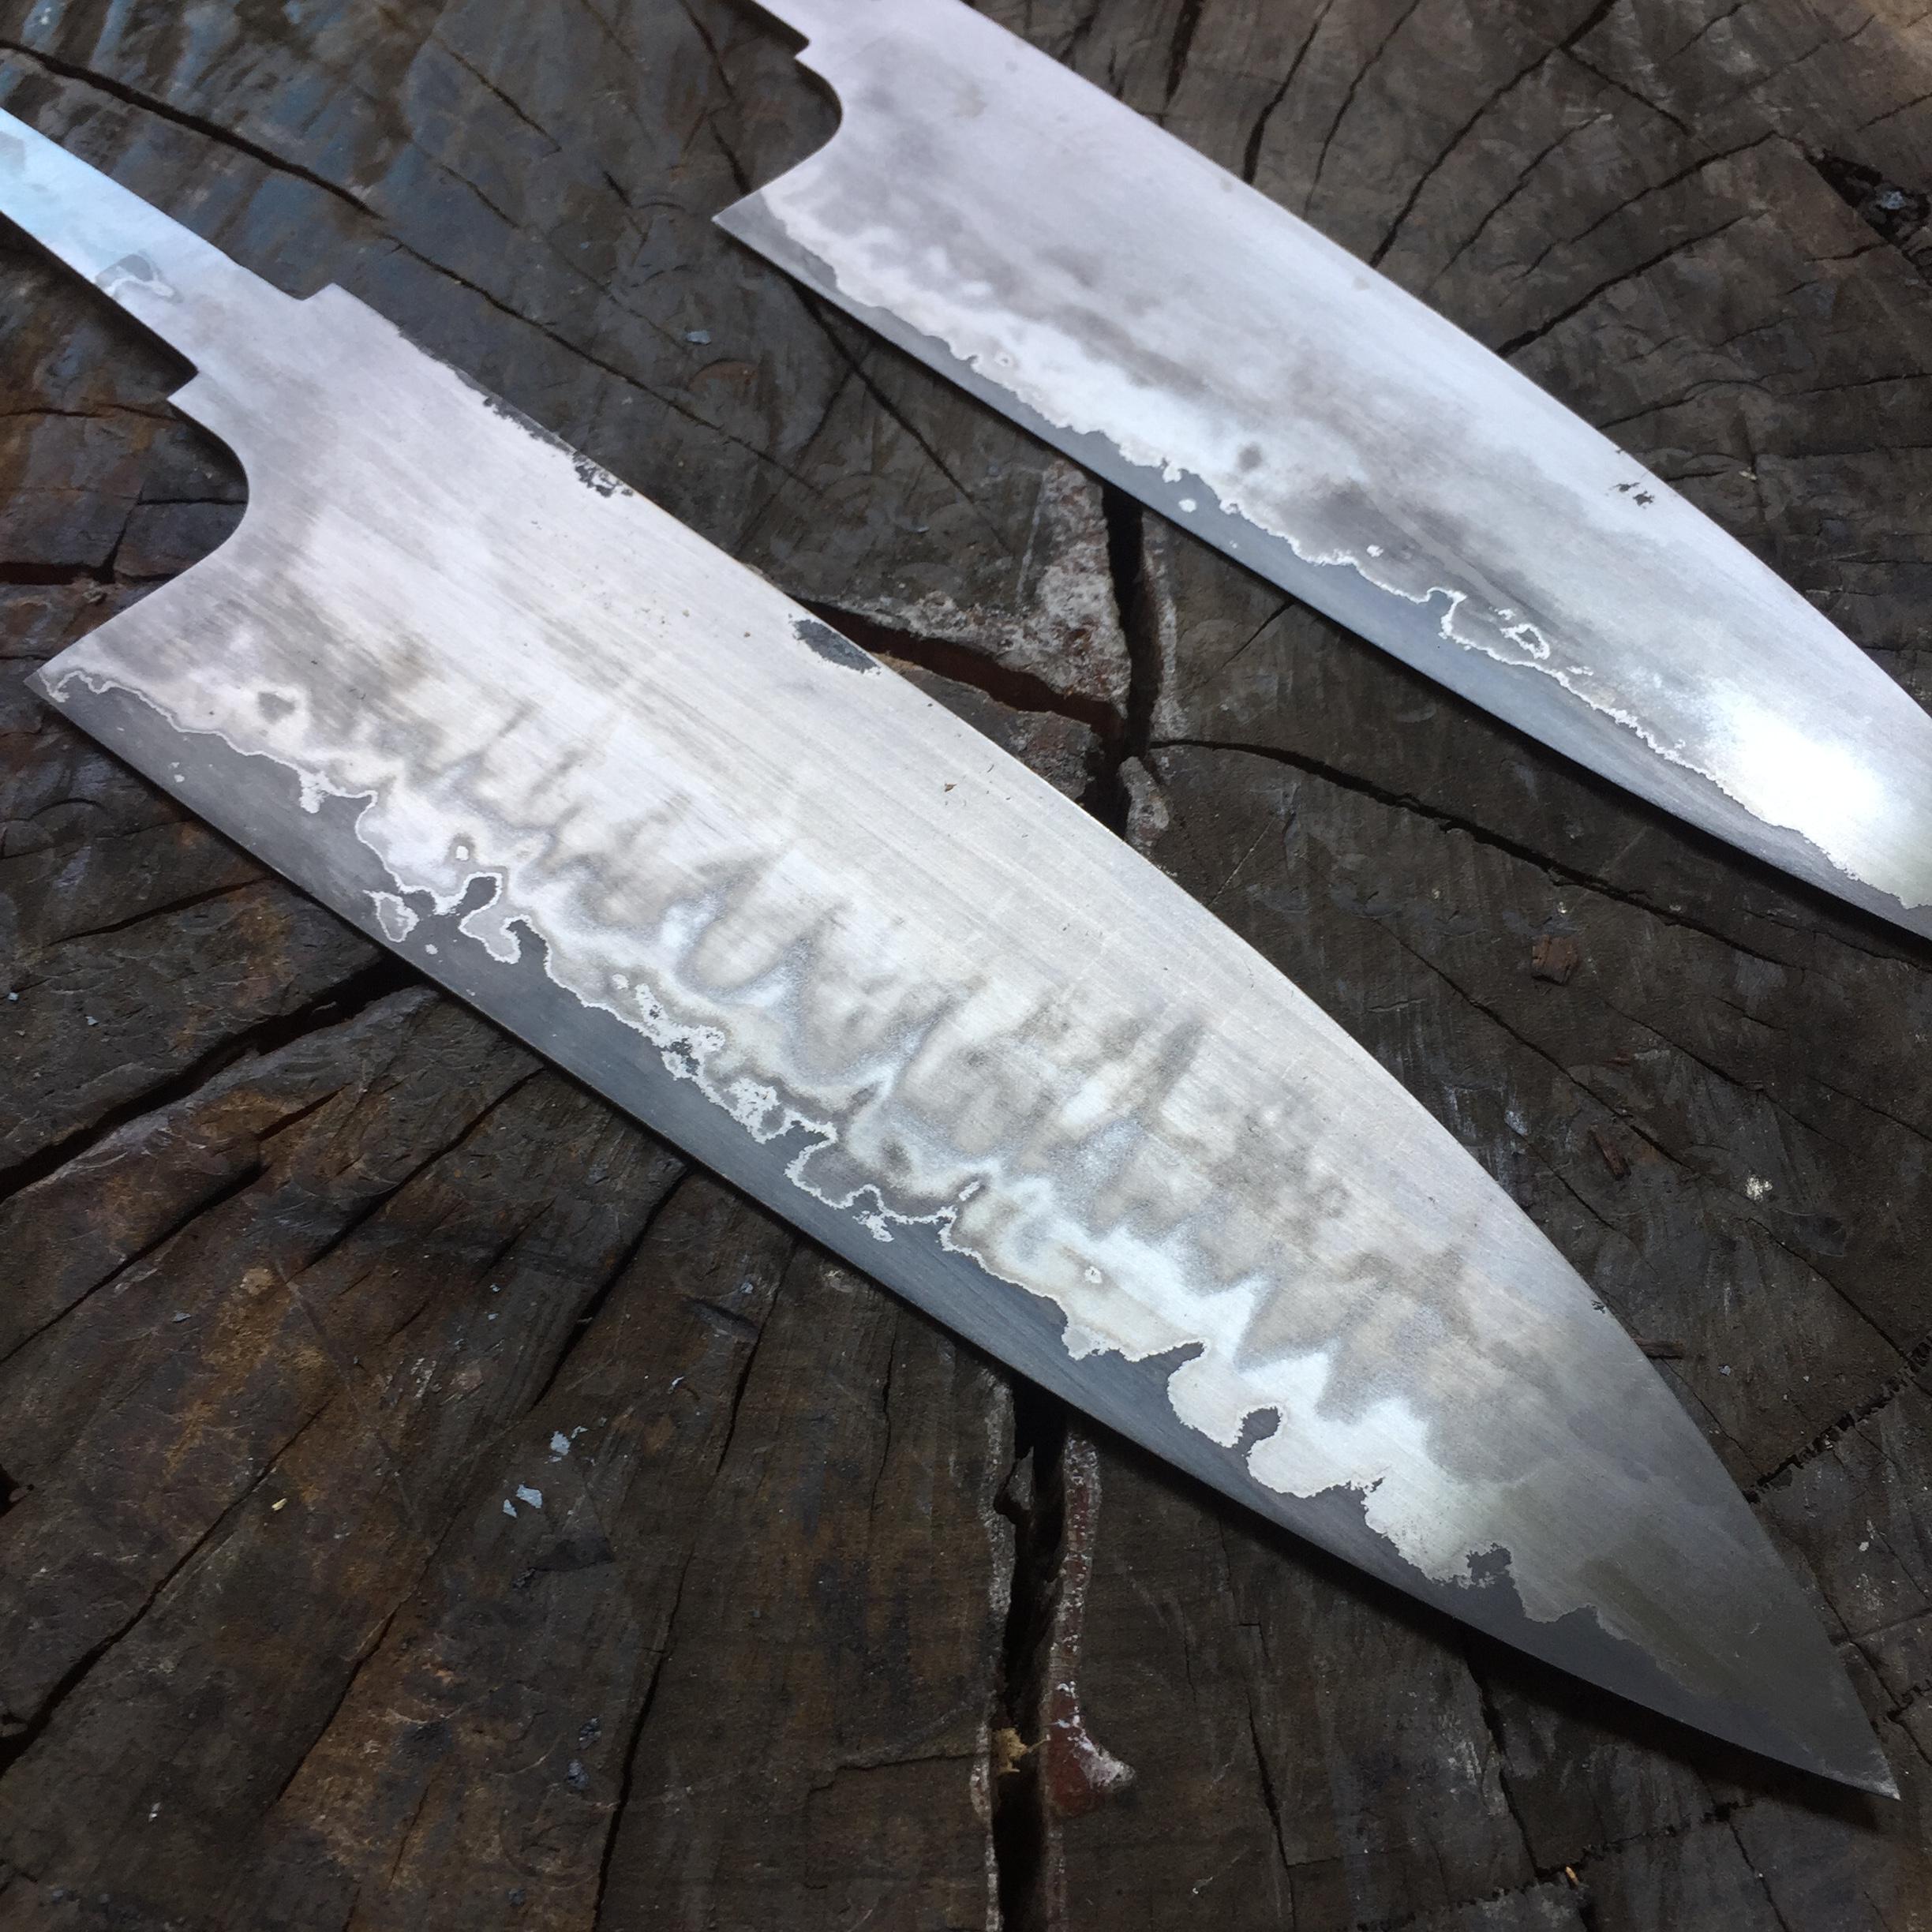
After the quench I rushed to get the blades in the tempering oven as fast as I could. I was very afraid that the blades would develope micro cracks if I didn't temper them right away. On the way to the oven I noticed that there was what looked like to be a hamon. It was too high up to be the separation between the core and cladding, the cladding comes about 3/16th from the edge.

After doing the second blade I noticed the same features while rushing to the oven. My thoughts are that this is carbon diffusion from the normalizing cycles I did and soak. I did not forge the blades because of how thin the stock came, I only did stock removal. So I didn't expect carbon diffusion to happen this fast. I wasn't sure if only 30min toatal of normalizing would actually have a great enough effect of the carbon displacement.

If this was carbon diffusion, does that mean that when the steel is joined with the cladding at the Hitachi mill some carbon diffusion also occurs? I assumed that was a process that takes much more time.

Pictures of the blades after the first 1hr tempering cycle (375 degrees F): https://imgur.com/a/757nJ

Thanks for any information on the subject,

Kevin
 
If it was a honyaki White #2 blade, I would say that it was an "accidental hamon."
 
First thing you need to tell us in a question like this is exactly what the steel is.
Since you mention "core and cladding", I assume the steel is a san-mai with a #2 blue core. If the sides are low carbon steel, then there will be no hamon. Carbon diffusion take a long time at high temperature and has to have many parameters met. It doesn't happen to any measurable degree in a HT.

Second thing we always need to know is how the HT was done. What type forge, times, etc. You gave part of that.The image shows heavy scale.
It looks like the HT was done with a very oxygen rich atmosphere. All we can see right now is scale, which tells nothing about any hamon tat may or may not be there.

Last thing we will always need to see ( especially in a hamon question) is the blade ground clean of scale and decarb. Preferably anclean ground photo at 400 grit and then one with an etch in FC.
 
The steel is Hitachi white steel #2 with mild steel cladding. I use an oval 2 burner devil's forge propane forge with a 100lb tank and 0-20 psi regulator. When heat treating blades I use the lowest psi possible without turning off the forge. I brought the blades to the color that I would quench at then stuck it in a large can of ashes to cool for 10 minutes (did this 3 times on each blade). For the quench I brought the blade to a shade over non magnetic, then very slowly moved it left and right from the forge lining and the center of the forge. This keeps the edge just over one shade above non-magnetic (which to me looks like a medium-dull-orange). Once I begin to see the color stabilize I start a stop watch on my neck that counts down 5 minutes. I keep moving the blade left and right from directly under the burner to up against the forge lining. This keeps the color from changing. For the whole soak I look directly at the blade and use the color of the forge bricks, spine of the blade, and edge of the blade to monitor the color and make sure it isn't getting hotter or colder.

I had the salt water and oil 1 foot from the forge. Once the timer beeps I hold the blade still for a 3 count to compensate for the time from the forge to the quench. Once I dip the blade in the salt water solution I count "one" out loud then quickly move it from the water to the oil (heated to 120 degrees using electric hot plate and a thermometer).

I didn't think that carbon diffusion would have a chance to occur, that's mostly why I was confused. I posted this to see what else it could be. I only used the word hamon as a description, I know there is no way the cladding formed a hamon.

As soon as the blades are done in the oven I will be grinding them to 400grit. Once I do that I will etch it and post more pictures. If those "hamon" looking lines are still there then I have no idea what to think.
 
Sound like you should have a good blade. All sorts of colors and things can show up on the surface after a quench. Most are either a scale or decarb effect.
The other thing is the difference between hardened steel and unhardened steel. This is sort of what a hamon is, but it can also show up in a lower carbon steel where some rapidly cools enough to form a pearlite-martensite mix and the rest stays pearlite. Even 1018 will harden to some extent in a water quench. I see it when I dunk a too-hot bar of mild steel in the tank to cool it off. You get bands/zones where there is clearly a difference. I have had 1030 snap in half be becoming too hard and brittle in doing this. We often forget that just because it won't make a knife edge doesn't mean it won't get hard.

Looking forward to seeing the final sanded out blade.
 
Ok so I kind of rushed this because it's my birthday and I'm going out with the family. So I got so the quality of the pictures wasn't great, and I started to rush the sanding at the end. I think the sanding was a problem because I'm used to sanding a blade by hand and working through the grits. But today I tried using my belt sander.

I did 120, 220, 320, and 400 grit. After 400 grit I could see the same "hamon" looking line and see the separate line for the laminations. But they were so faint without a etch that I couldn't get them on the phone camera.

I etched the blades anyways and scrubbed them down with some Mother's Mag. This didn't show any detail, just a grey blade. So I going to just put it aside and tomorrow try again but hand sand instead.

I did see what almost looked like glitter on one of the blades. This made my heart sink because it almost looked like grain growth, and I thought I did everything right. So I put a quick edge on the tip of the blade and did an edge test. I pushed down on the edge hard against the edge of a small iron block. I assumed that if it was gain growth the edge would chip or snap (must have been feeling risky because thinking back that was almost a dumb idea). The edge did chip or snap and surprised the heck out of me by flying through that test like it was nothing. No edge damage at all, the edge flexed around the iron like it was nothing. So I'm assuming I just didn't clean of the blade before the etch well enough or just didn't polish it well enough.

So maybe I did just rush and need to retry tomorrow and fallow up with the knives. Here are some pictures of the blade that looked like it had grain growth and the edge test: https://imgur.com/a/2Llxf
 
I looked at your pics. Soak it in white vinegar overnight, to remove the scale. Then start grinding/sanding until you are down to clean steel.
 
I'm working on hand sanding the blades and I'm at 600grit right now. I'm starting to clearly see the hamon like line appearing.

Here are some pictures I took of the blade I am polishing. On the edge you can see one section that is the white steel 2 core, then you see a middle section which is the mild steel cladding that hardend, then finally on the right you can see the section of un-hardened mild steel: https://imgur.com/a/ecOeq

I am absolutely amazed that I was able to do something like this. I can't even describe how proud I am of how this heat treatment turned out. I will be fallowing up with more pictures as I polish both blades.

I'm considering doing some differential polishing when the blade is all done to show off the contrast between the 3 sections of the blade.
 
Kevin, you seem to be happy with your results and work, and the others have given you good guidance.
but let me add and clarify some things for you.

Murray doesn't actually do any normalizing as you termed it, he does a one time process anneal.
He does not heat up to a quench temp and then to the ashes. It's more of a dull cherry red, less than the quench color/temp.
The blade then goes to the ashes until cool, usually he does overnight but it can be in an hour or so.

The blade is then sandblasted, cold forged, profiled, straightened, holes drilled etc, then a clay slurry applied and then the quench in warm water.
I've used the same steel you have many times successfully quenched in water and never cracked a blade. But I can understand your hesitation with a water quench.

you might want to do a quick etch to expose the core and make certain it is centered and your blade straight. You can straighten on a wood block with a brass hammer.

As mentioned, hamons don't really occur with laminated steel. Here are two blades i did with Mike Shindel last week. This is the first time I've seen this look from the steel. Cladding is 410 ss

congrats on working with this steel and process, I love the edges that this steel produces.

h0KjT5X.jpg


vxohbHG.jpg
 
Thank you so much for the kind words HSC it means a lot me me.

I was not aiming to mimic completely the process Mr.Carter uses when he makes his blades. He is many miles ahead of me obviously. I was afraid to forge these ones considering I only had enough steel for 2 blades l, and the stock was not thick enough to accept and errors I could have made. So stock removal was a less anxiety inducing and more efficient plan. I just used the ashes to when softening the blades as a way to let the blades soften. I wanted to cool them without having to leave them in my forge and turning it off. I was working on other projects at the same time and turning off my forge, waiting, then having to turn it back on seemed way too inconvenient to me.

But thank you for clarifying the full process for me. I used soda cans with the tops cut off to hold the ashes. I did not have enough ashes around to full insulate that blades. I picked the cans hoping that the aluminum of the cans would help retain some heat. Knowing they would still cool relatively quick (took 10min to reach 250 F) I did this 3 times as a way to compensate.

If these lines are not hamons from the mild steel slightly hardening does that mean then that they are from some of the carbon moving from the core? That is what I originally believed it was, yet the line on the drop point blade was very high from where the core meets the clad. Which confused me because I didn't think the carbon would reach that far.

Thank you again for the kind words and input. Your knives in the picture look beautiful by the way, they are very impressive.
 
Here is an update of how the blades are coming. I sanded by hand instead of using my grinder because of the familiarity I have polishing is greater than grinding. So this fallow up took a bit longer.

I brought both blades up to 800grit then etched in my FC ( 1/6th FC 5/6th water) for 5min. After the etch I lightly brushed each blade with 1000 grit sand paper. Here are picture of the results: https://imgur.com/a/8VOjd

The drop point blade has a larger gap between the lamination line and the "hamon" line we were astringent before. Where as the sheep's foot blade has a much smaller gap, closer to what HSC described in his pictures.

I noticed directly after the etch that the white steel blended in with the mild steel next to it. This made it hard to see where the core is in relation to the rest of the blade. What causes this to happen? Is it from carbon diluting close to the white steel? Or did the mild steel harden to a degree where it was thinner, closer to the white steel? (Both blades have a full flat grind).

Next I will be sanding both blades to 1000 grit, etching, brushing with 2000 grit paper, sanding with 2000 grit, etching again, then differentially polishing the hard and softer steels along with some light etching. I will keep posting pictures as I go from here.

Thank you again for the help and insight into what is happening with the steel. This kind of stuff is very interesting to me, and learning from experience helps me understand the science of it all.


Edit:
https://imgur.com/a/Sy6jE
I'm adding a picture of the other side of the sheeps foot blade. This section of the blade etched much more crisp than the rest of the blade and the drop point blade. So I thought a much more clear picture would help.
 
Last edited:
I'm still working on these blades and have noticed an aesthetic problem on the drop point blade. On one side the lamination line is about 1/8th" higher towards the tip (the blade tapers towards the tip) than on the other. Do you think I should go back to the grinder and even this out? With this negatively effect the performance of the blade?

I'm looking to sell these once I get a knife maker's membership on the forums. I'm worried about this causing someone to skip out on buying the knife. But going back to re grind the knife than having to re do all the polishing I've been doing is really going to set me back. I only have a few days left before I leave for school and I'm not sure how much time I can get set back, the way I sand and polish my blades is very time consuming.

That's for the advice,
Kevin
 
With san-mai, there is almost always some variation in the two sides. If the difference is as little as 1/8", it is probably well within normal. As long as there is 4-6mm of hard steel ( ha-gane) showing the knife will perform properly.
 
Ah ok.

Thank you for helping me with that, I was really afraid that I would be set back.

Right now I'm working on etching and polishing the blades. I'm get the contrast between the different sections of the blade to show. To do this I'm using a fine polish on the unhardened mild steel or the "hamon" section. Then I'm using a diluted aluminum oxide polish (purple compound) for the section of mild steel right above the white#2. And for the white #2 I'm using aluminum oxide polish. This part takes me the longest. balancing the shades of the steels is like balancing on a wooden beam. Too much and you can't see them, too little and there is no contrast. I etch the blade whenever the contrast becomes off, then re-polish.

I'm currently getting some small spots from etching. I think this is due to it sitting a little too long in the etching solution. I let it sit for a minute, I'm going to remove these little spots then try and etch quickly (10-20sec.).


Here are some pictures of the sheeps foot blade:https://imgur.com/a/njxQO
I do this part one blade at a time, I will ad some pictures of the drop point blade once I start polishing it.
 
After the etch and cleaning/neutralizing, give it a rub with 0000 steel wool or a wet 3M gray or blue cloth. This will clean up the surface oxides and spots. Then you can use the compounds for shiagi-togi.
 
I was using some 2,000 grit paper to clean off the oxides, is this ok?

These spots I'm seeing aren't making much sense to me. When I buff them with any of the compounds they look almost like galvanized sheet metal. This makes me think that it's grain growth. But I noticed them earlier and when I did the edge test the steel was fine. I pushed the edge onto a round iron bar to make sure the edge didn't fail. Even when brought to a very thin edge there was no cracking or chipping, the edge flexed.

But every time I etch the blade (even after neutralizing then rubbing with the 2,000 grit paper) these spots show up.

If it were from over heating during the HT then I would expect it to fail during the test, but it didn't. I'm not sure what to think of this.

I started getting suspicious when one side of the blade was not showing the lamination line as well as the other. The spots were blurring everything out.

If I have to re HT the blades then I have to re do all the polishing. I only have 2 days left to work on these knives.

Edit: added pictures of the spots on the blade. After etching and lightly sanding:https://imgur.com/a/yvx51
 
Last edited:
I was using some 2,000 grit paper to clean off the oxides, is this ok?

These spots I'm seeing aren't making much sense to me. When I buff them with any of the compounds they look almost like galvanized sheet metal. This makes me think that it's grain growth. But I noticed them earlier and when I did the edge test the steel was fine. I pushed the edge onto a round iron bar to make sure the edge didn't fail. Even when brought to a very thin edge there was no cracking or chipping, the edge flexed.

But every time I etch the blade (even after neutralizing then rubbing with the 2,000 grit paper) these spots show up.

If it were from over heating during the HT then I would expect it to fail during the test, but it didn't. I'm not sure what to think of this.

I started getting suspicious when one side of the blade was not showing the lamination line as well as the other. The spots were blurring everything out.

If I have to re HT the blades then I have to re do all the polishing. I only have 2 days left to work on these knives.

Edit: added pictures of the spots on the blade. After etching and lightly sanding:https://imgur.com/a/yvx51
Try whether you can scratch those spots with the tip of a knife .Maybe you're still not get to hard steel ? Something similar happened to me , little more sanding solve the problem .
 
I'll give that a try. If nothing comes from it I'm just going to have to grease the blades and store them away for a while. then work on them whenever I have the time to make it home.

I'm almost certain this is grain growth and I just need to give the heat treatment another shot. I think the problem came from right before I quenched the blades. I brought the knives up in temperature a bit to compensate for the time from the forge to the quench. The blades must not have lost as much temperature as I expected, causing them to be quenched too hot. Knowing how Hitachi white can be more difficult the heat treat this makes the most sense.

At least the blades were never damaged at any point. I can easily just adjust all the HT steps and try again. If they had cracked during the HT or during any other step then I would have to track down and order more and really start over.
 
I was using some 2,000 grit paper to clean off the oxides, is this ok?

These spots I'm seeing aren't making much sense to me. When I buff them with any of the compounds they look almost like galvanized sheet metal. This makes me think that it's grain growth. But I noticed them earlier and when I did the edge test the steel was fine. I pushed the edge onto a round iron bar to make sure the edge didn't fail. Even when brought to a very thin edge there was no cracking or chipping, the edge flexed.

But every time I etch the blade (even after neutralizing then rubbing with the 2,000 grit paper) these spots show up.

If it were from over heating during the HT then I would expect it to fail during the test, but it didn't. I'm not sure what to think of this.

I started getting suspicious when one side of the blade was not showing the lamination line as well as the other. The spots were blurring everything out.

If I have to re HT the blades then I have to re do all the polishing. I only have 2 days left to work on these knives.

Edit: added pictures of the spots on the blade. After etching and lightly sanding:https://imgur.com/a/yvx51


Looks like decarb to me.
 
Back
Top