Recommendation? 20CV warping after hard-milling

The_Iron_Joe

Knifemaker, Jeweller. Custom Books Open!
Joined
May 3, 2012
Messages
1,091
Like the title says... I wanted to try milling my blades AFTER heat treatment in order to avoid any warping issues encountered with how thin the blades get, but I am encountering a LOT of stress while machining the blade. While I can gradually machine both sides of a blade to try to avoid warp, this really isn't an efficient use of time, and has actually led to breakage of a support structure used to prevent vibration, which is just a flat portion of steel left outside the blade profile, on the side of what would later be the cutting edge. The stock becomes very thin on the finishing passes, and the internal stresses are enough to cause the blade to fracture, whereas there should be no cause for a break if the steel wasn't experiencing any stress.

I am very certain that I am not heating up the steel while I am milling it down, as I am using flood coolant constantly during the operations, and the stock material never gets warm to the touch. Additionally, I've milled plenty of annealed S35VN without any warping issues on the mill table whatsoever.

I have a feeling that I need to normalize the 20CV stock before I do the rest of my heat treatment, but I'm not exactly sure how I should go about doing that, and any other steps I should take. Ideally, the blades would then not warp while being milled after being hardened and tempered. Or am I missing something else?
 
I haven’t hard milled a blade yet, but I have been considering doing it.
How thin are you leaving the stock along the edge?
How are you holding the blade?
Maybe show or describe your workflow or order of operations for milling.
From machining annealed aebl, I’ve milled one side, taken it off, had it bow, flipped it to mill the next side and then it ends up flat.
 
Last edited:
Do you stress relieve the material before hardening? You might try to 1200° stress relief cycle.

I do that to all my stock removal material now regardless of how it’s processed
 
How thin are you leaving the stock along the edge?
Toolpaths are set to leave the stock at 0.4mm at the edge.

How are you holding the blade?
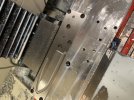
I'm holding the blade with three screws, although only two are really necessary.

eehJs2z.png


From here, the steel is milled down on one side, then the other, to this point;

Q3ddYZg.png


There is 0.1mm of material left to be removed on either side to bring it to size;

EcDuGXm.png


EDIT to mention that I'm debating adding a second screw location just behind the tip of the blade, although I'd really rather avoid doing that if possible to keep the same profile along the spine, as that'll be less time consuming to finish.
 
Last edited:
Do you stress relieve the material before hardening? You might try to 1200° stress relief cycle.

I do that to all my stock removal material now regardless of how it’s processed

I haven't had to until now, but I think that's what I meant by "normalizing"! Are they two distinct methods? And would the temperature needed vary depending on the type of steel I'm trying to relieve stress in?
 
I haven't had to until now, but I think that's what I meant by "normalizing"! Are they two distinct methods? And would the temperature needed vary depending on the type of steel I'm trying to relieve stress in?
It’s not at all the same as normalizing

it probably does vary a little bit between steels but you can certainly do 1200° and then furnace cool overnight for pretty much most steals
 
It’s not at all the same as normalizing

it probably does vary a little bit between steels but you can certainly do 1200° and then furnace cool overnight for pretty much most steals
Thanks for the tips! I'll give that a shot when more steel arrives.
 
0D2B024B-EE00-42FE-A5BD-745FCDEAA5E0.jpeg Gotta love figuring out machining problems. Here are some of my thoughts,

I would look to increase the rigidity of you fixturing. I would consider holding from the spine and maybe along the entire edge. You can always cut off the spine tab after the bevels are cut, then cut off the tab along the edge. You could even leave a lot more material along the spine to help with rigidity.

if you are cutting this out of bar stock in a previous op, consider cutting the bevels when it is still a full bar, when there is more support.

I would do a stress relief temper after machining.

I think the problem is that each time the tool makes a cut that tiny edge flap is being flexed. It is only going to hold so long. I’ve read that machining induces more stress than grinding does. One thing I’ve been trying to think about in my cnc machine knife making is that I don’t have to follow the standard stock removal order of operations. A different order of operations may work better on a cnc machine.
 
Last edited:
View attachment 1362442 Gotta love figuring out machining problems. Here are some of my thoughts,

I would look to increase the rigidity of you fixturing. I would consider holding from the spine and maybe along the entire edge. You can always cut off the spine tab after the bevels are cut, then cut off the tab along the edge. You could even leave a lot more material along the spine to help with rigidity.

if you are cutting this out of bar stock in a previous op, consider cutting the bevels when it is still a full bar, when there is more support.

I would do a stress relief temper after machining.

I think the problem is that each time the tool makes a cut that tiny edge flap is being flexed. It is only going to hold so long. I’ve read that machining induces more stress than grinding does. One thing I’ve been trying to think about in my cnc machine knife making is that I don’t have to follow the standard stock removal order of operations. A different order of operations may work better on a cnc machine.
Increasing rigidity is ultimately going to help any operation, for sure. Like I said, I have been debating adding another support behind the tip of the blade, and I think you're right, support along the spine is probably necessary to reduce flexing further.

I want to avoid machining the bevels while the blade is still full rectangular stock if I'm heat treating beforehand, as I'm trying to avoid warp with thin blades that don't have full thickness. Milling down the profile of the blade out of hardened steel sounds like it'd be a bit of a slog even with roughing end mills.

For blades I've heat treated after milling, I've done the bevels as the second step after making holes to mount the stock with and that has worked very well. So considering all that, I like your idea of leaving more material at the edge to help with stability.
 
If you're cutting with a ball mill, try using a bull nose. That center web doesn't cut very well it induces a lot of forces you won't have on a corner radius end mill
 
If you're cutting with a ball mill, try using a bull nose. That center web doesn't cut very well it induces a lot of forces you won't have on a corner radius end mill
Thanks very much for that tip, I don't think I have any on hand so I'll have to order some to try out. What radius would you recommend? The larger the better for this use?
 
I’ve been using the lakeshore carbide 1/4 .09 radius bull nose for my bevels. I’m curious to hear Nathan the Machinist’s, and other recommendations.

I’ve also been doing a parallel tool path, starting from the tip, to the plunge, and cutting from the edge toward the spine. Seems to work well for the most part. I’ve also tried just using non bull nose end mills. Along the bevel it doesn’t seem to matter, the plunge does come out with less noticeable step overs with the bull nose.

Yeah, I was thinking that the bevels would probably have "cuts" at each step over with a flat end mill, it's why I didn't think to use them for this aspect so far.

I would assume that the larger radius you can use for a design, the smoother the transition would be from spine to edge, and as I plan on sanding down the transitions in the blades for the model I'm currently working on, the less steel I have to remove by hand, the better!

Interesting, I had been using a contouring tool path for my bevels, but I imagine the resulting pathways probably look about the same. I know some guys like to set their tool paths to start from the edge and cut upwards towards the spine, starting near the tip and stepping over towards the plunge. I imagine this is probably a little harder on the end mill, but I could be wrong.
 
Back
Top