#68 white Owl bail mod.

Joined
Dec 14, 2010
Messages
610
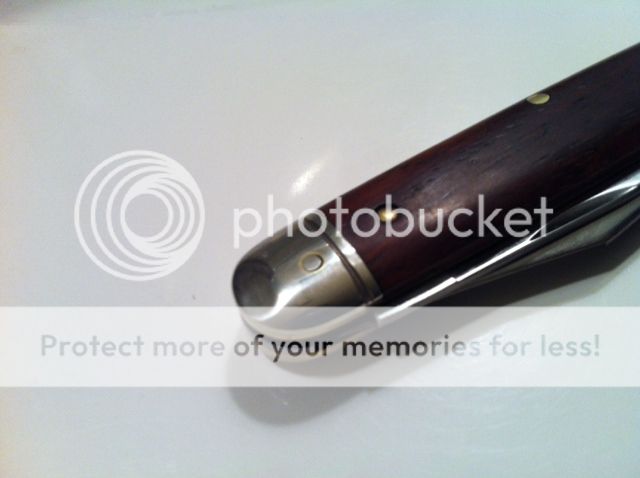
I've seen a lot of talk about the Northfield 68 and how it is almost perfect..... I know that some folks love the bail and some hate it. When I picked this owl up from boggs (Jim) a while back, I carried it but kept finding the bail to be a bit annoying. It hasn't had much pocket time lately and it's a beautiful knife, so Here is my mod. It didn't turn out bad. To do it correctly would mean replacing the pin or using solder, but this is what grinding the bail/pin down and heavily peening it followed by some cosmetic work will look like. It is very secure and im sure that it will have no interference with function, but the pin is visible.

Just thought I would share just in case any of you were on the fence or curious about what this easy mod would look like. I really like it and am glad I did it, but then again, I can live with a visible pin (some people lose sleep over that kinda stuff)!


It looks far worse in these pictures than it does in person...


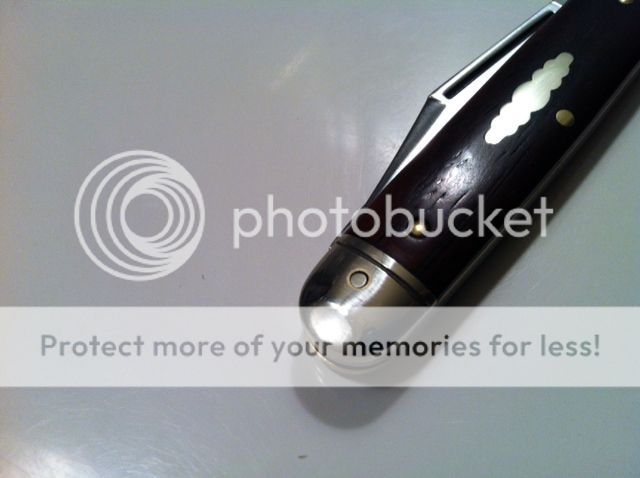
The pin looks like it could move, but I've tried to push it through and cannot get it to move.


She's going in the pocket tomorrow!
 
Looks much better without the bail! That is the only reason I didn't get the cocobolo was I knew I wouldn't like the bail but I sure do love everything else about it. Cocobolo and the cloud shield are such a great combo for some reason. :)
 
I did the exact same thing with my cocobolo white owl. Not particularly pretty (your effort is better than mine) but much better than with the bail. The important thing for me is that I am now happy to use it without the bail poking my hand. I'll post pictures when I'm home again.
 
Here ye'are.
ImageUploadedByTapatalk1380456440.504549.jpg
ImageUploadedByTapatalk1380456455.190014.jpg

A bit of a massacre, I got stuck in without thinking about how I was going to polish it up afterwards, so it's unfinished at the moment until I can get to the necessary shop, or order stuff in (no shop on the island is suitable really).

Paul
 
Paul, short of a polish, yours looks much better than mine! I think I sanded the bolster too far trying to achieve a flush appearance.

Either way, I am much happier with it as well. I actually like the bail as a collector, not so much as a user... Thanks for sharing your pics Paul!

Here ye'are.
View attachment 381319
View attachment 381320

A bit of a massacre, I got stuck in without thinking about how I was going to polish it up afterwards, so it's unfinished at the moment until I can get to the necessary shop, or order stuff in (no shop on the island is suitable really).

Paul
 
They both look good!! I remember someone else did the same with a stag #33 a while back but the pics aren't up anymore. Did you just pry the bail away from the bolster and pull it off or did you have to cut it off?
 
They both look good!! I remember someone else did the same with a stag #33 a while back but the pics aren't up anymore. Did you just pry the bail away from the bolster and pull it off or did you have to cut it off?

I used a small flat file to take the top off the pin on one end, carefully popped the bail off when it was free, then put the pin back and peened it.
 
Good on both of you for taking the steps you needed to get these things into your pockets and use them :thumbup:
Much better than stashing them away unused. Once that bridge is crossed with a knife, it seems so much easier to use it like a real tool and not worry about it so much :)
 
I used a small flat file to take the top off the pin on one end, carefully popped the bail off when it was free, then put the pin back and peened it.

So the pin for the bail goes all the way through? Ie if you didn't put it back, you'd have a back spring out of place and nothing but bolster pressure holding the pen blade in place?
 
The pin for the bail does go all the way through, I was afraid to take the pin out, so I filed the head on both sides of the pin so the bail would just slip off. I then had to sand the pin to where it was just a touch proud on each side and peen the crap out of it. the rest was finish work, progressive sand paper 220, 400, 600, 1500 then polish with a paddle strop. Didn't take long at all.

So the pin for the bail goes all the way through? Ie if you didn't put it back, you'd have a back spring out of place and nothing but bolster pressure holding the pen blade in place?
 
Good on both of you for taking the steps you needed to get these things into your pockets and use them :thumbup:
Much better than stashing them away unused. Once that bridge is crossed with a knife, it seems so much easier to use it like a real tool and not worry about it so much :)

Cheers mate, had to be done because like you said; what's the point if I'm not going to use it anyway.

So the pin for the bail goes all the way through? Ie if you didn't put it back, you'd have a back spring out of place and nothing but bolster pressure holding the pen blade in place?

There was what looked like a hollow brass pin housing the nickel silver pin. I could have left it out altogether and it would have been fine, I reckon. But I didn't want the hole so I put it back.

Paul
 
I think it looks great! I did the same to my ebony 33!
edd5bb30.jpg
[/URL][/IMG]

~Jim
 
I think it looks great! I did the same to my ebony 33!
edd5bb30.jpg
[/URL][/IMG]

~Jim

That pattern looks much more usable to me now. After my 68 Northfield experience I was put off the conductor altogether because of the bails. I figured I would never use it, so I ain't got one. Great work SonnyJim :)
 
Back
Top