Moorik
Platinum Member
- Joined
- Jan 17, 2025
- Messages
- 535
Well, gentlemen and gentlemen,
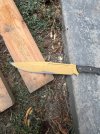
I come bearing a VERY detailed review of Huntsman Knife blades.
I mean, under a microscope—yes, literally.
There’s going to be a lot of text here and plenty of enthusiastic information that might help you understand just how well-crafted each model is. (I will literally show it under a microscope.)
There will be a lot of photos here, along with detailed notes on using the Fell Beast blade in real conditions. In a short time, I’ve probably put it through the equivalent of what 99% of people would never do with it over an entire lifetime.
I actually hit the maximum photo limit for a post — otherwise, there would have been even more.

The steel, or rather its quality, and the craftsmanship of the blade work are critically important—essentially, in my opinion, they account for 70% of any blade’s value.
I specifically conducted several tests like this with the Fell Beast, and later I’ll do a similar review with the Tyrant. These tests involved multiple sharpenings, followed by extremely tough use. The blade naturally dulls over time, I resharpen it, then subject it to very harsh tests for about a couple of weeks, and finally sharpen it a third time, just to solidify the results.
The test I’ll show, with the sharpening process, was extremely tough on the blade—probably a level of use that hardly anyone would put a blade through (I’m certain no one but me would).
So, here’s the deal:
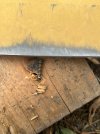
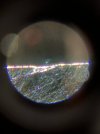
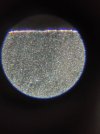
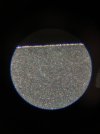
For two weeks, I used it to chop large, dried boards made of hornbeam, oak, pine, ash, as well as firewood and pallets, where I encountered screws and nails. Here’s exactly how the blade, damaged by a screw, looks under a microscope—and, in my opinion, it looks pretty good.
The cutting edge of the blade only has dents, not chips, which is extremely good for Z-tuff steel that struck a screw.
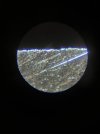
The factory sharpening is very good, especially considering that the blade is large, which usually makes it harder to work with. The BTE (behind the edge) measurements along the entire length of the blade are well-executed and finished, and I didn’t notice any variation in angles or BTE values across the cutting edge, which is crucial for a machete-chopper like this, especially for a maniac like me who puts it through extreme use.
The difference in a couple of spots was around 1-1.5 degrees, which, honestly, is impressive for such a large blade.
I resharpened the blade to 24 DPS (24 degrees per side).
All of this is because I used the blade for tests it wasn’t designed for—heck, I was chopping unhardened steel bolts, striking aluminum, and more. I find it interesting to do this in a controlled context. Essentially, during tests at 21 DPS (21 degrees per side), which is the average factory sharpening angle, the blade was still cutting through screws and nails.
For myself, I sharpen it to 24 DPS. I always do my custom regrind on all knives at a slightly higher angle to subject the blade to insane stress, to understand its limits, and then reduce the angle later if needed.
The factory angle was between 21-22 degrees.
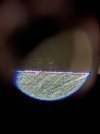
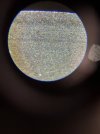
Here will be a photo of my custom regrind and how Z-Tuff steel looks under a microscope after using a 200/160 (roughly 80 grit) abrasive from the Poltava factory, with a copper-tin bond. This isn’t diamond—it’s Elbor, which is essentially the same but, in my opinion, slightly better.
The abrasive reveals the steel’s entire structure. Additionally, you can see the carbides and the grain structure. My microscope isn’t top-notch, and I’m just a forum nerd, so I’m showing what I can.
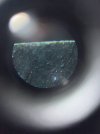
The steel, under the insane stresses I subjected the blade to for 7 days straight, chopping all kinds of wood indiscriminately—a TON of wood—remained sharp and could still cut paper.
Let me reiterate: I chopped a ton of firewood, took the blade into the forest, and cut down about five trees, each roughly 17-22 inches in circumference.
These were even tough, dry trees that made the blade feel like it was bouncing off them.
And after all that, the blade wasn’t cutting paper like a laser, of course, but it stayed sharp and handled things like bushes, small trees, and thickets with ease, even after one of the tests that lasted nine days.
Largely, good geometry is also about the fact that even when the blade dulls, it STILL gets the job done.
^
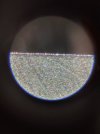
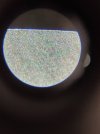
On a 150-grit stone, I started getting a solid burr, and I could see just how ductile and strong the steel is. Look at how large the burr is—it’s still holding onto the cutting edge.
It takes several passes to remove it.
I encountered this burr and was surprised; it even made me chuckle a bit. I named this burr "Zaedion."
This isn’t paper or anything else—it’s definitely steel. A massive burr named Zaedion, sending you its regards.

Continuing with the same 150-grit stone, I noticed dents in the steel, still from the bolts I was chopping in my madness. Keep in mind this is at 250-300x magnification.
So, essentially, the steel shows no visible damage—at least the kind that can’t be fixed. Whatever damage was there can be manually resharpened, even by someone who isn’t the most experienced sharpener.

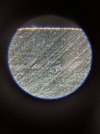
At 300 grit, with the cutting edge already formed, you can start to see the carbides and the structure, which is looking good. Additionally, at this stage with these stones, I can already feel pretty good feedback from the steel. The abrasives I use for sharpening are essentially a test for the steel through sharpening. Even good steel sometimes doesn’t provide good feedback or a satisfying feel for how it responds to sharpening. The formation of the burr, as you approach 250–300 grit, can vary, but here everything is EXCELLENT.The burr reflects a lot of light under the microscope, but keep in mind, this is at 300x magnification. In reality, it’s extremely, extremely small. At the same time, when switching sides during sharpening—that is, when flipping the blade—the burr moves to different sides with the help of the abrasive, which indicates that the steel is ductile.
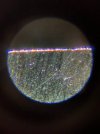
At 800 grit, the burr is almost nonexistent, and I remove it completely. I go through these meticulous and complex steps to absolutely rule out any chance that I messed something up, ensuring my tests are essentially PERFECT. In fact, I don’t just do this once—I do it three times in a row! And by the third time, this result is exactly what I expect. Plus, I use oil with this abrasive, which prevents overheating and helps polish the edge better. (Don’t mind me, I’m just being a nerd about it.)
Essentially, at this point, you could stop, as the blade, with my custom 24-degree resharpening, is already shaving hair—not just cutting it, but splitting it in half.
But we’re interested in the steel’s structure and carbides, aren’t we? (Or is that just me?)
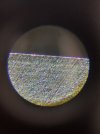
Here I moved on to the 14/10 abrasive, which is about 1000 grit, but in fact grit numbers are not a very accurate measure. The previous stone is supposedly 800 grit, BUT its particle size is 20/14 microns — that’s a huge difference in microns, while in grit it’s only about 200 units. (I’M BEING EVEN MORE PEDANTIC!)
Lots of carbides! And the steel is amazing, very beautiful steel! It’s a pity we lost the “Zaedion” burr
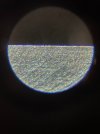
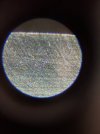
Here I reached 2000 grit, in microns this is 7/5, which already exposes the carbides even more, and polishes the edge, making it smooth, this is very useful for the blade to penetrate wood and other hard materials (f*ck I sharpen for 3-4 hours just to hit bolts?!?!)
That's the point gentlemen, if you look at previous microscopies, we see that a coarser abrasive and sharpening makes it so that we have a micro-micro saw on steel, even if it is visible when approaching 250-300-400, but it is in the micro structure (this is how sharpening works)
And I sharpen at very high values so that the blade is smooth and there is no micro saw!
I can praise the steel because when I sharpen at such values in microns, I do not get micro chipping in the steel, with a x350 microscope.
(95% of steel crumbles here)
Now comes the most interesting step, and I’ll explain it a bit more simply so as not to overload you with information and unnecessary words.
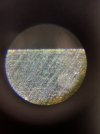
Here’s what I do: I go all the way up to an abrasive of 11,000 grit, or even 16,000, which corresponds to about 0.5 microns. I apply a high-concentration diamond paste onto a special abrasion-resistant strop tape, and then I perform stropping, polishing the surface.
But what’s the downside of this? The carbide structure itself gets polished as well — the carbides become smooth, along with the surface. This makes the edge feel somewhat “soapy,” meaning it loses cutting aggression.
So what do I do to prevent that? I polish at 16,000 grit, and then I go back to an abrasive of 3/2 microns (around 6000 grit) to expose the carbides. This way, I get a polished surface but with very, very AGGRESSIVE carbides sticking out. That’s why the cutting edge looks the way it does here. Overall, this kind of meticulous process shows what this steel is really capable of, and what it can endure in my tests.
On top of that, for heavy-duty work, such an edge actually becomes about TWICE as durable, since with a machete we chop and strike, rather than slice like with a regular knife.
I come bearing a VERY detailed review of Huntsman Knife blades.
I mean, under a microscope—yes, literally.
There’s going to be a lot of text here and plenty of enthusiastic information that might help you understand just how well-crafted each model is. (I will literally show it under a microscope.)
There will be a lot of photos here, along with detailed notes on using the Fell Beast blade in real conditions. In a short time, I’ve probably put it through the equivalent of what 99% of people would never do with it over an entire lifetime.
I actually hit the maximum photo limit for a post — otherwise, there would have been even more.

The steel, or rather its quality, and the craftsmanship of the blade work are critically important—essentially, in my opinion, they account for 70% of any blade’s value.
I specifically conducted several tests like this with the Fell Beast, and later I’ll do a similar review with the Tyrant. These tests involved multiple sharpenings, followed by extremely tough use. The blade naturally dulls over time, I resharpen it, then subject it to very harsh tests for about a couple of weeks, and finally sharpen it a third time, just to solidify the results.
The test I’ll show, with the sharpening process, was extremely tough on the blade—probably a level of use that hardly anyone would put a blade through (I’m certain no one but me would).
So, here’s the deal:
For two weeks, I used it to chop large, dried boards made of hornbeam, oak, pine, ash, as well as firewood and pallets, where I encountered screws and nails. Here’s exactly how the blade, damaged by a screw, looks under a microscope—and, in my opinion, it looks pretty good.
The cutting edge of the blade only has dents, not chips, which is extremely good for Z-tuff steel that struck a screw.

The factory sharpening is very good, especially considering that the blade is large, which usually makes it harder to work with. The BTE (behind the edge) measurements along the entire length of the blade are well-executed and finished, and I didn’t notice any variation in angles or BTE values across the cutting edge, which is crucial for a machete-chopper like this, especially for a maniac like me who puts it through extreme use.
The difference in a couple of spots was around 1-1.5 degrees, which, honestly, is impressive for such a large blade.
I resharpened the blade to 24 DPS (24 degrees per side).
All of this is because I used the blade for tests it wasn’t designed for—heck, I was chopping unhardened steel bolts, striking aluminum, and more. I find it interesting to do this in a controlled context. Essentially, during tests at 21 DPS (21 degrees per side), which is the average factory sharpening angle, the blade was still cutting through screws and nails.
For myself, I sharpen it to 24 DPS. I always do my custom regrind on all knives at a slightly higher angle to subject the blade to insane stress, to understand its limits, and then reduce the angle later if needed.
The factory angle was between 21-22 degrees.
Here will be a photo of my custom regrind and how Z-Tuff steel looks under a microscope after using a 200/160 (roughly 80 grit) abrasive from the Poltava factory, with a copper-tin bond. This isn’t diamond—it’s Elbor, which is essentially the same but, in my opinion, slightly better.
The abrasive reveals the steel’s entire structure. Additionally, you can see the carbides and the grain structure. My microscope isn’t top-notch, and I’m just a forum nerd, so I’m showing what I can.

The steel, under the insane stresses I subjected the blade to for 7 days straight, chopping all kinds of wood indiscriminately—a TON of wood—remained sharp and could still cut paper.
Let me reiterate: I chopped a ton of firewood, took the blade into the forest, and cut down about five trees, each roughly 17-22 inches in circumference.
These were even tough, dry trees that made the blade feel like it was bouncing off them.
And after all that, the blade wasn’t cutting paper like a laser, of course, but it stayed sharp and handled things like bushes, small trees, and thickets with ease, even after one of the tests that lasted nine days.
Largely, good geometry is also about the fact that even when the blade dulls, it STILL gets the job done.
^
On a 150-grit stone, I started getting a solid burr, and I could see just how ductile and strong the steel is. Look at how large the burr is—it’s still holding onto the cutting edge.
It takes several passes to remove it.
I encountered this burr and was surprised; it even made me chuckle a bit. I named this burr "Zaedion."
This isn’t paper or anything else—it’s definitely steel. A massive burr named Zaedion, sending you its regards.

Continuing with the same 150-grit stone, I noticed dents in the steel, still from the bolts I was chopping in my madness. Keep in mind this is at 250-300x magnification.
So, essentially, the steel shows no visible damage—at least the kind that can’t be fixed. Whatever damage was there can be manually resharpened, even by someone who isn’t the most experienced sharpener.

At 300 grit, with the cutting edge already formed, you can start to see the carbides and the structure, which is looking good. Additionally, at this stage with these stones, I can already feel pretty good feedback from the steel. The abrasives I use for sharpening are essentially a test for the steel through sharpening. Even good steel sometimes doesn’t provide good feedback or a satisfying feel for how it responds to sharpening. The formation of the burr, as you approach 250–300 grit, can vary, but here everything is EXCELLENT.The burr reflects a lot of light under the microscope, but keep in mind, this is at 300x magnification. In reality, it’s extremely, extremely small. At the same time, when switching sides during sharpening—that is, when flipping the blade—the burr moves to different sides with the help of the abrasive, which indicates that the steel is ductile.

At 800 grit, the burr is almost nonexistent, and I remove it completely. I go through these meticulous and complex steps to absolutely rule out any chance that I messed something up, ensuring my tests are essentially PERFECT. In fact, I don’t just do this once—I do it three times in a row! And by the third time, this result is exactly what I expect. Plus, I use oil with this abrasive, which prevents overheating and helps polish the edge better. (Don’t mind me, I’m just being a nerd about it.)
Essentially, at this point, you could stop, as the blade, with my custom 24-degree resharpening, is already shaving hair—not just cutting it, but splitting it in half.
But we’re interested in the steel’s structure and carbides, aren’t we? (Or is that just me?)

Here I moved on to the 14/10 abrasive, which is about 1000 grit, but in fact grit numbers are not a very accurate measure. The previous stone is supposedly 800 grit, BUT its particle size is 20/14 microns — that’s a huge difference in microns, while in grit it’s only about 200 units. (I’M BEING EVEN MORE PEDANTIC!)
Lots of carbides! And the steel is amazing, very beautiful steel! It’s a pity we lost the “Zaedion” burr

Here I reached 2000 grit, in microns this is 7/5, which already exposes the carbides even more, and polishes the edge, making it smooth, this is very useful for the blade to penetrate wood and other hard materials (f*ck I sharpen for 3-4 hours just to hit bolts?!?!)
That's the point gentlemen, if you look at previous microscopies, we see that a coarser abrasive and sharpening makes it so that we have a micro-micro saw on steel, even if it is visible when approaching 250-300-400, but it is in the micro structure (this is how sharpening works)
And I sharpen at very high values so that the blade is smooth and there is no micro saw!
I can praise the steel because when I sharpen at such values in microns, I do not get micro chipping in the steel, with a x350 microscope.
(95% of steel crumbles here)

Now comes the most interesting step, and I’ll explain it a bit more simply so as not to overload you with information and unnecessary words.
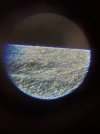
Here’s what I do: I go all the way up to an abrasive of 11,000 grit, or even 16,000, which corresponds to about 0.5 microns. I apply a high-concentration diamond paste onto a special abrasion-resistant strop tape, and then I perform stropping, polishing the surface.
But what’s the downside of this? The carbide structure itself gets polished as well — the carbides become smooth, along with the surface. This makes the edge feel somewhat “soapy,” meaning it loses cutting aggression.
So what do I do to prevent that? I polish at 16,000 grit, and then I go back to an abrasive of 3/2 microns (around 6000 grit) to expose the carbides. This way, I get a polished surface but with very, very AGGRESSIVE carbides sticking out. That’s why the cutting edge looks the way it does here. Overall, this kind of meticulous process shows what this steel is really capable of, and what it can endure in my tests.
On top of that, for heavy-duty work, such an edge actually becomes about TWICE as durable, since with a machete we chop and strike, rather than slice like with a regular knife.


