- Joined
- Jan 10, 2007
- Messages
- 1,924
I just spent a week in Old Washington at the ABS Handles and Guards class. This session was taught by Joe Keeslar who literally wrote the book on Handles and Guards. I would also like to mention that he is an excellent teacher.
Before the course I emailed Mr. Keeslar and he said to bring one full tang knife blade and one narrow tang knife blade completely finished except for the handles. The completed part is important unless you want to miss out on valuable learning time finishing blades. He also said to bring any materials that I would like to bring if I had anything specific in mind. Although, they provide materials for the knives.
The first thing that we went over in the class was full tang knife construction. The demonstration knife was one of Joe Keeslar's Brute De Forge knives. His methods involve no glue and a lot of peening.
I enjoyed doing things a bit differently that I normally do so it was fun. For my full tang knife I made a chopper with a 10'' blade and 15'' overall so I can practice cutting things. It ended up with bolsters (which were covered in the class) and curly maple handles.

Next we covered silver wire inlay. Which I of course wanted to learn so I decided to put some on my chopper. I went with the demonstration pattern Joe used as it gave me the chance to use pins and have lines crossing over each other etc.

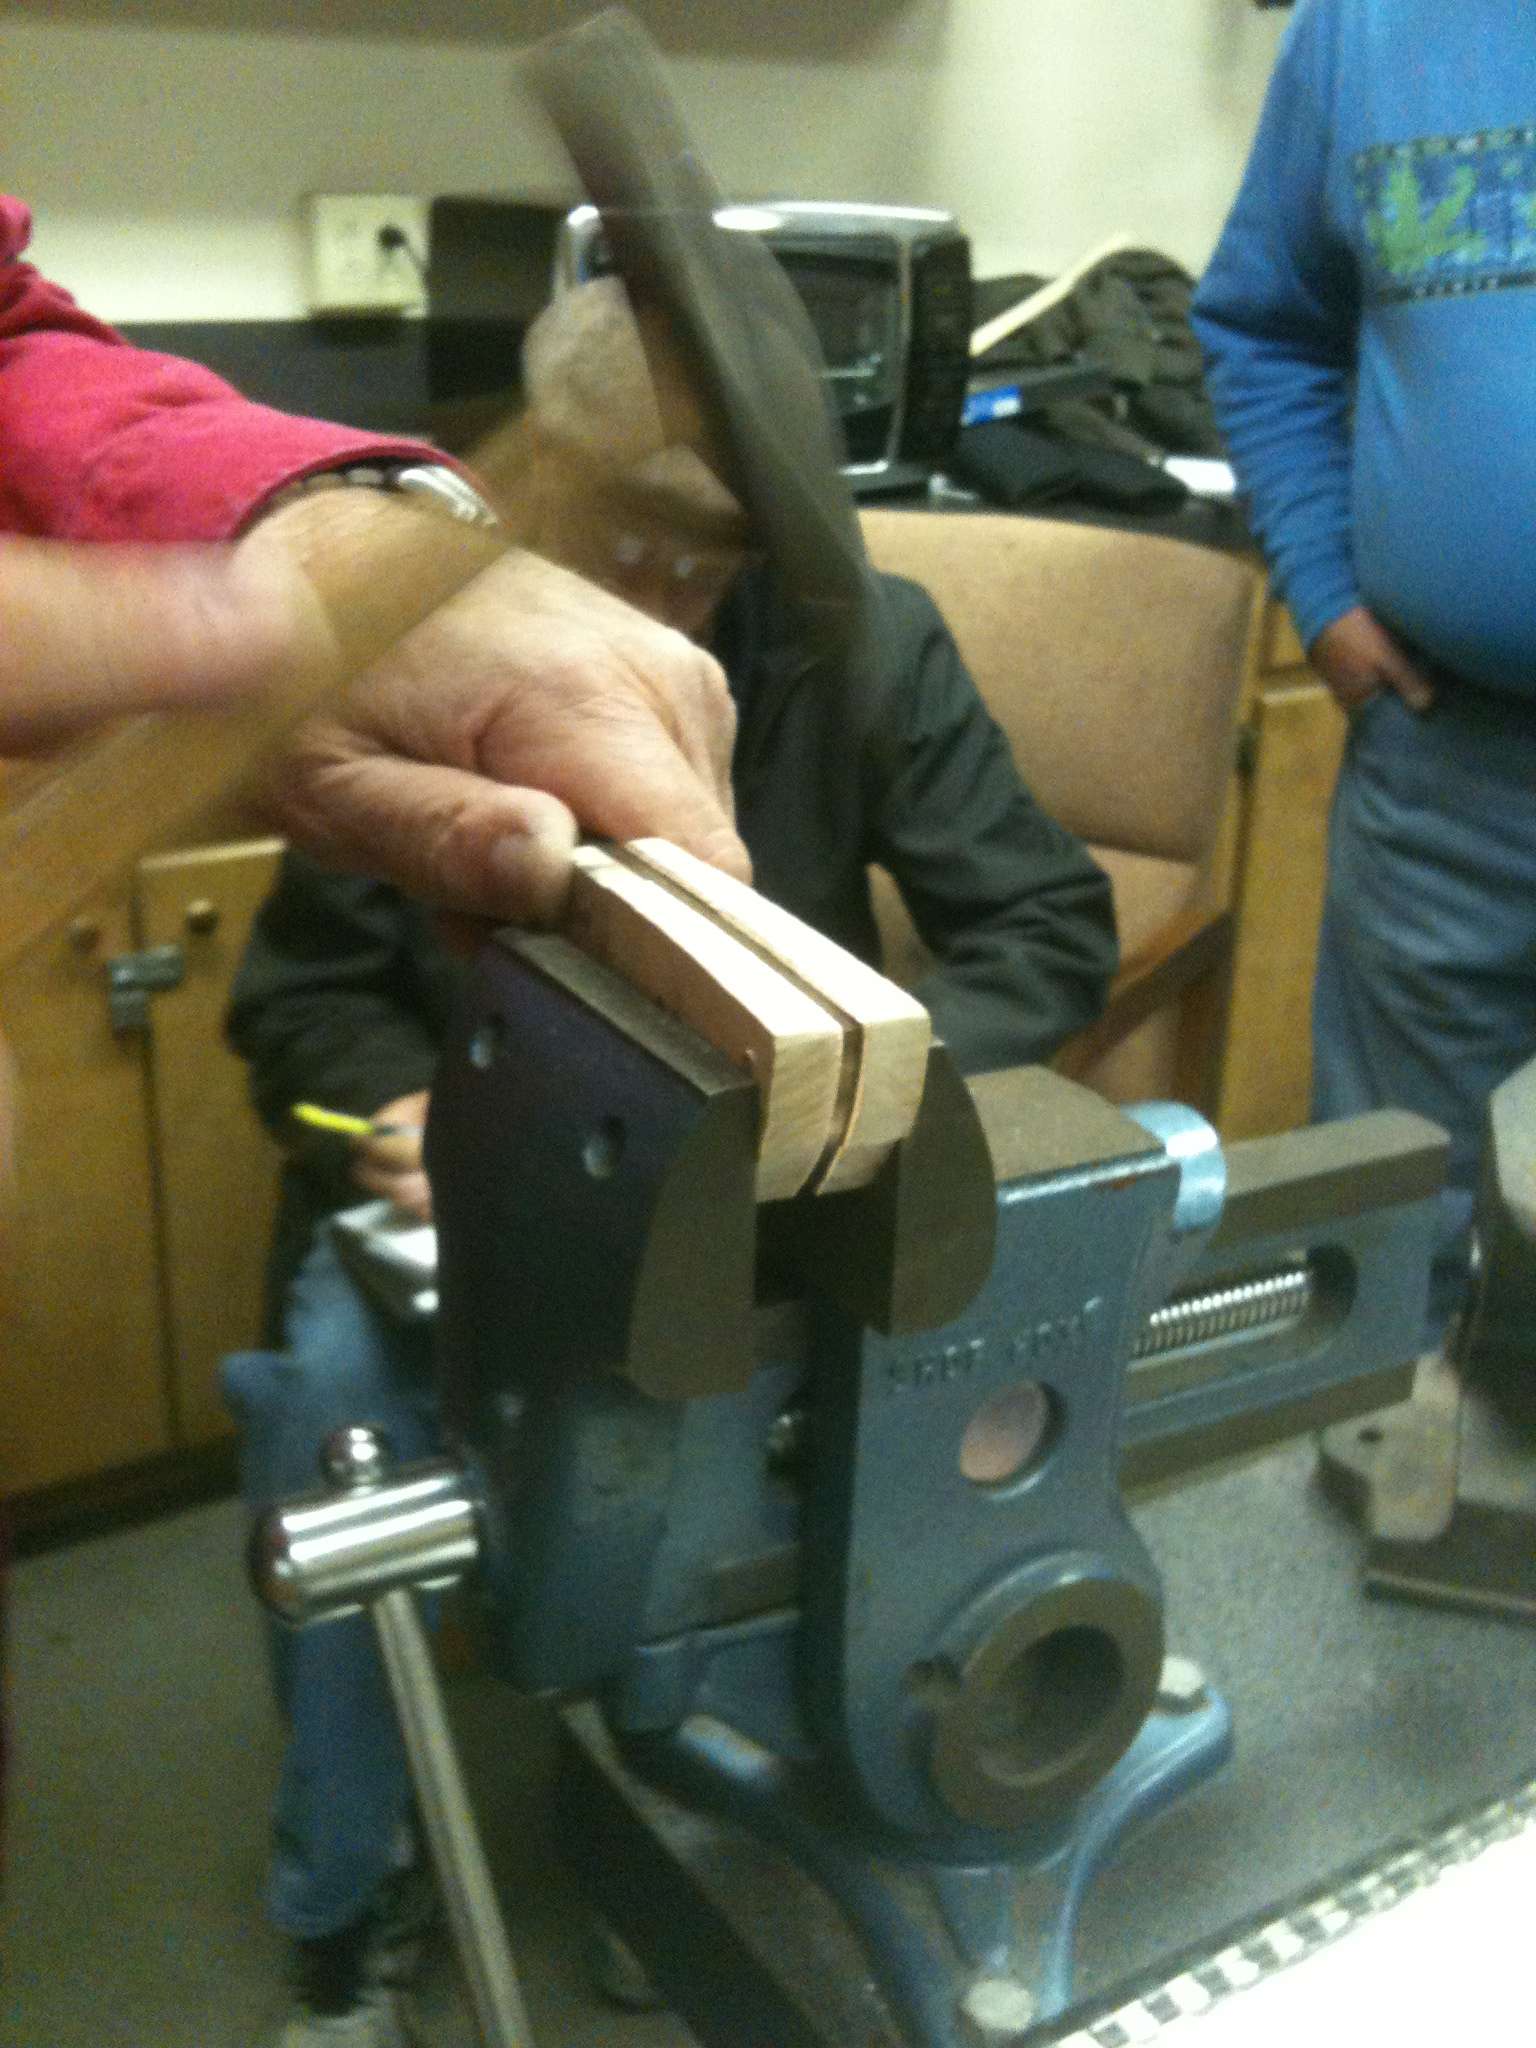
After covering the finishing of a maple handle we moved on to the narrow tangs. Mr. Keeslar favors soldered guards so that is how we did it. I would suspect that if you took the class from someone who presses their guards that would be what you would learn. Here is Joe Keeslar soldering a guard:

Other topics that were covered included: Pin usage in keeping spacers lined up with handles, laying out a leather sheath, butt cap construction, and by popular request the forging of a Brute De Forge knife:
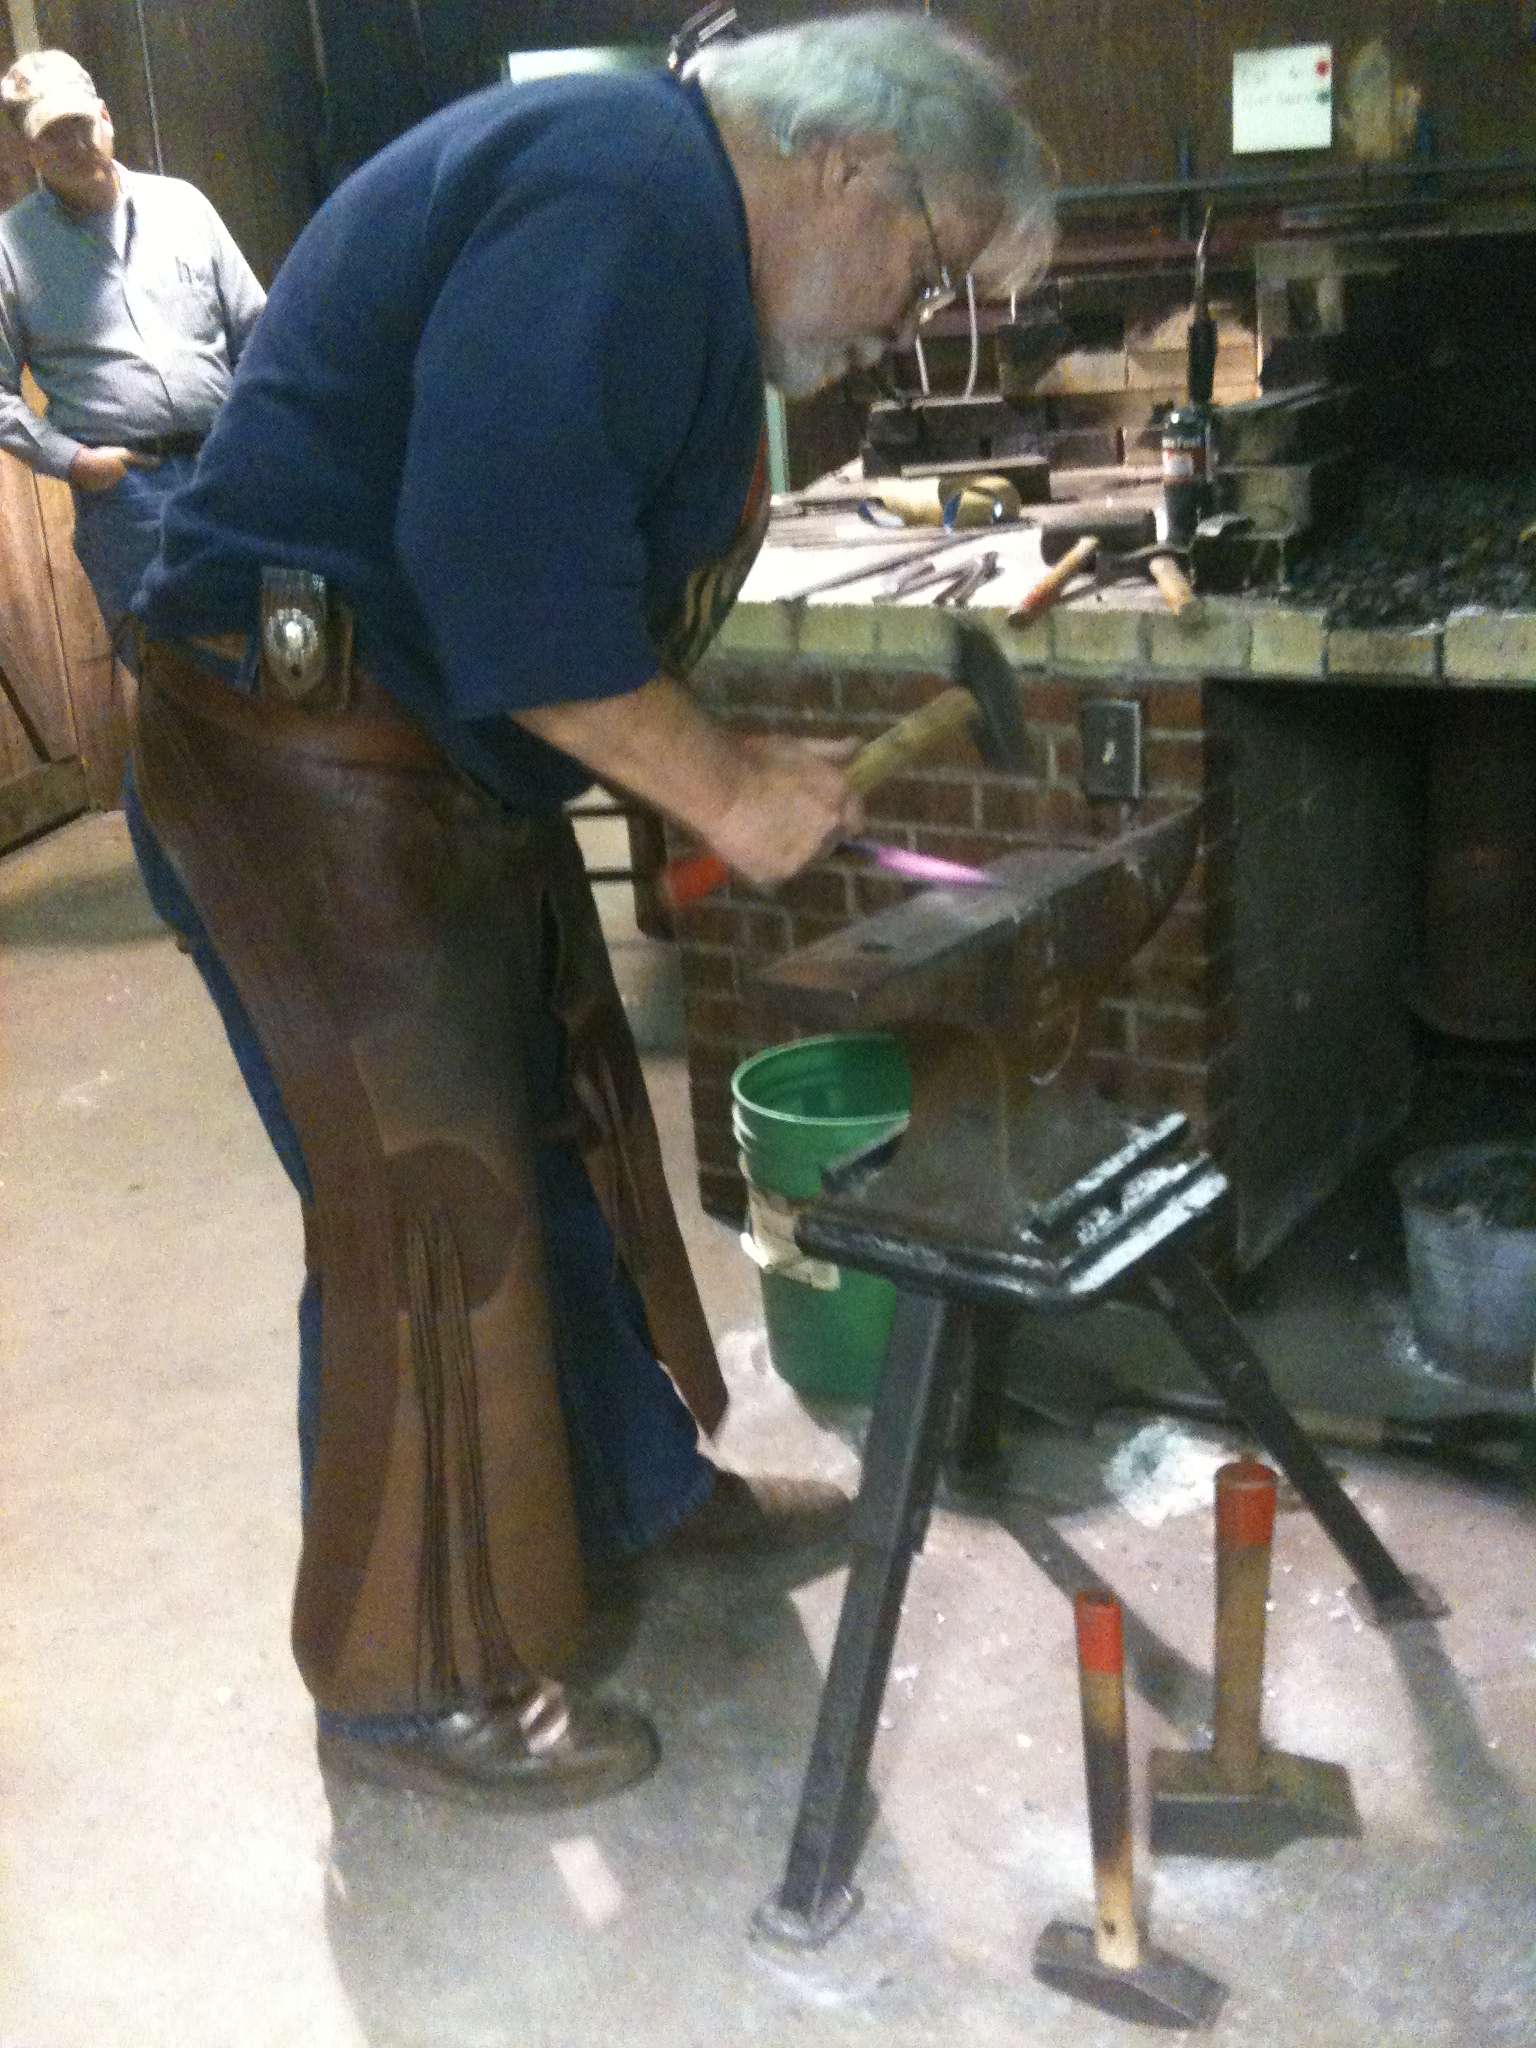

By the way, the man swings a BIG hammer!

Overall I really enjoyed the course. You really had to move to try and get close to finishing two knives in the five days. But, a lot of learning was done. I didn't get any pictures of the second knife which is about 3/4 of the way finished. And, I still need to make some pictures of the nearly complete chopper now that it has wire inlay and has been stained.
Before the course I emailed Mr. Keeslar and he said to bring one full tang knife blade and one narrow tang knife blade completely finished except for the handles. The completed part is important unless you want to miss out on valuable learning time finishing blades. He also said to bring any materials that I would like to bring if I had anything specific in mind. Although, they provide materials for the knives.
The first thing that we went over in the class was full tang knife construction. The demonstration knife was one of Joe Keeslar's Brute De Forge knives. His methods involve no glue and a lot of peening.

I enjoyed doing things a bit differently that I normally do so it was fun. For my full tang knife I made a chopper with a 10'' blade and 15'' overall so I can practice cutting things. It ended up with bolsters (which were covered in the class) and curly maple handles.

Next we covered silver wire inlay. Which I of course wanted to learn so I decided to put some on my chopper. I went with the demonstration pattern Joe used as it gave me the chance to use pins and have lines crossing over each other etc.

After covering the finishing of a maple handle we moved on to the narrow tangs. Mr. Keeslar favors soldered guards so that is how we did it. I would suspect that if you took the class from someone who presses their guards that would be what you would learn. Here is Joe Keeslar soldering a guard:

Other topics that were covered included: Pin usage in keeping spacers lined up with handles, laying out a leather sheath, butt cap construction, and by popular request the forging of a Brute De Forge knife:


By the way, the man swings a BIG hammer!

Overall I really enjoyed the course. You really had to move to try and get close to finishing two knives in the five days. But, a lot of learning was done. I didn't get any pictures of the second knife which is about 3/4 of the way finished. And, I still need to make some pictures of the nearly complete chopper now that it has wire inlay and has been stained.


