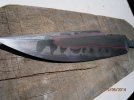
AMERICAN FIGHTER pick heavy

Joined
Nov 11, 2013
Messages
100
HI GUYS
long time no see, well i just want to introduce you a knife that i made recently, is my just second knife in this style and i'm very satisfied how this knife come out, so let the story begin.
i took a leaf spring from the pile of the scrap steels, and i cut a large piece


here is in the forge, i cut a short tail to give sure catch to the tongs


the forging is allmost finish


here after rough grind the perimeter


bevels and fin are now rough grinded ( later i decided to go to hi grind)


after finishing grinding and polishing i decide to try for differential hardening and hamon if possible, first i cover the tottal blade with a very thin clay layer


after drying i decide to improvise a bit


holly crap!!!!! i allmost forgot to take the pic with the last clay layer on it!!! as we say late is better to never!!!


right after heat treat, did you see the funy face on the clay?


blade all cleaned up and polish ready for the acid etch, pheric chloride


and now let the fun begin!, look how she come out from the echant!!!!


and after some circles of etch and polish!!!! holy smoke!!!!


after thatis time for the handle making, the guard first,phosphor bronze


i'm going to use a block of judas tree, that i collected my own!


start shaping


handle ready, stunning beauty!!


and the knife is done!!


this one taken by the night and its quite blurr but i like the perspective!!


specifications
blade 11,4 in. from leaf spring
handle 5,5in. judas tree, phosphor bronze guard, brass pin
tottal 16,9in.
-------------------------------------------------------------------------------------------------
hope you like it, and any comment are wellcome( my apologies for the mesh in my shop)
 
Last edited:
Nice work.
I really like the handle contouring and that wood is just gorgeous.
Thanks for showing.

Doug
 
HI GUYS
long time no see, well i just want to introduce you a knife that i made recently, is my just second knife in this style and i'm very satisfied how this knife come out, so let the story begin.
i took a leaf spring from the pile of the scrap steels, and i cut a large piece


here is in the forge, i cut a short tail to give sure catch to the tongs


the forging is allmost finish


here after rough grind the perimeter


bevels and fin are now rough grinded ( later i decided to go to hi grind)


after finishing grinding and polishing i decide to try for differential hardening and hamon if possible, first i cover the tottal blade with a very thin clay layer


after drying i decide to improvise a bit


holly crap!!!!! i allmost forgot to take the pic with the last clay layer on it!!! as we say late is better to never!!!


right after heat treat, did you see the funy face on the clay?


blade all cleaned up and polish ready for the acid etch, pheric chloride


and now let the fun begin!, look how she come out from the echant!!!!


and after some circles of etch and polish!!!! holy smoke!!!!


after thatis time for the handle making, the guard first,phosphor bronze


i'm going to use a block of judas tree, that i collected my own!


start shaping


handle ready, stunning beauty!!


and the knife is done!!


this one taken by the night and its quite blurr but i like the perspective!!


specifications
blade 11,4 in. from leaf spring
handle 5,5in. judas tree, phosphor bronze guard, brass pin
tottal 16,9in.
-------------------------------------------------------------------------------------------------
hope you like it, and any comment are wellcome( my apologies for the mesh in my shop)
Knife build. What type of clay did you use and where do you buy it?. Very nice knife very very nice piece of wood
 
thanx pal, i'm happy you like it.
well for clays i use this, it's a resin for stove and forge repairs, i buy it here in greece from local store, but I must mention that not using it as it comes out of the cartridge because it is too thick, dilute with a little water until i get the density I want, in this specific BLADE I've used three different densities, from sparse to the first complete cover the blade, until thick enough to last layer

 
Last edited:
Whoa... Déjà vu ;) :p


This is a nice knife with nice overall lines and the handle is really pretty.

You'll find that if you are after a lot of activity in a hamon, you'll get the best results with a simple, shallow hardening steel. The jagged lines that can be seen on your blade are actually a result of super heavy etching... the actual transition (hamon) is the area above that. I'm trying to help, not pick on you. :)

You will also want to use MUCH LESS clay. :)
 
thanx for the comment mister wheeler, no way to misunderstood!!,just to tell, i now that the monosteels are most efficient to create hamons,to be honest this blade is pure product of experimentation, and I hope you understand that what is happens thereon BLADE is due to Clay and not in some sly trick, now to reach this result is true that I did several cycles of etching and polishing,if this is called super heavy etch then yes, this is it!, allso thanks for the advise for less Clay, i will certainly implement on some of the next blades. I left last the most important, and because I like to attach to Caesar what belong to Caesar's and what belong to God to the God, I must admit that your knives be my inspiration for this knife!! i'm watching your work and i'm a fan!! will not flatter you by saying this, but this is the truth! and thanx again for your time and the tip!!
 
You are off to a good start

Your handle shape is better than many that try that style

On the next mount your handle a tad straighter and thin your guard

Good job
 
Hi hariklis :)


Sorry, I didn't think, or mean to say that you were lying! :foot: I was just trying to help you better understand what you had going on in your steel. :)

I should have included this in my first post... I outlined where the structural transition is in your blade in this photo. You certainly did achieve differential hardening. :cool:

Hope that clears up what I meant to say harkilis :) Keep up the great work! :thumbup:

The red line is just inside of the transition. :)
hariklis.jpg
 
Hariklis,

I agree with Nick. Try your process using some W2, W1, or 1095. You'll see the difference.
You might even get results from an old rasp or file from the scrap pile if the steels mentioned
above aren't readily available.

Keep up the good work.


Tad
 
Last edited:
thanx tad, i have allready work with some 1095, have some nice hamons,but mostly plain lines like this.

or this, this is some earlier work

but what hapend with the fighter blade i saw first time on my blades!, after a lot of thought i'm going to believe that hapens begouse of the different densitys of the clays, but i can't be sure, instead i'm sure that plenty of bladesmiths in this forum as more experienced than me, known better!!!
 
Hi hariklis :)


Sorry, I didn't think, or mean to say that you were lying! :foot: I was just trying to help you better understand what you had going on in your steel. :)

I should have included this in my first post... I outlined where the structural transition is in your blade in this photo. You certainly did achieve differential hardening. :cool:

Hope that clears up what I meant to say harkilis :) Keep up the great work! :thumbup:

The red line is just inside of the transition. :)
View attachment 454908

oh no sorry nick i don't think that in any way about you!!!, my apologies if i give you wrong icon with my script, blame to my bad english
 
Back
Top