First off, Let me introduce myself to some folks here. I'm 31, and one of my jobs that I have right now is providing a mobile cow execution service. (I'm not so politically correct as to call myself a slaughter technician) The job basically involves driving to the animal owner's farm, shooting the animal, skinning it, gutting it, halving it, getting it back to the processing plant, quartering it, washing, trimming, and weighing it. So, I have some ample opportunity to test knives in a working, real world fashion, rather than theoretical on a kitchen table.
Having only recently heard of Bark River Knife and Tool as a company, And having seen their knives and the prices on the internet, I found a secondhand Montana Guide with stag handles for sale on the equipment exchange section of Canadian Gun Nutz forum. It was about half the price of a new one off of Amazon, or other retailer. It wasn't my first choice of style, but I figured at least I'd get a feel for the quality of the knife before buying my first choice. I personally think it's a great looking knife, but this is more a usage review than a beauty pagent.
 IMG_20150205_173947 by wolverine00089, on Flickr
So, when I got it, it was lightly used, but the seller told me that he had flattened out the convex edge. I'm going to assume that he didn't understand how a convex edge works. So, I took and resharpened the edge to a convex edge. It would cut paper without effort, and shave hair off my arm when I was done. I was told on the Bark River Knife and Tool Facebook page that they though the blade was A2 tool steel.
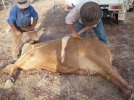
I was called to do an emergency kill of a yearling heifer that had fallen on ice and broker her leg. It was a severe break that had bone sticking out of the skin. This will come into play later. She was in the 700 pound live weight range.
So, after figuring out how to get her out, and how to set up the truck so that I was out of the very cold wind, I shot her, and the farmer drug the carcass out of the pen with a tractor, and got her hung up on the crane on the truck. Then I bled her and cut out the anus and cut off the tail with a sticking knife.
Then I got to work with the Montana Guide knife. First, I opened up some of the belly skin just past the flanks. It's easier to do that while the guts are still inside and keep the flank meat attached at the same time. I have a technique for doing that where I begin the cut near the butt, between the legs, and after opening a small hole, stick the blade inside the hole just under the skin laying the blade flat against the meat, and then slicing downwards. Doing it that way gives you some skin to grab onto when beginning the skinning process and takes time off the work.
Usually for that job, I use a sheep skinner that has a molded handle and the sharpened part of the blade goes right to the guard. I can go down the whole belly in one cut like that. The Montana Guide didn't have a guard setup like that, and so I had to reset the blade into the cut a few times. Usually with the commercial skinning knives out of stamped steel and molded handles I'd have to touch up the blade on a fine cut steel after that cut. That cut didn't phase the edge of the Montana Guide.
The skinning process with the Montana Guide was a breeze on the belly. The rose meat (the muscle that's just under the skin) separated from the skin easier than many of the commercial skinning knives I'd used could. The knife seemed more controllable. As I was in a hurry as it was getting dark out, I didn't go to the extent of taking off all the rose meat from the skin. I took it just to the line that would be across the top of the hip and shoulder when the animal is standing and over the prime rib.
In between getting past the flank muscle, and the end of what I kept on the carcass of rose meat, I opened the belly, and took out the guts. Opening the belly was easy. But I'm glad I had a Kevlar glove on. It felt like that knife could have bit deep into my hand with just a cotton glove. It did all the cuts inside the animal that I wanted it to with ease. It cut the meat on the hanging tenders, the membrane on the skirt meat (diaphragm), and the esophagus, and breathing tube in the front of the chest cavity with ease. The esophagus and breathing tube can be hard on the edge of a knife, especially if there's still food in the esophagus. In the smallest part of the chest cavity, I found that the Montana Guide's shorter length made the knife more maneuverable inside to get a good easy cut on the veins, arteries, and other membranes that bind the organs in when you're trying to get them out. It was easier to maneuver to draw it partway up the sternum at the front of the chest cavity to remove the heart and cut off the whole organ mass.
So, I got back to the back legs. A small complaint about the length of the blade. With a 4 inch knife, I can open and skin lower part of a rear leg in 5-8 major cuts. With the shorter blade, it took a few more. I use the same technique as I talked about on the belly to open the legs. The knife is inserted under the skin where the anus was cut out. The blade is flat against the meat. The blade is then drawn towards the knee, and as it gets near the knee, the knife cut goes from holding the blade horizontal following the curve of the meat to vertical on the outside of the leg as it goes past the knee, and down the bone of the lower leg. When you want the cut to end, the knife edge is twisted outwards, and it cuts off the skin. The rest of the circle around the lower leg is cut, and it's opened on the back side of the leg with a cut going towards the anus hole, maybe needing a bit of working around the skin on the knee.
The Montana guide, being a shorter knife, needed a few extra cuts to do that job, and not having a guard, I had to reset the knife to continue the cut as I had pushed the knife inwards too far and gone past the blade where I was trying to cut the skin open. During this process, I ran the flat part of the blade into the protruding hip bone. I washed the knife and checked the edge as well as I could, and didn't see a dent in the edge.
I finished skinning the animal down to the front shoulders, then opened the front legs with a technique similar used to do the back legs. I skinned the elbows out, and pulled the skin upwards, and cut the skin from the center of the chest to the inside of the elbow, then laying the blade flat on the meat, cut down the back of the leg (top of the leg if the animal is hanging)below the knee, then twisted the knife so the edge turned upright, breaking the cut off. (use the left hand to hold the knife to make the cut when doing the leg to your right) Once the legs and brisket were done, I skinned the hide down the neck to the ears, and cut the hide off the animal. I cut the meat at the top of the skull with the knife, and there's where the Montana Guide's work was finished on that animal.
I didn't use the Montana Guide to cut the tendons right around the bone on the first joint in the neck. It is not a job for a thick bladed knife in my humble opinion. I also didn't use it when separating the front leg joints, also a thin narrow blade job, and I just use a sawzall for the rear legs as I seem to always get the wrong joint with a knife and cause trouble for myself for hanging the animal. I could have used it for separating the vertebrae at the back rib for separating the front from the back half of the animal, but I didn't. A thin knife is needed to get through the rib joint so I would have had to swap knives.
Once the animal was in the truck, I washed up the Montana guide, and checked the edge. It wasn't as sharp as when I started, but it was still sharp enough. I tried steeling it with an F Dick sapphire cut steel to touch it up, but the blade wasn't having any of that.
I took the knife home and touched the blade up on a fine diamond hone and stropped it on leather with green stropping compound. 2 days later I took it out to do 2 bulls that a customer wanted done. Rather than describe the process again, I'll give my observations.
The Montana Guide's lack of blade length was more pronounced on these 1400 pound animals. It became easier to lose the edge of the blade into the cut while opening. The blade cut through the 30% thicker bull hide like a sharp knife through soft butter. It was easier to do a skinning job as I didn't have to sharpen the knife for a long time. I didn't have to sharpen the knife till I got to the front shoulders on the second bull, and then only because I accidentally ran the entire edge over the steel lift cable. The knife would have still cut, but as I was in a hurry, I used some of the other knives I had with me.
Other observations. This knife would have a perfect blade length for animals in the under 400 pound range from what I could see. Something along the lines of deer, sheep, antelope, llama, etc. The way the knife is made, the cuts are very controllable. It is very comfortable in my hand. I used the knife for about 3 hours the second day, without hand fatigue. The rougher texture of the stag scales made gripping the knife quite nice even with cotton gloved hands, and if kept washed while blood was liquid during the job, it was easy to clean afterwards. The blade, if left undried for a short period of time would show water spotting and ringing. That's not an issue for most people, but for me, when I show up to a customer's house, they tend to be impressed by shiny things. Sometimes you don't have it all... Le sigh!!!
Overall, the knife seems very well made. It would seem to me to be a good utility knife as well. There are no major design cons that I would list for the knife. What I had to say about it in a negative fashion was pretty unique to the job at hand, rather than the quality of the knife itself. I'd probably keep the knife for skinning and gutting, and use a knife with an inch or so more blade to do the opening cuts with.
I thank you for reading this. Comments and questions are welcome.
Having only recently heard of Bark River Knife and Tool as a company, And having seen their knives and the prices on the internet, I found a secondhand Montana Guide with stag handles for sale on the equipment exchange section of Canadian Gun Nutz forum. It was about half the price of a new one off of Amazon, or other retailer. It wasn't my first choice of style, but I figured at least I'd get a feel for the quality of the knife before buying my first choice. I personally think it's a great looking knife, but this is more a usage review than a beauty pagent.
IMG_20150205_173947 by wolverine00089, on FlickrSo, when I got it, it was lightly used, but the seller told me that he had flattened out the convex edge. I'm going to assume that he didn't understand how a convex edge works. So, I took and resharpened the edge to a convex edge. It would cut paper without effort, and shave hair off my arm when I was done. I was told on the Bark River Knife and Tool Facebook page that they though the blade was A2 tool steel.
I was called to do an emergency kill of a yearling heifer that had fallen on ice and broker her leg. It was a severe break that had bone sticking out of the skin. This will come into play later. She was in the 700 pound live weight range.
So, after figuring out how to get her out, and how to set up the truck so that I was out of the very cold wind, I shot her, and the farmer drug the carcass out of the pen with a tractor, and got her hung up on the crane on the truck. Then I bled her and cut out the anus and cut off the tail with a sticking knife.
Then I got to work with the Montana Guide knife. First, I opened up some of the belly skin just past the flanks. It's easier to do that while the guts are still inside and keep the flank meat attached at the same time. I have a technique for doing that where I begin the cut near the butt, between the legs, and after opening a small hole, stick the blade inside the hole just under the skin laying the blade flat against the meat, and then slicing downwards. Doing it that way gives you some skin to grab onto when beginning the skinning process and takes time off the work.
Usually for that job, I use a sheep skinner that has a molded handle and the sharpened part of the blade goes right to the guard. I can go down the whole belly in one cut like that. The Montana Guide didn't have a guard setup like that, and so I had to reset the blade into the cut a few times. Usually with the commercial skinning knives out of stamped steel and molded handles I'd have to touch up the blade on a fine cut steel after that cut. That cut didn't phase the edge of the Montana Guide.
The skinning process with the Montana Guide was a breeze on the belly. The rose meat (the muscle that's just under the skin) separated from the skin easier than many of the commercial skinning knives I'd used could. The knife seemed more controllable. As I was in a hurry as it was getting dark out, I didn't go to the extent of taking off all the rose meat from the skin. I took it just to the line that would be across the top of the hip and shoulder when the animal is standing and over the prime rib.
In between getting past the flank muscle, and the end of what I kept on the carcass of rose meat, I opened the belly, and took out the guts. Opening the belly was easy. But I'm glad I had a Kevlar glove on. It felt like that knife could have bit deep into my hand with just a cotton glove. It did all the cuts inside the animal that I wanted it to with ease. It cut the meat on the hanging tenders, the membrane on the skirt meat (diaphragm), and the esophagus, and breathing tube in the front of the chest cavity with ease. The esophagus and breathing tube can be hard on the edge of a knife, especially if there's still food in the esophagus. In the smallest part of the chest cavity, I found that the Montana Guide's shorter length made the knife more maneuverable inside to get a good easy cut on the veins, arteries, and other membranes that bind the organs in when you're trying to get them out. It was easier to maneuver to draw it partway up the sternum at the front of the chest cavity to remove the heart and cut off the whole organ mass.
So, I got back to the back legs. A small complaint about the length of the blade. With a 4 inch knife, I can open and skin lower part of a rear leg in 5-8 major cuts. With the shorter blade, it took a few more. I use the same technique as I talked about on the belly to open the legs. The knife is inserted under the skin where the anus was cut out. The blade is flat against the meat. The blade is then drawn towards the knee, and as it gets near the knee, the knife cut goes from holding the blade horizontal following the curve of the meat to vertical on the outside of the leg as it goes past the knee, and down the bone of the lower leg. When you want the cut to end, the knife edge is twisted outwards, and it cuts off the skin. The rest of the circle around the lower leg is cut, and it's opened on the back side of the leg with a cut going towards the anus hole, maybe needing a bit of working around the skin on the knee.
The Montana guide, being a shorter knife, needed a few extra cuts to do that job, and not having a guard, I had to reset the knife to continue the cut as I had pushed the knife inwards too far and gone past the blade where I was trying to cut the skin open. During this process, I ran the flat part of the blade into the protruding hip bone. I washed the knife and checked the edge as well as I could, and didn't see a dent in the edge.
I finished skinning the animal down to the front shoulders, then opened the front legs with a technique similar used to do the back legs. I skinned the elbows out, and pulled the skin upwards, and cut the skin from the center of the chest to the inside of the elbow, then laying the blade flat on the meat, cut down the back of the leg (top of the leg if the animal is hanging)below the knee, then twisted the knife so the edge turned upright, breaking the cut off. (use the left hand to hold the knife to make the cut when doing the leg to your right) Once the legs and brisket were done, I skinned the hide down the neck to the ears, and cut the hide off the animal. I cut the meat at the top of the skull with the knife, and there's where the Montana Guide's work was finished on that animal.
I didn't use the Montana Guide to cut the tendons right around the bone on the first joint in the neck. It is not a job for a thick bladed knife in my humble opinion. I also didn't use it when separating the front leg joints, also a thin narrow blade job, and I just use a sawzall for the rear legs as I seem to always get the wrong joint with a knife and cause trouble for myself for hanging the animal. I could have used it for separating the vertebrae at the back rib for separating the front from the back half of the animal, but I didn't. A thin knife is needed to get through the rib joint so I would have had to swap knives.
Once the animal was in the truck, I washed up the Montana guide, and checked the edge. It wasn't as sharp as when I started, but it was still sharp enough. I tried steeling it with an F Dick sapphire cut steel to touch it up, but the blade wasn't having any of that.
I took the knife home and touched the blade up on a fine diamond hone and stropped it on leather with green stropping compound. 2 days later I took it out to do 2 bulls that a customer wanted done. Rather than describe the process again, I'll give my observations.
The Montana Guide's lack of blade length was more pronounced on these 1400 pound animals. It became easier to lose the edge of the blade into the cut while opening. The blade cut through the 30% thicker bull hide like a sharp knife through soft butter. It was easier to do a skinning job as I didn't have to sharpen the knife for a long time. I didn't have to sharpen the knife till I got to the front shoulders on the second bull, and then only because I accidentally ran the entire edge over the steel lift cable. The knife would have still cut, but as I was in a hurry, I used some of the other knives I had with me.
Other observations. This knife would have a perfect blade length for animals in the under 400 pound range from what I could see. Something along the lines of deer, sheep, antelope, llama, etc. The way the knife is made, the cuts are very controllable. It is very comfortable in my hand. I used the knife for about 3 hours the second day, without hand fatigue. The rougher texture of the stag scales made gripping the knife quite nice even with cotton gloved hands, and if kept washed while blood was liquid during the job, it was easy to clean afterwards. The blade, if left undried for a short period of time would show water spotting and ringing. That's not an issue for most people, but for me, when I show up to a customer's house, they tend to be impressed by shiny things. Sometimes you don't have it all... Le sigh!!!
Overall, the knife seems very well made. It would seem to me to be a good utility knife as well. There are no major design cons that I would list for the knife. What I had to say about it in a negative fashion was pretty unique to the job at hand, rather than the quality of the knife itself. I'd probably keep the knife for skinning and gutting, and use a knife with an inch or so more blade to do the opening cuts with.
I thank you for reading this. Comments and questions are welcome.
Last edited:
") If anyone wants a knife reviewed for this kind of purpose, they could send me the one they want reviewed and I'll do the review in exchange for the knife.
If anyone wants a knife reviewed for this kind of purpose, they could send me the one they want reviewed and I'll do the review in exchange for the knife.