- Joined
- Nov 18, 2010
- Messages
- 6,118
Hey all, let's see what you have done with those BK2's! I will start off showing mine and what I did, and how I did it, and if by some strange circumstance it tickles your fancy, how you can do it too!
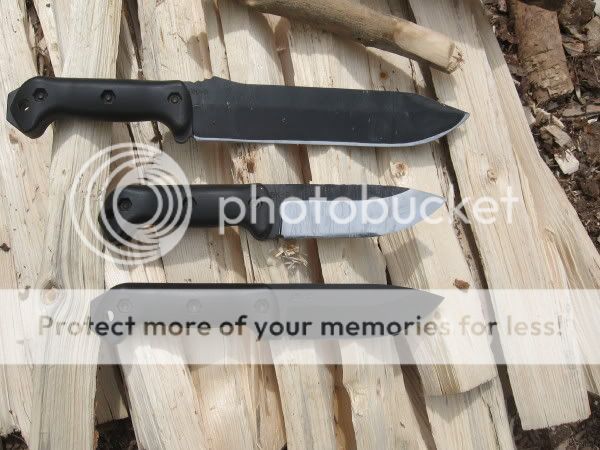
So here she is. Winona. (Yes, I am a big Farscape fan.)
Anywhoosles, here she be.

Total number of modifications at this point is four. First is the handle scales. I took a triangle file to those and carved some grooves all haphazard. They improve the grip. Not going to go into that very much because they are pretty simple.
Next is the fire kit holder thingy. All that is is a piece of computer case steel cut to size and bent at the right angles to slide over the sheath, with holes to let the screws that join the belt loop to the sheath itself through, thus holding it in place. (I also had to reverse the chicago screws so the container would fit properly and I could actually get to the screws to tighten them down.) I didn't take any pictures of the process, it was pretty straightforward (and aggravating) but once done I painted it black. As you can see, that wasn't the greatest paint job in the world, but I am not really worried about looks. The container for the firekit itself came from a cheap bike repair kit at Wal-Mart. The stuff inside those always gets tossed inside the saddle bag anyways, so I figured this would make for a good fire kit container. (An altoids tin could also be easily used in the same manner.) Then I put some paracord with some buckles to hold it tight, and there you have it, Robert is your father's brother.
Next I have the belt loop. A lot of people complain about the belt loop, and how it is so floppy. I looked at it as more storage. I put a credit card in the loop, then sewed a seam right across the top, like so:

I did it as tight to the card as I could, and it made it to where cards put in would be a tight fit. I used some 97lb test Spectra thread from County Comm and melted the ends when done to sit flat. Here it is with three in there.

Next a piece of inner tube stretched over it to finalize the modification and hold stuff in all the way around...

And now you have a great place to store a pocket fresnel lens and a signal mirror and whatever else that is flat and credit card sized.
Next is the allen wrench storage. Due to the handles coming loose, I figured I needed a way to hold an allen wrench on the knife sheath, but I didn't want to have it taking up space in my fire kit, and I didn't want to use ranger bands. ("Ranger bands" are cut pieces of bicycle inner tube used as rubber bands for those that are not aware.) I wanted something easily accessible but tight so I wouldn't lose the wrench. So I visited a buddy of mine across the way, looked for a few ideas, settled on a nylon block, drilled a hole, then proceeded to mess it up when I got home. Quick trip to Lowe's provided a replacement that was far easier to work with.
(As a side note here, I also used that last paragraph to show the correct usage of the words "loose" and "lose". They are not interchangeable. Yes, I have a little OCD when it comes to that.)
These are the nylon spacers I used. (The bag is from the correct ones, the actual spacers in this picture are NOT the correct ones, they are the next size up. The correct ones are already in use on the knife.)

So, from the picture, the correct size is 3/8 x .171 x 1. The hole in the middle holds a 5/32" allen wrench perfectly, and is a very nice pressure fit. I took two of them, put them on the allen wrench to make sure they were straight, then wrapped a small piece of gorilla tape around them to hold them together. Then I took apart the sheath, put them in that small area behind the sheath, and tightened it down. Then I took it apart, and it shows two indentations where there are two plastic strips that run up the loop part perpendicular to everything up to the rivets. Leaving the tape on, and using those indentations as a guide, I took a cutting disk on a dremel and make two small notches in the nylon spacers to fit in there. Once done, put it back in place, tightened it down, and presto! Perfect fit!


(Note 1: Because of my metal kit holder, my back has slightly more space between the two than a standard, unmodified sheath. If I did not have the metal thing, there would have to be some sanding of the nylon spacers to fit perfectly.)
(Note 2: The nylon spacers are darn near impervious to anything file related. I sat with a small triangle and rat tail file for the better part of an hour, and managed to make two notches that were less than a millimeter deep. The dremel with a cutting disk took less than a second to carve out chunks perfectly sized. Save yourself the hassle, and use a dremel or something similar.)
And there you have it. Winona in her frankensheath. I still have more plans on stuff to do to it, but thus far this is what I have accomplished. If you have any questions feel free to ask, I will do my best to answer. Oh, total cost I think for everything that I purchased ended up being less than $5. Inner tube was free from local bike shop. Several inner tubes. Enough inner tube to keep me in business for the next year I think. The nylon spacers were like $1.50 or something, and the allen wrench came from a small cheap set I bought for like $0.97. Everything else I had. The metal kit holder could probably be better done with kydex, but I have no kydex, and although I have some giant sheets of ABS that would have worked, my attempt at shaping that resulted in a huge puffy mess of melted plastic.
Now let's see yours!
So here she is. Winona. (Yes, I am a big Farscape fan.)
Anywhoosles, here she be.
Total number of modifications at this point is four. First is the handle scales. I took a triangle file to those and carved some grooves all haphazard. They improve the grip. Not going to go into that very much because they are pretty simple.
Next is the fire kit holder thingy. All that is is a piece of computer case steel cut to size and bent at the right angles to slide over the sheath, with holes to let the screws that join the belt loop to the sheath itself through, thus holding it in place. (I also had to reverse the chicago screws so the container would fit properly and I could actually get to the screws to tighten them down.) I didn't take any pictures of the process, it was pretty straightforward (and aggravating) but once done I painted it black. As you can see, that wasn't the greatest paint job in the world, but I am not really worried about looks. The container for the firekit itself came from a cheap bike repair kit at Wal-Mart. The stuff inside those always gets tossed inside the saddle bag anyways, so I figured this would make for a good fire kit container. (An altoids tin could also be easily used in the same manner.) Then I put some paracord with some buckles to hold it tight, and there you have it, Robert is your father's brother.
Next I have the belt loop. A lot of people complain about the belt loop, and how it is so floppy. I looked at it as more storage. I put a credit card in the loop, then sewed a seam right across the top, like so:
I did it as tight to the card as I could, and it made it to where cards put in would be a tight fit. I used some 97lb test Spectra thread from County Comm and melted the ends when done to sit flat. Here it is with three in there.
Next a piece of inner tube stretched over it to finalize the modification and hold stuff in all the way around...
And now you have a great place to store a pocket fresnel lens and a signal mirror and whatever else that is flat and credit card sized.
Next is the allen wrench storage. Due to the handles coming loose, I figured I needed a way to hold an allen wrench on the knife sheath, but I didn't want to have it taking up space in my fire kit, and I didn't want to use ranger bands. ("Ranger bands" are cut pieces of bicycle inner tube used as rubber bands for those that are not aware.) I wanted something easily accessible but tight so I wouldn't lose the wrench. So I visited a buddy of mine across the way, looked for a few ideas, settled on a nylon block, drilled a hole, then proceeded to mess it up when I got home. Quick trip to Lowe's provided a replacement that was far easier to work with.
(As a side note here, I also used that last paragraph to show the correct usage of the words "loose" and "lose". They are not interchangeable. Yes, I have a little OCD when it comes to that.)
These are the nylon spacers I used. (The bag is from the correct ones, the actual spacers in this picture are NOT the correct ones, they are the next size up. The correct ones are already in use on the knife.)
So, from the picture, the correct size is 3/8 x .171 x 1. The hole in the middle holds a 5/32" allen wrench perfectly, and is a very nice pressure fit. I took two of them, put them on the allen wrench to make sure they were straight, then wrapped a small piece of gorilla tape around them to hold them together. Then I took apart the sheath, put them in that small area behind the sheath, and tightened it down. Then I took it apart, and it shows two indentations where there are two plastic strips that run up the loop part perpendicular to everything up to the rivets. Leaving the tape on, and using those indentations as a guide, I took a cutting disk on a dremel and make two small notches in the nylon spacers to fit in there. Once done, put it back in place, tightened it down, and presto! Perfect fit!
(Note 1: Because of my metal kit holder, my back has slightly more space between the two than a standard, unmodified sheath. If I did not have the metal thing, there would have to be some sanding of the nylon spacers to fit perfectly.)
(Note 2: The nylon spacers are darn near impervious to anything file related. I sat with a small triangle and rat tail file for the better part of an hour, and managed to make two notches that were less than a millimeter deep. The dremel with a cutting disk took less than a second to carve out chunks perfectly sized. Save yourself the hassle, and use a dremel or something similar.)
And there you have it. Winona in her frankensheath. I still have more plans on stuff to do to it, but thus far this is what I have accomplished. If you have any questions feel free to ask, I will do my best to answer. Oh, total cost I think for everything that I purchased ended up being less than $5. Inner tube was free from local bike shop. Several inner tubes. Enough inner tube to keep me in business for the next year I think. The nylon spacers were like $1.50 or something, and the allen wrench came from a small cheap set I bought for like $0.97. Everything else I had. The metal kit holder could probably be better done with kydex, but I have no kydex, and although I have some giant sheets of ABS that would have worked, my attempt at shaping that resulted in a huge puffy mess of melted plastic.
Now let's see yours!

")
") he's dead to me now. no pictures, it didn't happen right?
he's dead to me now. no pictures, it didn't happen right? 