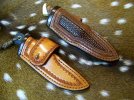
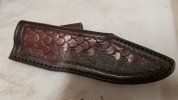
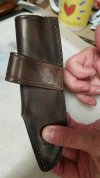
Border on Tooled area

Joined
Sep 21, 2016
Messages
450
Pleased with the overall outcome of this sheath, but am looking for advice as so how to get more definition on the border around my tooled pattern. (this is something I should probably know, but don't). Should I have used a swivel knife around that area? I didn't want to use a camouflage tool around the border, just wanted a nice deep line.

Thanks for the help.
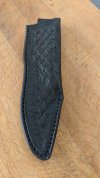
IMG_20180812_155224.jpg
 
When laying out a tooling pattern in your mind, the border boundary line is the very first thing you should determine. Draw in your guide lines and then cut them with your swivel knife, then bevel those cut line to the inside. Then proceed with your tooling pattern. I generally do use a camouflage or other border tool as the last procedure to clean up any over stamps or fill a small void where the center tooling failed to fill. There are many choices when considering a border tool, and one of my favorites is the Craftool F925. It is small and fits many situations including the tooling around my inlay stitch lines. By the way, I guess you know by now, that the Dragon scale tool is very unforgiving. The pebble grain sort of tattled on you.

Paul
 
Paul, Do you have photo or two to illustrate your use of border tool F925? I've been making sheaths for a few months and I also need advise in this area.
Thank you.
Richard
 
Thanks, Paul. The swivel knife/beveling piece is what I am missing. And yes, the dragon scale tool is very unforgiving, indeed. This was my first time using it. I'll actually be re-doing this one, as I have since determined that the knife will sit more comfortably in a canted position. I'll post my re-work pictures if it appears I've made some progress in the problem areas, for comparison purposes. (I'll check out the F925 tool, too) Thanks for the advice! (I wish I could stay home from work today and work on my do-over!!)
 
I ordered that border tool. It's on closeout...so was able to get my hands on it just in the nick of time......(was lucky that my local store had one in stock). I also ordered an F927--similar but different. I think i'll like them both.
 
Amy, and rjn, here is a photo a couple of border stamps I use. the top sheath is the F925 both around the inlay and around the outside border. also used a pebble grain tool on that one. The Russet sheath is a Barry king border tool. It has no number but it is called 7 seed. border tool. comes in 4 sizes and I prefer the number 3 size. Then I put a Craftool 724 seeder in the blank center of the Barry King as you see ion the photos. All outside border lines have been cut and beveled. I don't cut a border line around most inlays, I just use the stitch line as a guide instead.


Paul


100_2730 (1).jpg
 
Last edited:
Thanks Paul.Those are good looking borders and of course great looking sheaths.
What tools do you use to cut and bevel your border line? Also, what edge paint do you use.
Thank you for the advise, Richard
 
I'm a most of the time but not always kinda guy on the cut and bevelled border. Sorta kinda. Aways on certain tooling patterns and almost never on others.

Yes on a Carlos border stamp:

a79GOFM.jpg


9CYB4LQ.jpg


No on a regular camo border stamp and or basket stamping:

dNFEdU7.jpg


XKeUKuE.jpg


Always on flower carved or oak carving:

Iy2t2TD.jpg


Here's why I quit on certain patterns:

veMkqPN.jpg


Notice the acute bend the yokes (the top carved part) take on this pair of chinks. Nichole is modeling them and this is the first time they have ever been on somebody, they are brand new. The customer can't come to pick em up for a few days and wanted some pics (heck they came out so cool we were gonna take pics anyhoo). Point is I found over the years that a cut border on certain patterns when the leather curves a lot right there will crack. Here's a pic of me waaaaay back in the day.

LVAUURr.jpg


Look no grey in the stache, now one of the family's nicknames for me is Chief Greybeard. Anyhoo I use to be a pretty well known horse trainer and I was busy. I worked 35-40 different horses a week. I was the guy ya took the problem horse to, the last stop before Alpo. I didn't get the cupcakes. That was the case with this paint mare I'm working from my horse. She was a rescue deal but just dangerous for the new owners to be around. I was the last call before Alpo. Anyhoo point here is I wore those shotgun chaps with the basket stamped yokes from basically dawn to dusk for about a decade. In weather from -20 to 100 plus. Day in and day out and I took care of em. But they did start cracking along the cut and bevelled lines on the yokes. I was still cowboyin' a lot then too and many of the guys that I worked with had leggings I made. I noticed some of those yokes cracking as well. So I quit doing it just for the longevity on items that were gonna be used and abused hard, with the patterns I mentioned. Its worked. Kinda like why I quit dyeing leather, mostly about the longevity of the projects. Just another thought.
 
Dave,
Thanks for the detailed explanations. The border work on the officers 1911 and revolver holsters is stellar.
If I can ask, what is the complete process you use to condition and finish your leather? I love the undyed look.
What supplier of leather do you use for your tooled knife sheaths?
Thanks, Richard
 
Welcome to Sheaths and Such Richard rjn rjn . Thanks. That style of tooling is called a Carlos Border stamp. Here's a tutorial I did on it a while back if you are interested:

https://www.bladeforums.com/threads/carlos-border-stamping-an-how-to.1589116/

I use Wicket and Craig 8-10 oz russet saddle leather for my holsters and many of the sheaths (particularly the carved ones). For the regular sheaths I use Herman Oak 7-8 oz veg tan. I simply oil the sheaths lightly with pure neatsfoot oil that has been warmed and then use a couple of light coats of BagKote as a finish. Thats kind of detailed in this tutorial:

https://www.bladeforums.com/threads/pancake-sheaths-and-how-i-go-about-them-pic-heavy.1262927/

If the Wicket and Craig came in the lighter weights without a 4 week wait (the tannery will split it for ya but it takes about a month), I would use it exclusively. I buy most of my leather from The Hide House.
 
  • Like
Reactions: rjn
Thank you Dave for the welcome and the information.
When I started into leather crafting it was to me, at the time, a "neccessary evil" that I did not enjoy. Now that I have a little experience I'm starting to enjoy it.
Thanks for your help! Richard
 
Dave you are such a smarty pants...or is it smarty chaps? I get confused so easily any more :)

But wow sir, those are inspirational works there and of course Paul, as always top notch workmanship too !

G2

edited to add ANovinc, in regards to a border line, I'll use my groover to add a groove into the leather, but then while the leather is drying, I'll use a bone folder tip to go over that area to deepen and burnish it, giving a more finished and pronounced border line

12 by GaryWGraley, on Flickr
 
Last edited:
Thanks, Gary. I may try that method too, and see what works best for me. Hoping to have time to complete my do-over this weekend.
 
So here's my do-over. Did not quite get the cant that I was looking for, and the belt loop has a little more space than I intended---both due to miscalculations on my part (the measure twice cut once thing). But I'm much more pleased with the border~!
20180820_183409.jpg
 
That looks good Amy. The border certainly makes your tooling stand out better than the first attempt. On my Horizontal sheaths I cant it similar. I don't need the cant for retention its more of a perception thing for the customer. My own personal one actually hangs down a little. But that would be disconcerting for most customers. Fitting of the welt provides the retention not the angle the sheath rides at. As a rule of thumb I sew on the top of the loop and when time to sew on the bottom I off set it towards the point of the sheath, one half of its width. That gives a pretty pleasing angle. I've got a stick I made up that is 1.15" wide that I use to use to make sure I got the belt loop right. Now, just by calibrated eyeball.
 
Thanks, Dave. The sheath does have retention, but it's the customer (my husband) who is, as you say above, disconcerted with the way it rides. See below for how mine is stitched--no off-set, as you can see.
Resized_20180820_183438_5902.jpeg
 
Amy, if you take a look at that sample I left with you at blade you will see there is a second stitch line 1/2" from the edge. This top most stitch lines and the 1/2" stitch line below are all done while the sheath is till flat, and the angle you was is set at that time. Main retention is a function of how well the body of the sheath fits the knife.

Paul
 
Last edited:
Thanks, Paul. I look at it often (it sets the bar for me and is inspiring), but will look more closely at the stitch lines this evening.
 
Mine is similar to Paul's I guess in that the stiching is done in stages:

yFzYSIG.jpg


My Horizontal sheaths are stitched in three stages. The top of the belt loop is sewn on first while the sheath is still flat. Then I fit and glue in the welt and glue up the sheath. I sand the edge and this tells me where to make the stitch line after sanding. The top stitch line is done first. This follows the outline of the welt. Then the belt loop is folded over and sewn in with the bottom (main) stitch line of the sheath.
 
Back
Top