weo
Basic Member
- Joined
- Sep 21, 2014
- Messages
- 3,097
Hello all. I came across this video that I wanted to share and ask the pros a couple of questions. It's in Russian, but I translated the text below using Google translate and guessed on a couple of words, feel free to correct.
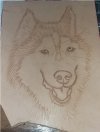
1. So, as usual, we prepare the part from vegetable tanned leather. Cut out taking into account an increase of 5 mm, glue the bakhtarm (backside?) with tape. Wet the skin with water and let it recover.
2. We place and fasten the prepared drawing on the skin.
3. With a thin tip of the stylus we set the pattern on the skin along the main contours.
4. Typically, animal faces, like human faces, are asymmetric. And if the picture is not translated accurately, the axes “float” during operation, if the plans are not followed, etc. the muzzle becomes curved or skewed.
5. Therefore, it is better to check and correct the symmetry of eyes, nose and mouth deliberately.
6. So, right on the skin, with light lines and dots, symmetry is tightened up here along the axis of the eyes, nose, corners of the mouth and ears.
7. Next, we cut the pattern with a rotary knife
8. The wool along the contour is cut with short lines - strokes.
9. Earlier work on wool is continued by the cardina (stylus?).
10. We draw the wool in the direction of growth.
11. Kardina (Stylus?) can also draw eyes.
12. Wool must be varied.
13. By pressing harder, you can make the wool more expressive, textured where necessary.
14. And vice versa, barely noticeable, small.
15. The border of the background and wool can be processed with the stamps "A 98" and "F 902-2"
16. Here the background is made by a stamp from Barry King. It has no number.
17. Molding on important leather with bakhtarma.
18. Stretch the skin gradually
19. Elongated parts after drying keep their shape.
20. On them you can easily work out the texture even higher.
21. In the work process, you can still pull up the volume.
22. Thus, we fill in the whole picture with texture.
Question for the pros: What's the purpose of taping the back side and is that all it is, taping with packing tape?

