Cleaning makers mark after etching

Joined
Apr 11, 2014
Messages
644
Ok I'm getting a nice etch of my mark but what is the best way to clean the crusty residue off the blade without causing tiny scratches? I've been going back an etching some of my previous knives so on future knives I may etch prior to final finish sanding.

Jay
 
A little rubbing with some 2000 grit cloth should work. If you are getting a lot of build up. You may have the juice turned up too high on your etcher.
 
I etch my mark as part of final finishing of the blade. Basically finish it then etch then, touch up the etched area with the same final step I just did. I too have found that having the power turned up too high will cause excessive discoloration and wear out stencils prematurely. It takes a while to find a good balance of time and power. One of the down sides of going back a finishing step is when I'm using a Scotch-brite belt for my final finish; the belt removes the black from the bottom of the mark. I once saw an Ed Cafferty post about fixing this but haven't been able to find it now that it is relevant to me.

Bob
 
Like others have said or implied. Same or finer grit as the last one you used to finish the blade going in the same direction as you last went.
 
Jay what are you using for etchant? I ask because I had a similar problem with dark crusty marks back when I was using salt water on swabs.

One approach would be to minimize the issue before it happens. Reduce the needed cleanup.

Etching deeper while keeping it clean and halo free is half the battle. I think it was Brian Fellhoelter (one more fine/experienced maker who used to hang out here) who suggested incorporating Windex into the routine. IME nothing made a bigger difference than using the appropriate electrolyte solution for the steel type and using Windex to stick the stencil down to steel. I was skeptical on the Windex but not anymore so I will leave it to you to try or toss the idea.

Also, using plain Scotch tape to "hinge" the stencil can be helpful in that you can pull the top or bottom piece of tape after 1st run and fold back the stencil far enough to clean out the etched steel area with EtOH on a clean swab. The long-sided tape hinge allows you to drop/reposition the stencil precisely, replace opposing tape if needed, and have another go or two at etching deeper with same modest voltage (I use 12V X 800mA for everything). This in itself minimizes the halo on carbon steel in my direct experience. From there, it is typically an easy job to clean up satin finish with the final grit as others have suggested here.

As an example, this is a sorry macro shot of my usual 0.50" wide mark on an 800 grit satin background directly after etching as described above. No cleanup other than a wipe down with Windex on a swab has been done yet. Look close and you can still see a halo etched a few thousandths deep which will be removed in short order with some fresh paper on a hard backing.

TORnQfm.jpg


Bob - I don't remember the exact details but there was a post on another forum where Ed Caffrey was experimenting with using black baking laquer to "color" his etched mark on his stock-removal pieces. It looked great with high contrast even on pattern-welded blades but the question of any paint's durability against CLP oils, blood, detergents etc. kept me from chasing it further.
 
Another piece of advice that I got early on is don't lay into it for like 60 seconds, Do a bunch of applications of like 5-10 seconds. i have a switchable AC-DC machine so I etch as deep as i can first and then switch to the mark setting mark so the bottom of the etched lines are black. It seems to me that what i clean off is stray black mark, not etching out of bounds, so to speak. Also don't have your pad soaks with electrolyte. Wet ti and then blot it on the palm of your hand to get a bit of the liquid out.
 
I think I need to buy a better machine... mine just leaves a black mark on the blade and doesn't get anywhere near the depth of Mr. Lewis' mark. or I'm doing it wrong. that wouldn't surprise me either. mine doesn't have any knobs for adjusting either, so where do you guys get your machines and what brand?
 
I think I need to buy a better machine... mine just leaves a black mark on the blade and doesn't get anywhere near the depth of Mr. Lewis' mark. or I'm doing it wrong. that wouldn't surprise me either. mine doesn't have any knobs for adjusting either, so where do you guys get your machines and what brand?

What machine do you have.... make sure you have your leads correct
 
Bob I think what Ed's post was about was redarkening the inlay with an "industrial" Sharpie. I remember reading that way back then and it helped me a lot cause I was having the same difficulty at the time. It works and stays put. I etch and then come back with the Sharpie and then over the top with 1200 grit polishing paper to clean up the excess. Works well. I seldom need to do it on stainless, D2 or A2 but almost always on damascus like this pic or 1095.

HCAmMpN.jpg
 
The machines that both etch deep and mark black are designed to switch between AC and DC. I can't remember which does which because the switch on my machine says "mark" and "etch" :D
I think I need to buy a better machine... mine just leaves a black mark on the blade and doesn't get anywhere near the depth of Mr. Lewis' mark. or I'm doing it wrong. that wouldn't surprise me either. mine doesn't have any knobs for adjusting either, so where do you guys get your machines and what brand?
 
Bob I think what Ed's post was about was redarkening the inlay with an "industrial" Sharpie. I remember reading that way back then and it helped me a lot cause I was having the same difficulty at the time. It works and stays put. I etch and then come back with the Sharpie and then over the top with 1200 grit polishing paper to clean up the excess. Works well. I seldom need to do it on stainless, D2 or A2 but almost always on damascus like this pic or 1095.

Thanks Dave, that was it.

Bob
 
In cases where the dark etch is not as pronounced as desired, I doubt that the "Industrial Sharpie" shading will hold up after a couple of good washings at the sink with dish detergent. I don't know a solution to a faint etch color, beyond getting the etch done properly the first time. Spend enough time on the DC etch.

How about the paint on gun bluing solutions? Are these surface coatings, or do they penetrate and truly stain the base metal?

Mike L.
 
The DC cuts deep and the AC darkens. The way I was taught to remember was that DC stands for Deep cut and do that one first. Then you darken it with the AC setting. I have the Personalizer Plus from Electro Chem. I get my stencils made there as well. One of the first companies of its kind.

http://www.ecemmi.com/products.html The Personalizer works great and comes with everything you need to get started. Most all of the knife supple houses have them.

I got mine here. http://usaknifemaker.com/personalizer-plus.html Don't bother with the q-tip as a pad. Use the graphite wand with Felt over it, that comes with the personalizer and you will be on your way with just a few trail marks on some scrap steel to getting nice clean makers marks.
 
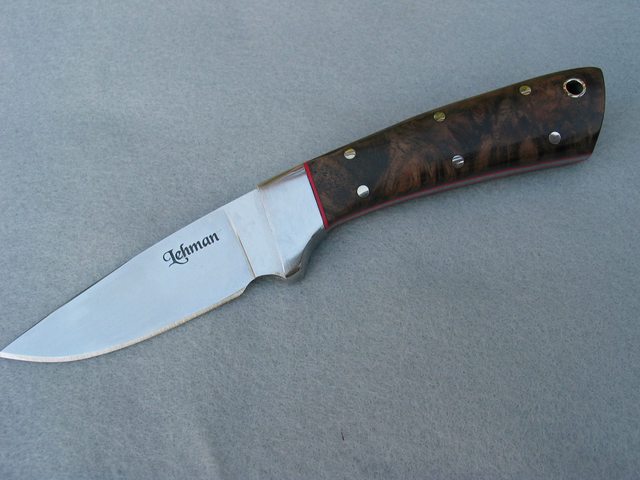
Laurence, I use the same etching machine but my etches are not as deep. I have been more concerned with getting a dark mark. I have been putting my machine at about 16 volts power and etching for about 4 seconds and then once again for four seconds before flipping the switch to mark for a good four seconds and then three more. I really like the looks of your mark. Should I be etching for a longer time in your opinion? Here is a picture of my mark ...shallow but dark. Thanks, Laurence "Larry" Lehman P.S. I use #94 etchant from IMG in New York on my stainless steels blades. LL

BAriQ0Bl.jpg
 
thanks a bunch Gents. sure enough, mine is only AC power and only leaves a black mark. Mine is called a Lectrotech and it's only designed to put black marks on... not impressed right now. Mostly not impressed that it took me so long to look into it on here. looks like I'm spending more money today on a better machine.
 
Jay what are you using for etchant? I ask because I had a similar problem with dark crusty marks back when I was using salt water on swabs.

One approach would be to minimize the issue before it happens. Reduce the needed cleanup.

Etching deeper while keeping it clean and halo free is half the battle. I think it was Brian Fellhoelter (one more fine/experienced maker who used to hang out here) who suggested incorporating Windex into the routine. IME nothing made a bigger difference than using the appropriate electrolyte solution for the steel type and using Windex to stick the stencil down to steel. I was skeptical on the Windex but not anymore so I will leave it to you to try or toss the idea.

Also, using plain Scotch tape to "hinge" the stencil can be helpful in that you can pull the top or bottom piece of tape after 1st run and fold back the stencil far enough to clean out the etched steel area with EtOH on a clean swab. The long-sided tape hinge allows you to drop/reposition the stencil precisely, replace opposing tape if needed, and have another go or two at etching deeper with same modest voltage (I use 12V X 800mA for everything). This in itself minimizes the halo on carbon steel in my direct experience. From there, it is typically an easy job to clean up satin finish with the final grit as others have suggested here.

As an example, this is a sorry macro shot of my usual 0.50" wide mark on an 800 grit satin background directly after etching as described above. No cleanup other than a wipe down with Windex on a swab has been done yet. Look close and you can still see a halo etched a few thousandths deep which will be removed in short order with some fresh paper on a hard backing.

TORnQfm.jpg


Bob - I don't remember the exact details but there was a post on another forum where Ed Caffrey was experimenting with using black baking laquer to "color" his etched mark on his stock-removal pieces. It looked great with high contrast even on pattern-welded blades but the question of any paint's durability against CLP oils, blood, detergents etc. kept me from chasing it further.

Well my set up has been kinda cobbled together. Im using the battery to my 18v drill and using straight saltwater on a Q-tip. I may have too much power so I probably should get a proper power source and try the windex method.
 
So far this is the best I've been able to do. Sorry about the crappy pic. Just did it real quick for this post.

Jay

image.jpg
[/URL][/IMG]
 
Laurence, I use the same etching machine but my etches are not as deep. I have been more concerned with getting a dark mark. I have been putting my machine at about 16 volts power and etching for about 4 seconds and then once again for four seconds before flipping the switch to mark for a good four seconds and then three more. I really like the looks of your mark. Should I be etching for a longer time in your opinion? Here is a picture of my mark ...shallow but dark. Thanks, Laurence "Larry" Lehman P.S. I use #94 etchant from IMG in New York on my stainless steels blades. LL

BAriQ0Bl.jpg

Larry,
Cool little drop point.
I have a light spray of windex on the blade before I tape on the stencil. Then with a medium wet felt on the wand, I have the knob turned to 4 1/2" and rub over lightly with the wand about 15 times, then switch the to AC and do it again for 15 times. On my smaller knives I use a very small stencil and just put it on mark/AC and rub over with the wand about 15 times.
 
We have this etcher(got it off ebay for practically nothing :D) it works great..

We use Butch's technique with some slight changes.Stencils from IMG.It makes a very deep mark and easy to darken..Just go over it with the last grit you used..
This little B&T was carried and used a bunch..Cleaned many fish and squirrel. The mark stayed nice and dark the whole time..This pic was after a couple years of use.
 
Well my set up has been kinda cobbled together. Im using the battery to my 18v drill and using straight saltwater on a Q-tip. I may have too much power so I probably should get a proper power source and try the windex method.

If i can get my etch as deep as this, i will be a happy man in the etch department. looks good.
 
Back
Top