CPM 3v Tanto {A new dog learning new tricks}

BenR.T.

Tanto grinder & High performance blade peddler
Moderator
Joined
Apr 18, 2011
Messages
4,925
Hey guys, I just wrapped up my latest tanto and tried a couple new things (for me) along the way. It's done at this point, but I will post a few of the pics I snapped along the way. I have to give a shout out to Dan Keffeler and David Mirabile for all of the inspiration, they are innovators in every sense of the word.

I don't have a lot of blade build picks, but I have covered that process pretty thoroughly in my previous threads.

Here is the blade, ground, hand sanded and ready for HT.


Fresh out of cryo


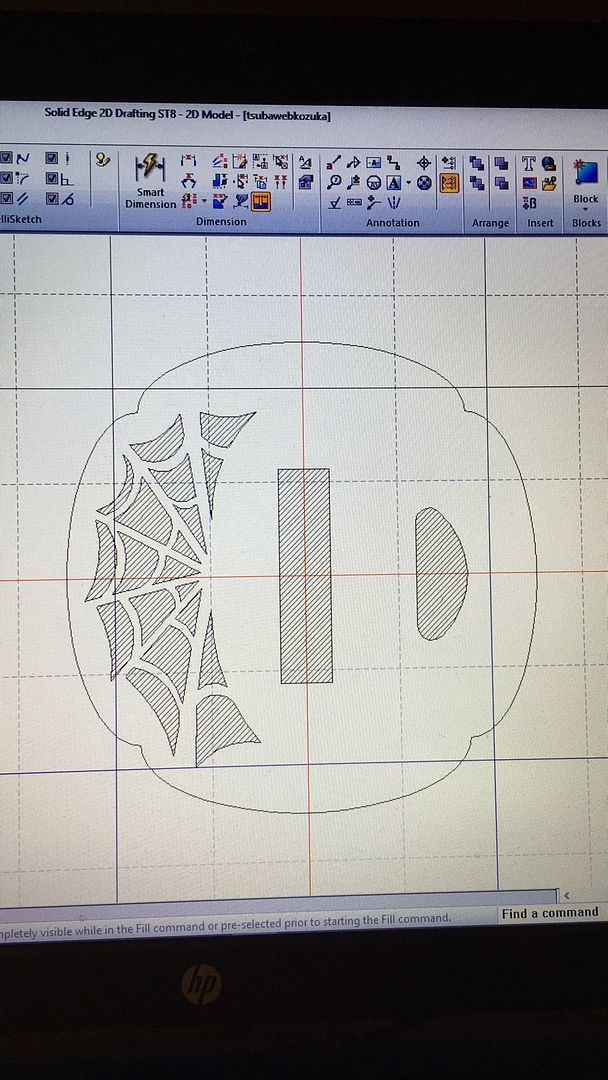
I have been playing with solid edge designing tsuba for waterjet. Here is my first design, and the one I will be using for this build.


Here is the tsuba fit to the blade with the hammered copper seppa.


Next up, before I finish the blade, get started on the saya. I am using Tero tuf for the body of the sheath. In my opinion it is the perfect modern material for a saya. It is extremely durable, and it's non abrasive nature means it wont harm the blade. It is made of a low friction wear material, perfect for this.

Tracing the blade onto the material.


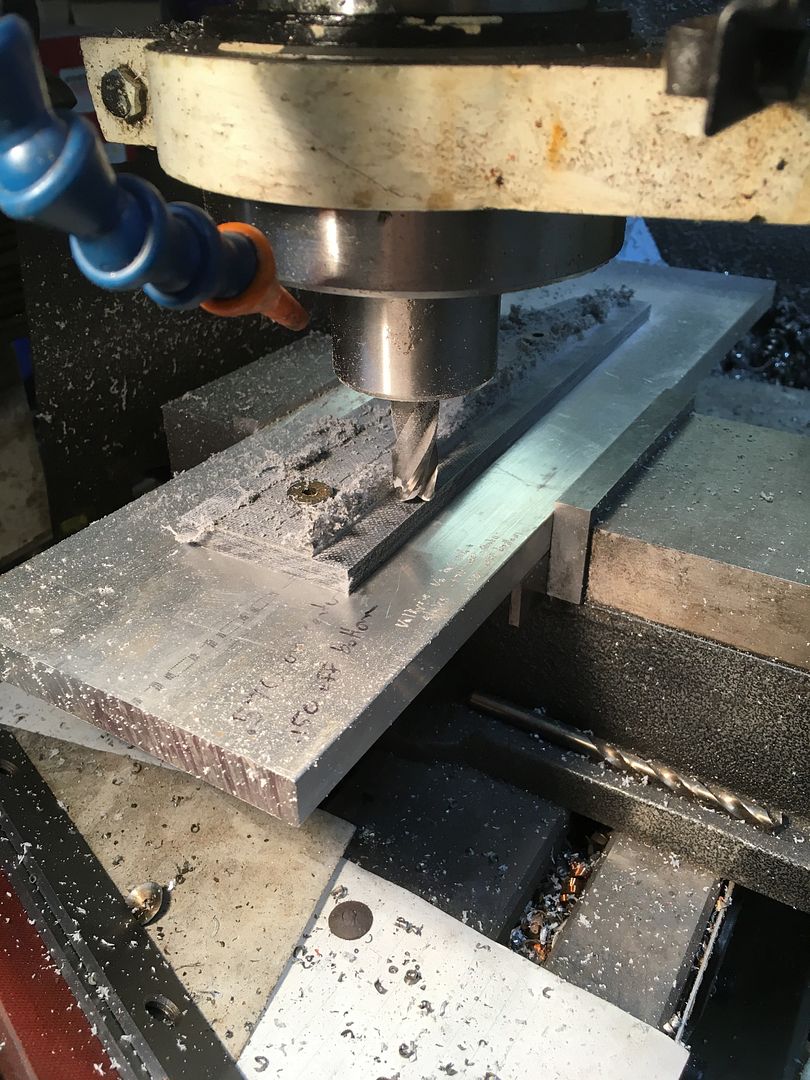
I went with a 3 pc construction method (no worries about splitting the saya on bad draw cut). Here I am milling the middle layer down to the proper thickness.


Drilling the holes for alignment.


Cut and fit to the blade. I use carbon fiber pins for alignment and structure in the construction.


more to come.......
 
Wow, nice! Very cool use of modern materials and technology there. Waiting for more pictures.
Thanks for sharing!

Gesendet von meinem SM-A310F mit Tapatalk
 
Beautiful job so far. Looking forward to more pics & the finished blade. What's your target hardness for this one?
 
Beautiful job so far. Looking forward to more pics & the finished blade. What's your target hardness for this one?

Thanks. It will be right at 60-61rc.
 
Thanks fellas!

Here the saya is epoxied, shaped and then ready for the carbon fiber sleeve.


Here it is all dried.


Nice and clean.


I decided to add a small drain hole.


I decided to make the Kurigata from G10 on this. It will have a nice polished look and be quite strong.


The kurigata had screws threaded into the back of it and it was then epoxied into blind holes on the saya.


Back to the knife......

Doing the final pulls on the finish.


At this point in the build I have finished the tsuba and seppa and it is ready to wrap and epoxy.

I will post finished pics next......
 
Coming out good, Ben! Trying a TeroTuf saya is on my loooong list of things to try. You pretty well nailed it, looks like. :thumbup:
 
Awesome! I like your Tsuba design, original yet looks like a classic with the web and scallops on the outer web.

Is the kozuka hitsu ana for a possible later kozuka/kogotana? cool stuff...
 
Thanks guys.

Awesome! I like your Tsuba design, original yet looks like a classic with the web and scallops on the outer web.

Is the kozuka hitsu ana for a possible later kozuka/kogotana? cool stuff...

Thanks Dan.

The hole is purely cosmetic. It is merely a nod to traditional tsuba design. There is something very cool about the Asymmetry of some antique tsuba which I have always liked.
 
Always on the move buddy....way to go! :cool:

Thanks Dudley!

Ok I won't leave you all hanging any longer. Here are the finished pics. I hope you guys like it!


If that wouldn't make a guy proud I don't know what would!!!! :D

You did GREAT......JSB personified!!! :cool:
 
Ben, I love the knife, and the saya is a nice departure from tradition, and probably almost a club in its own right. Looks good, too.

I have known you through the forums for years, so I hope you don't mind honest input. I really don't like the waterjet approach/look. I realize I am different than most, and I know that it is a little hypocritical since I have a mill and several grinders that I use like rented mules (stole that phrase from Matt Vernier).

Waterjet (here is where you can laugh at me) seems like a shortcut that takes away from the really good craftsmanship you did on the rest of this piece, and that you do in general.

I just spent 2 days filing a ridge in on a jian because grinders won't give me a sharp ridge and a basically lenticular surface. I could have gotten a really crisp ridge without filing a heat treated blade, but it would be flat when done. It is sort of like hand sanding, is what I am getting at, the look or function of things made with hand tools sometimes is better than the look of things made with machine tools to some of us (some prefer stone tumbled or belt grinder finishes, I guess). For me, saws and files look better than waterjet. That's all. You know I am a fan of your work, and I think I am a friend, so I just wanted to say this.

Great work. I am surely not discounting the quality or functionality, or the appearance of everything but the waterjet work.

Once, a good friend of mine, Richard Sexstone, looked at a traditional goosequill dao I had made, and I did the handle wrap in paracord (ungutted paracord, at that). He whistled as he looked at the pattern welded steel and the result of careful clay heat treatment. Then, he looked at the handle. He asked me whether I had a buyer for the blade. I told him I had, and that I had just sold it for about $1,800 without a sheath. He said, "This handle turned a $2,500 blade into an $1,800 sword."

I spent about 5 seconds thinking of arguing, but I realized he was being honest and speaking as a friend. I was actually really glad he did that. So, I hope you recognize I am giving my honest opinion in the same spirit. The only difference is that Richard is a whole lot better than both of us, and I am not any better at this stuff than you are. Still, I mean nothing but the best.
kc
 
Back
Top