- Joined
- May 10, 2016
- Messages
- 7
Hey guys.
Finished product is all the way at the end, so if you want to see that, scroll all the way down. If you want to hear all the details and see the pictures of (almost) every step of the way, read on...
So I recently made my first knife from a Sarge 3.5" Hunter Kit off of Amazon. I really only went this route because I didn't have the required tools to go from raw steel, and wanted to get my feet wet as soon as possible. So I basically did everything I could to test out techniques I'd eventually want to implement when I start working from bar stock. I'd love any notes you guys are willing and able to provide so I can adjust my technique or approach on the next go around - I'm about to pull the trigger on the next batch of supplies, including my first real piece of D2 steel.
Anyway, let's jump right in.
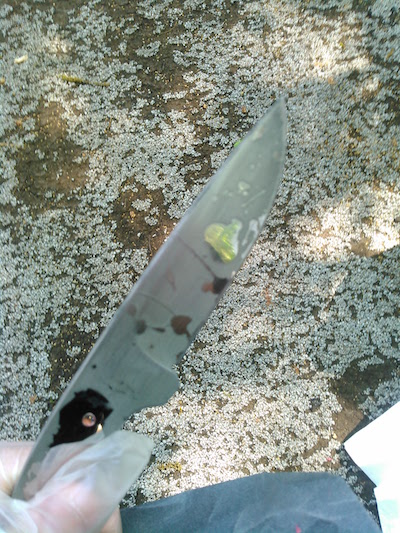
As you can see, the 440C Stainless Blade was already mirror-shiny. That quickly disappeared.
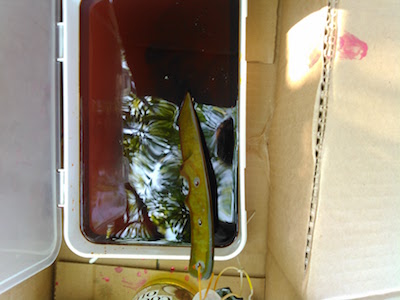
I was initially worried that the acid wash wouldn't take, but those fears were quickly relieved. I flicked the blade with some nail polish, let it dry, and dunked it into PCB etchant from Radio Shack for about 5 minutes. I decided to let it go a little longer.
This is what came out:
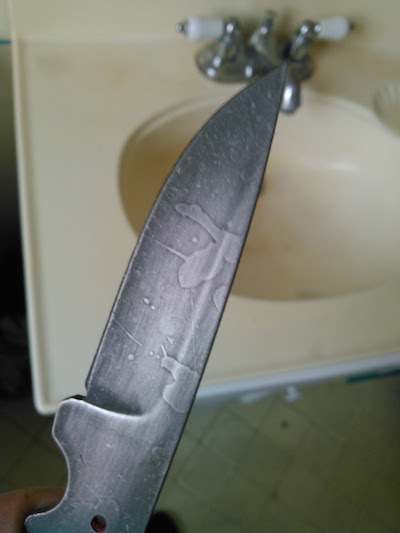
Nice! But I would be damned if I was gonna have those bright shiny spots jumping out. So I gave it a scrub with some 220 grit sandpaper, then threw it back in.
I couldn't tell you how many times I did some variation on this, sanding, dunking, and wiping, but it was a lot.
Then I did a very ghetto stone wash - some garden rocks and the blade in an old protein powder container, wrapped in a towel, and shaken by hand. The stone wash did not came out how I'd hoped. I'm not sure what I was looking for exactly - maybe it was a deeper contrast between the stone wash and the acid etch. Maybe the acid wasn't dark enough. Maybe I didn't use enough stones. I'm not sure. But I rinsed and repeated the acid/stonewash/sandpaper cycle a few more times til I got roughly where I was hoping to be.
Right Side:

Left Side:
OK, time to make the handle.
The scales are black walnut purchased off of Amazon that showed up WILDLY mismatched. See Exhibit A:

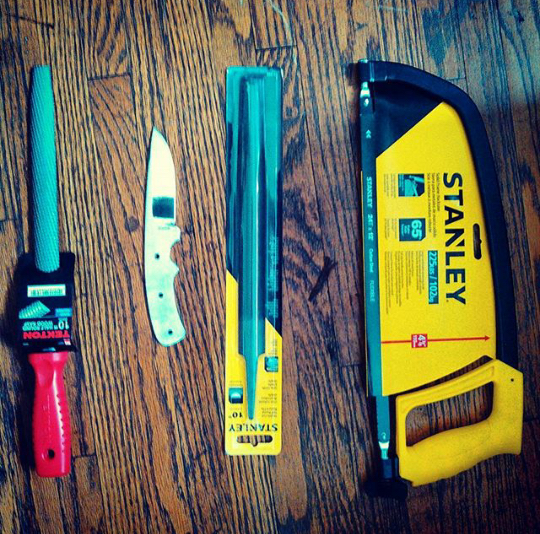
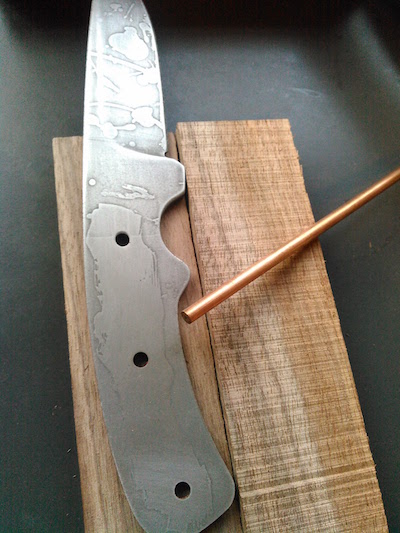
Assembled my materials, including some nice 5/32" mosaic pinstock.
I didn't have anything but a hacksaw (embarrassingly, I don't even have a workbench set up yet), so I asked my buddy who works construction to cut it out at work.
He did an... OK job. Very obviously did not have a scroll saw. I've since purchased a jigsaw, and will hopefully be buying a bandsaw soon, so I will probably "handle" this stuff myself from here on out.
Anyway, I was in a hurry to get going cause I waited roughly two weeks for him to cut em, so I slathered them in JB, worked the pins in like a madman (next time not using 5-minute cure KwikWeld, lesson learned :black_eyed") , and clamped it for all I was worth.
, and clamped it for all I was worth.
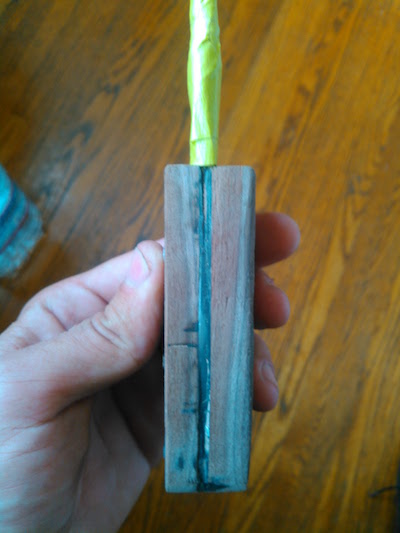
Six hours later, I had this hideous creature (other lesson learned - sand/plane your scales BEFORE you epoxy them on with 2200 PSI weld):


Anyway, I went to Home Depot for the 210th time that week and bought a bunch of sanding belts and disks for my used Belt/Disk Sander. I scoured the rust off of it, and put brand new, racing red belts and disks on it. Ready to roll. Ain't she pretty?

Turned it on, got an awful "better stop now" sound, and it blew the fuse. Tried it again, no dice. I may have fried the motor on it by holding down the "reset" switch on my power strip. I haven't messed with it since, though I will once I get some free time (any qualified Craftsman motor repair technicians, get at me!).
So I grabbed my trusty rounded file and set off to work.
This is the only real "progress" pic I have, but as you can see, I started with the outside "perimeter", shaping it to the profile of the blade.
Then I set about contouring it to my hands, going with whatever felt comfortable and doing my best to remove the 1/16"+ discrepancy between the two sides.
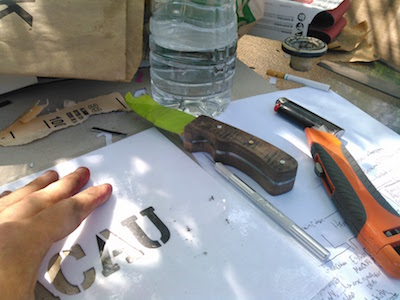
This is what I ultimately came up with:
I hit it all over with some 220 grit sandpaper for the next day or so, getting all the epoxy away from the seams, polishing the metal a bit, and generally smoothing out as best I could. Obviously, I lost whatever acid wash was on the outside of the tang. I did my best to gradate the "smooth" steel to the acid washed as it went up the blade. Then I hit it all over with some 400 grit briefly, but I'm impatient and I wanted to get to finishing. I rubbed it all over with Tung oil, then about 6 hours later, scrubbed it with 220 and 400, then another coat, then 400, then another coat, then 0000 steel wool, and so on and so forth. I wasn't incredibly scientific about this, but at some point I switched to a mix of Tung oil and beeswax, at about a 2:1 ratio. I actually really liked this, as it filled the cells of the open grains much better than had the Tung oil on its own.
I also gave the blade a few once-overs with 4-600 grit sandpaper, and steel wool to even everything out. Anyway, God bless you if you've read this far. Here's the finished product.
http://i.imgur.com/qeH1YeT.jpg

Here's a high-resolution gallery for those interested enough to check it all out in detail.
On the whole, I'm pretty happy with the way it turned out. I learned a whole hell of a lot, and I'm excited to see what I can do with my own personal designs. I'd love to hear what you guys think, and if you have any pointers that I can carry with me into my next knife.
The next one is going to be a 4 1/2" blade, 1 1/2" wide, and a total length of about 9 1/4", made of D2.
Things I know I need to fix are my belt/disc sander. I was planning on cutting the steel from 1 1/2" precision ground D2 with a 4 1/2" Porter Cable Cutoff Tool/Grinder, with DeWalt DW8061B5 Cutting Wheels. Then I was going to profile it on the grinder, then the sander.
Anyway, I'm all writed-out, so I'm signing off for now. Thanks much!
Finished product is all the way at the end, so if you want to see that, scroll all the way down. If you want to hear all the details and see the pictures of (almost) every step of the way, read on...
So I recently made my first knife from a Sarge 3.5" Hunter Kit off of Amazon. I really only went this route because I didn't have the required tools to go from raw steel, and wanted to get my feet wet as soon as possible. So I basically did everything I could to test out techniques I'd eventually want to implement when I start working from bar stock. I'd love any notes you guys are willing and able to provide so I can adjust my technique or approach on the next go around - I'm about to pull the trigger on the next batch of supplies, including my first real piece of D2 steel.
Anyway, let's jump right in.
As you can see, the 440C Stainless Blade was already mirror-shiny. That quickly disappeared.
I was initially worried that the acid wash wouldn't take, but those fears were quickly relieved. I flicked the blade with some nail polish, let it dry, and dunked it into PCB etchant from Radio Shack for about 5 minutes. I decided to let it go a little longer.
This is what came out:
Nice! But I would be damned if I was gonna have those bright shiny spots jumping out. So I gave it a scrub with some 220 grit sandpaper, then threw it back in.
I couldn't tell you how many times I did some variation on this, sanding, dunking, and wiping, but it was a lot.
Then I did a very ghetto stone wash - some garden rocks and the blade in an old protein powder container, wrapped in a towel, and shaken by hand. The stone wash did not came out how I'd hoped. I'm not sure what I was looking for exactly - maybe it was a deeper contrast between the stone wash and the acid etch. Maybe the acid wasn't dark enough. Maybe I didn't use enough stones. I'm not sure. But I rinsed and repeated the acid/stonewash/sandpaper cycle a few more times til I got roughly where I was hoping to be.
Right Side:
Left Side:
OK, time to make the handle.
The scales are black walnut purchased off of Amazon that showed up WILDLY mismatched. See Exhibit A:
Assembled my materials, including some nice 5/32" mosaic pinstock.
I didn't have anything but a hacksaw (embarrassingly, I don't even have a workbench set up yet), so I asked my buddy who works construction to cut it out at work.
He did an... OK job. Very obviously did not have a scroll saw. I've since purchased a jigsaw, and will hopefully be buying a bandsaw soon, so I will probably "handle" this stuff myself from here on out.
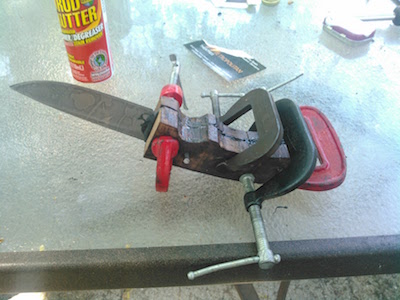
Anyway, I was in a hurry to get going cause I waited roughly two weeks for him to cut em, so I slathered them in JB, worked the pins in like a madman (next time not using 5-minute cure KwikWeld, lesson learned :black_eyed
, and clamped it for all I was worth. Six hours later, I had this hideous creature (other lesson learned - sand/plane your scales BEFORE you epoxy them on with 2200 PSI weld):
Anyway, I went to Home Depot for the 210th time that week and bought a bunch of sanding belts and disks for my used Belt/Disk Sander. I scoured the rust off of it, and put brand new, racing red belts and disks on it. Ready to roll. Ain't she pretty?
Turned it on, got an awful "better stop now" sound, and it blew the fuse. Tried it again, no dice. I may have fried the motor on it by holding down the "reset" switch on my power strip. I haven't messed with it since, though I will once I get some free time (any qualified Craftsman motor repair technicians, get at me!).
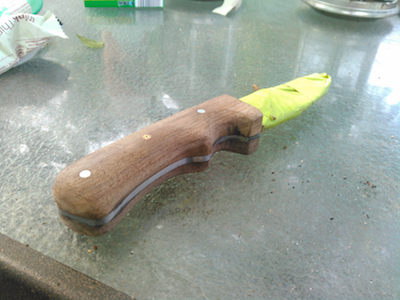
So I grabbed my trusty rounded file and set off to work.
This is the only real "progress" pic I have, but as you can see, I started with the outside "perimeter", shaping it to the profile of the blade.
Then I set about contouring it to my hands, going with whatever felt comfortable and doing my best to remove the 1/16"+ discrepancy between the two sides.
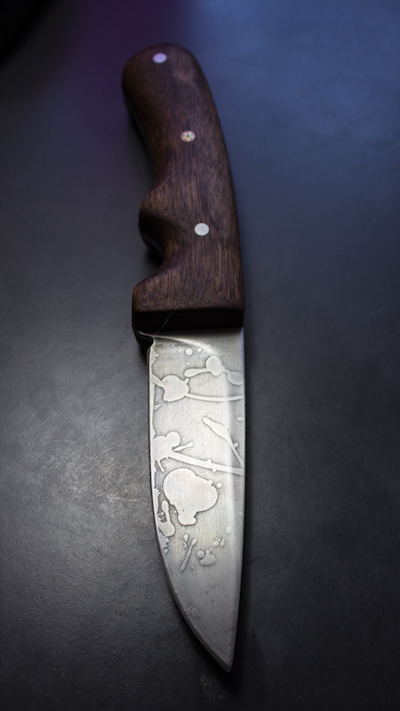
This is what I ultimately came up with:
I hit it all over with some 220 grit sandpaper for the next day or so, getting all the epoxy away from the seams, polishing the metal a bit, and generally smoothing out as best I could. Obviously, I lost whatever acid wash was on the outside of the tang. I did my best to gradate the "smooth" steel to the acid washed as it went up the blade. Then I hit it all over with some 400 grit briefly, but I'm impatient and I wanted to get to finishing. I rubbed it all over with Tung oil, then about 6 hours later, scrubbed it with 220 and 400, then another coat, then 400, then another coat, then 0000 steel wool, and so on and so forth. I wasn't incredibly scientific about this, but at some point I switched to a mix of Tung oil and beeswax, at about a 2:1 ratio. I actually really liked this, as it filled the cells of the open grains much better than had the Tung oil on its own.
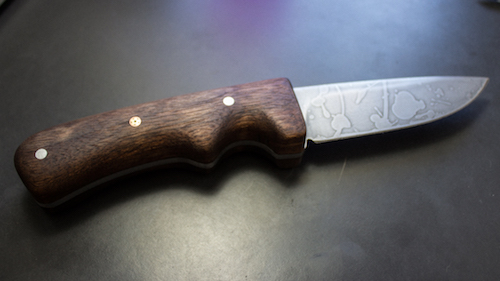
I also gave the blade a few once-overs with 4-600 grit sandpaper, and steel wool to even everything out. Anyway, God bless you if you've read this far. Here's the finished product.
http://i.imgur.com/qeH1YeT.jpg
Here's a high-resolution gallery for those interested enough to check it all out in detail.
On the whole, I'm pretty happy with the way it turned out. I learned a whole hell of a lot, and I'm excited to see what I can do with my own personal designs. I'd love to hear what you guys think, and if you have any pointers that I can carry with me into my next knife.
The next one is going to be a 4 1/2" blade, 1 1/2" wide, and a total length of about 9 1/4", made of D2.
Things I know I need to fix are my belt/disc sander. I was planning on cutting the steel from 1 1/2" precision ground D2 with a 4 1/2" Porter Cable Cutoff Tool/Grinder, with DeWalt DW8061B5 Cutting Wheels. Then I was going to profile it on the grinder, then the sander.
Anyway, I'm all writed-out, so I'm signing off for now. Thanks much!