Made my first Damascus knife from 1095 and 15n20...just did 30 layers as it was my first attempt and everything came out amazingly well. The only "problem" that I have is getting my contrast dark enough. I did the ferric etch and also the coffee soak but when I try to polish the 15n20 for that shine I lose a lot of definition between the 2. I etch again with the same results. I just got through with a diamond paste polish for an ultra shine but don't want to dull the whole thing again with another coffee soak. Wth is the secret to getting that hard contrast without losing shine?
-
The BladeForums.com 2024 Traditional Knife is available! Price is $250 ea (shipped within CONUS).
Order here: https://www.bladeforums.com/help/2024-traditional/
You are using an out of date browser. It may not display this or other websites correctly.
You should upgrade or use an alternative browser.
You should upgrade or use an alternative browser.
Damascus help
- Thread starter showgoat
- Start date
- Joined
- Sep 21, 2014
- Messages
- 3,107
Is the blade hardened?Made my first Damascus knife from 1095 and 15n20...just did 30 layers as it was my first attempt and everything came out amazingly well. The only "problem" that I have is getting my contrast dark enough. I did the ferric etch and also the coffee soak but when I try to polish the 15n20 for that shine I lose a lot of definition between the 2. I etch again with the same results. I just got through with a diamond paste polish for an ultra shine but don't want to dull the whole thing again with another coffee soak. Wth is the secret to getting that hard contrast without losing shine?
What's your post/HT finishing process? What grit did you grind/sand to before etching?
What's your exact process for etching (method of cleaning the blade, FCl conentration, temp, time, cycles)
What are you polishing with and how?
Can't really give advice without that information
Blade was ran through all the standard thermal cycles and then hardened twice...two temper cycles as well. Belt grind was up to 400 grit and then hand sanded progressively up to 1200. Dawn dish soap and rinsed then into a parts cleaner with acetone then etched. Ferric is a 3to1 ratio just with distilled water mix at room temp for 2 ten minutes cycles with 0000 steel wool and cleaning between cycles. Cleaned and then polished by Dremel with a buffing wheel and 14000 grit diamond paste. Mirror on the 15n20 looks amazing but the 1095 lightens up too much imo. Probably not an actual problem at all but I am my own worst critic and would like some tips on how to keep the contrast darker in the future. (Did coffee soak for around 3 hours the first go round but everything seemed like it polished off quickly). Thanks for the time and any advice is appreciated.Is the blade hardened?
What's your post/HT finishing process? What grit did you grind/sand to before etching?
What's your exact process for etching (method of cleaning the blade, FCl conentration, temp, time, cycles)
What are you polishing with and how?
Can't really give advice without that information
Bill DeShivs
Knifemaker / Craftsman / Service Provider
- Joined
- Jun 6, 2000
- Messages
- 12,824
Dremel and diamond paste is a big mistake.
If you want definition between the high and low areas, polish with very high grit paper and a sanding block.
The Dremel combo is washing out any definition you will have.
If you want definition between the high and low areas, polish with very high grit paper and a sanding block.
The Dremel combo is washing out any definition you will have.
Makes sense...thanks BillDremel and diamond paste is a big mistake.
If you want definition between the high and low areas, polish with very high grit paper and a sanding block.
The Dremel combo is washing out any definition you will have.
Stacy E. Apelt - Bladesmith
ilmarinen - MODERATOR
Moderator
Knifemaker / Craftsman / Service Provider
- Joined
- Aug 20, 2004
- Messages
- 38,412
Re-etch after polishing and then only lightly touch up with 800 grit paper ona hard backing board.
Stacy E. Apelt - Bladesmith
ilmarinen - MODERATOR
Moderator
Knifemaker / Craftsman / Service Provider
- Joined
- Aug 20, 2004
- Messages
- 38,412
Coffee etch isn't really an etch. It is mostly a coating of dried resins from the coffee.
One thing you want to assure for a two-tone etch is that the dark steel has etched below the level of the bright steel. This is called "topography" and allows the layers to show differently. The difference is small but needs to be there. The high and low topography allows polishing of the high spots while leaving the recessed layers dark. Polishing on a buffer or with a Dremel will round te surfaces and make the contrast poor. Final sanding to around 400-800 grit should be done with a hard backing board. After the final etch, lightly touch up with 1000-2000 grit paper on a hard backing board.
One thing you want to assure for a two-tone etch is that the dark steel has etched below the level of the bright steel. This is called "topography" and allows the layers to show differently. The difference is small but needs to be there. The high and low topography allows polishing of the high spots while leaving the recessed layers dark. Polishing on a buffer or with a Dremel will round te surfaces and make the contrast poor. Final sanding to around 400-800 grit should be done with a hard backing board. After the final etch, lightly touch up with 1000-2000 grit paper on a hard backing board.
Thank you for the info sirDoes baking in oven at 250F or so help "set" the black of the etch?
It seems after a coffee etch that gives that nice deep black if I bake in oven after (well below tempering temperature it makes the black a bit harder.
Thanks for the advice...I agree with the topography as I achieved that with the etch and probably did a little rounding maybe with the Dremel but can still feel it pretty well. 14000 grit doesn't eat much.Coffee etch isn't really an etch. It is mostly a coating of dried resins from the coffee.
One thing you want to assure for a two-tone etch is that the dark steel has etched below the level of the bright steel. This is called "topography" and allows the layers to show differently. The difference is small but needs to be there. The high and low topography allows polishing of the high spots while leaving the recessed layers dark. Polishing on a buffer or with a Dremel will round te surfaces and make the contrast poor. Final sanding to around 400-800 grit should be done with a hard backing board. After the final etch, lightly touch up with 1000-2000 grit paper on a hard backing board.
Got one started beginning at 14 that will end at 252...thanks for the replyToo few layers. Next time run the layers up to around 150.
Hoss
- Joined
- Sep 21, 2014
- Messages
- 3,107
If you're new to damascus, I'll add my 2 cents to what Devin said.
I agree with his opinion that 30 layers is too few, but I think this is more a personal taste thing and not necessarily related to your original question. IMO (depending on the final pattern, of course) the sweet spot is anywhere between 120-480 layers. (I could have said 100-500 layers, but my standard process is to start with 15 layers, cut that billet in 4 pieces to get 60 then go from there. Under 100 layers, you don't get much pattern because the layers are too broad, and over 500 the layers start getting too thin to make a good contrast between the dark/light.
Remember, this part of the conversation is personal opinion on aesthetics, not advice how to finish the blade to get good contrast.
Have fun
Pattern density also plays a role!
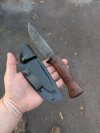
16 layers, I called it puddles; just random splotches!
Same billet as above, but after being cut into 6 pieces, restacked for 96 layers:
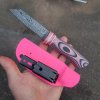
144 layers, but forged down a bit thinner, pattern got very muddy, almost too fine:
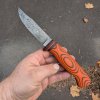
Same 144 layer billet, but not forged down as much:
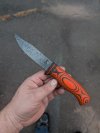
96 layer billet was 1/8" 1084, 3/32" 15N20. The 144 layer billet was 3/32" 125CR1 and 1/16" 15N20, so the 15N20 was finer. Next time, I may go 1/8" carbon, 1/16" 15N20 to get finer 15N20 lines and more darker carbon in the mix. I did raindrop on some, random on others in the 1084 pieces. The 144 layer was my first ladder attempt. The grooves were 3/4" apart, which was way to far apart I found out later. I forged it flat, then forged it down more into shape, so I lost the ladder look to it. Looks like big raindrops or a topo map of mountains. All of these have a much bolder/higher percentage of 15N20.
Some patterns (ladder, twist, raindrop, etc) really pop at higher layer counts (gives a nice chatoyance!!!). The random doesn't look bad in lower layer counts (90-100), but it also depends on the thickness it's drawn down to. Thick billet, low layer, not much contrast. Thin piece, then ground down with a lower layer count will have a lot of contrast to it! I went down pretty thin on the first 144 layer piece and it's compacted a lot more than the other piece that I left thicker!!
16 layers, I called it puddles; just random splotches!

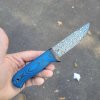
Same billet as above, but after being cut into 6 pieces, restacked for 96 layers:


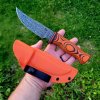
144 layers, but forged down a bit thinner, pattern got very muddy, almost too fine:

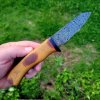
Same 144 layer billet, but not forged down as much:

96 layer billet was 1/8" 1084, 3/32" 15N20. The 144 layer billet was 3/32" 125CR1 and 1/16" 15N20, so the 15N20 was finer. Next time, I may go 1/8" carbon, 1/16" 15N20 to get finer 15N20 lines and more darker carbon in the mix. I did raindrop on some, random on others in the 1084 pieces. The 144 layer was my first ladder attempt. The grooves were 3/4" apart, which was way to far apart I found out later. I forged it flat, then forged it down more into shape, so I lost the ladder look to it. Looks like big raindrops or a topo map of mountains. All of these have a much bolder/higher percentage of 15N20.
Some patterns (ladder, twist, raindrop, etc) really pop at higher layer counts (gives a nice chatoyance!!!). The random doesn't look bad in lower layer counts (90-100), but it also depends on the thickness it's drawn down to. Thick billet, low layer, not much contrast. Thin piece, then ground down with a lower layer count will have a lot of contrast to it! I went down pretty thin on the first 144 layer piece and it's compacted a lot more than the other piece that I left thicker!!
Yeah, twist can look really cool low or high layer count! I did some mokume with 20 and 40 layer and did raindrops and it looked nice and bold, even in thin pieces. I am just starting to dive into the damascus stuff myself, so much to learn and experiment with!
I agree with the layer count as well. I have watched many videos about making it but just wanted to see if my method was going to work before I went any further. I ended up loving the look of the wider layers and learned a lot from doing it for my first time and the advice on here. Thanks for the replyIf you're new to damascus, I'll add my 2 cents to what Devin said.
I agree with his opinion that 30 layers is too few, but I think this is more a personal taste thing and not necessarily related to your original question. IMO (depending on the final pattern, of course) the sweet spot is anywhere between 120-480 layers. (I could have said 100-500 layers, but my standard process is to start with 15 layers, cut that billet in 4 pieces to get 60 then go from there. Under 100 layers, you don't get much pattern because the layers are too broad, and over 500 the layers start getting too thin to make a good contrast between the dark/light.
Remember, this part of the conversation is personal opinion on aesthetics, not advice how to finish the blade to get good contrast.
Have fun
Great info... definitely gonna save this to use for future referencePattern density also plays a role!
16 layers, I called it puddles; just random splotches!
View attachment 2755464
Same billet as above, but after being cut into 6 pieces, restacked for 96 layers:
View attachment 2755467
View attachment 2755468View attachment 2755469
View attachment 2755465
144 layers, but forged down a bit thinner, pattern got very muddy, almost too fine:
View attachment 2755463
Same 144 layer billet, but not forged down as much:
View attachment 2755462
96 layer billet was 1/8" 1084, 3/32" 15N20. The 144 layer billet was 3/32" 125CR1 and 1/16" 15N20, so the 15N20 was finer. Next time, I may go 1/8" carbon, 1/16" 15N20 to get finer 15N20 lines and more darker carbon in the mix. I did raindrop on some, random on others in the 1084 pieces. The 144 layer was my first ladder attempt. The grooves were 3/4" apart, which was way to far apart I found out later. I forged it flat, then forged it down more into shape, so I lost the ladder look to it. Looks like big raindrops or a topo map of mountains. All of these have a much bolder/higher percentage of 15N20.
Some patterns (ladder, twist, raindrop, etc) really pop at higher layer counts (gives a nice chatoyance!!!). The random doesn't look bad in lower layer counts (90-100), but it also depends on the thickness it's drawn down to. Thick billet, low layer, not much contrast. Thin piece, then ground down with a lower layer count will have a lot of contrast to it! I went down pretty thin on the first 144 layer piece and it's compacted a lot more than the other piece that I left thicker!!
