How To Damn burr on stainless

Joined
Oct 30, 2018
Messages
219
So,

I’m really struggling to fully remove the burr on my sabatier branded stainless knives. No idea of the exact stainless composition.

Tried both progressively lighter edge trailing and edge leading strokes, stropping on leather, cork, etc.

Being doing my best to minimise/remove the burr on every stone before progressing but even on my 3000 stone it just keeps flipping over and is becoming flipping annoying. After a lot of time and effort I can remove the majority of it but there still seems to be small sections remaining and if I work overly hard on those I can accidentally raise a burr in another area. I’m spending more time removing burrs than I am actually sharpening!!!

Any ideas? I’ve read through a decent amount of posts on this subject but still struggling...

I should add, been using a sharpie when stropping on the stone just to make sure I’m hitting the apex. It seems I am. Sharpness isn’t an issue, able to cleaning slice newspaper against the grain (apart from when it hits the burr!)
 
Last edited:
Thanks, sorry should have mentioned that I have tried that also. I sharpen at 15dps and have increased the angle to approximately 30 dps for a few strokes but no effect, doesn’t seem to rip the burr off, just flops it over to the other side
 
At this stage, probably start over. Grind off the apex by slicing into the stone, as if cutting it with very very light pressure.

It’s cliff stamp method of sharpening without burr.

I usually do not use this method but in your situation it may be the best approach.
 
Burrs that are hard to remove are happening, in part, due to the steel type or hardness (softish 'gummy' stainless, for example). Other things making it more difficult are using too-heavy pressure, or using a stone that isn't cutting the steel cleanly. That could be a problem with the abrasive type or quality, or it could also be due to glazing or clogging on the stone's surface. Soft & gummy stainless is notorious for clogging stones. If the stone is used with water or used dry, it happens pretty easily, because soft stainless clings tenaciously to the grit and is difficult to scrub off. When the stone is glazed or clogged with swarf, the only thing that can happen is burring or rolling of the edge, as some effort/pressure is exerted to try to make it cut the steel, when it isn't capable of doing so.

If I were chasing a problem like this, I'd make sure the stone is clean and not glazed (glazing makes the surface 'shiny' like glass, when viewed at a low angle with a bright backdrop behind it). Might try a different stone for comparison. Also, make sure that as you apex the edge, your de-burring passes are getting progressively lighter and lighter. With soft stainless like this, the burr needs to be very gently abraded away, instead of breaking it off by flipping it back & forth (which you're seeing, isn't working with this steel).
 
Last edited:
Thanks both,

Chris very interesting vid. How he maintains an angle using that technique is beyond me.

Obsessed, stone has been conditioned I think the advise regarding lightly abrading is the way to go. Just redone the knife now and increased angle edge leading strokes followed by light normal apex edge leading strokes has resulted in burr removal in a much quicker time frame than previously.

Thanks
 
Another tip is to remove the burr more or less completely after the first coarse stone.

Raise it, flip the blade, flip the burr, elevate the angle by 2x or more and use light leading passes.

Check after each pass visually and by running your finger perpendicular to the edge from the spine, you should feel the burr shrinking. AS it does, only make contact with light leading strokes where you still feel it on that side. Check the other side, like as not there will be a few spots where it has flipped and many where it is essentially gone. Again, double the angle and remove them with light leading passes only where you feel the burr. Take it back to the same stone for a handful of passes at the original angle.

It is important that you not wind up chasing it too much. The attachment point starts out very robust, the more times it flips, the more easily it will continue to flip. Very important you eliminate the bulk of it on the initial attempt.

Repeat this process with each progression. Another tip is to limit the number of stones. Use a coarse to reset the bevel, a medium to reduce the scratch pattern, and a fine or extra fine, a hard strop surface, or smooth steel to finish it off. If finishing it off with a finer grade of waterstone, use a microbevel, just a few passes back and forth. Check for burr, complete with a few very light trailing passes.
 
Thanks both,

Chris very interesting vid. How he maintains an angle using that technique is beyond me.

Obsessed, stone has been conditioned I think the advise regarding lightly abrading is the way to go. Just redone the knife now and increased angle edge leading strokes followed by light normal apex edge leading strokes has resulted in burr removal in a much quicker time frame than previously.

Thanks

:thumbsup:

The 'light normal edge leading' passes are how I de-burr & clean up the edge as well. I know raising the angle can work, but I prefer doing it at the same sharpening angle, to thin the burr enough that it becomes extremely weak and easier to remove (see pics below; Victorinox paring knife with a large, but very thin burr tearing away). It reduces the lateral stress against the apex by keeping the bevels flush to the stone, which distributes and reduces per-unit pressure. That helps to prevent new burrs from forming, and it keeps the edge geometry where I want it to be, instead of microbevelling the edge a little bit.

kxNPzMN.jpg

mIacPbu.jpg
 
Last edited:
One trick I commonly use is stropping the edge on some sort of hard media, like basswood with a compound. Usually I strop on wood with 4 um CBN compound and that tends to remove the burr quite well. Sometimes if it is really stubborn, I will draw the edge through some hard wood, then strop again.
 
You can also try to use very short, light, edge-leading strokes -- no more than a quarter of an inch.

The burr leans away from the edge that you're sharpening. So when you switch sides, you can cut it off cleanly with an edge-leading stroke.

If you make the stroke too long, the burr will reform (not flip) on the other side.

I've never had trouble removing the burr quickly and easily with this technique.
 
Yes I ran into that the other day.
I was sharpening my loaner knife that I carry in my tool belt; a Nappa back lock that I found in the street back when Hector was a pup. Some kind of basic stainless.

I didn't care if it was sharp as much as I wanted to break in my new Norton India pocket stone so I reprofiled the edge and attempted to put some kind of working edge on the knife.

Not going too well, won't really catch on finger nail I refined it on my hard Black Ark pocket stone. (all with oll; thanks guys).

Oh well . . . I'll work on it more later.
I took it to work and used it just because.
To my surprise it did sort of cut stuff. Better than expected in fact.
After a couple of days I happened to try it on my finger nail and it was now biting my nail !
I must have stripped off the wire edge. It was an extremely fine wire edge if any. I didn't create much of any wire edge at all to start and with magnification there wasn't much to see when I stopped "sharpening" it.

All I can think is I stripped off the wire edge while using it. The first thing I cut of any significance was an inch diameter softish plastic tubular object I cut in two.

I never ever debur by drawing through a cork or felt or, Bob forbid, my wooden grit infested sink bridge (Murry Carter).

If I have to do that I am using the wrong steel (Nappa SS cheepy) or I'm not using my Edge Pro Apex correctly.

Draw through a wooden block or felt to debure cheep stainless.
Like the death penalty, generally there are more civilized options but sometimes it is the best solution to a specific problem.

OK . . . that was fun, can't wait to get back to my M4 and the Edge Pro.
 
Last edited:
:thumbsup:

The 'light normal edge leading' passes are how I de-burr & clean up the edge as well. I know raising the angle can work, but I prefer doing it at the same sharpening angle, to thin the burr enough that it becomes extremely weak and easier to remove (see pics below; Victorinox paring knife with a large, but very thin burr tearing away). It reduces the lateral stress against the apex by keeping the bevels flush to the stone, which distributes and reduces per-unit pressure. That helps to prevent new burrs from forming, and it keeps the edge geometry where I want it to be, instead of microbevelling the edge a little bit.

Did you get the burr from the photo to tear away like that just from edge leading strokes at the same angle only? The only time I have had a burr rip off like that was using a Worksharp. I've never experienced it happening on a stone before.

Also, why don't you want a microbevel? Doesn't the microbevel allow you to create a more steep/aggressive primary bevel?

Cool photo.

That burr started to tear away after I'd given the edge a few passes on a strop with green compound. In the higher-mag 2nd photo, you can see some of the green-tinted material from the strop on the blade (IIRC, I think the material I was using for the strop was cork). The burr was formed with a medium Spyderco bench stone, used with oil. I scrubbed pretty aggressively on the stone, making the burr larger than I ordinarily would (still very thin, though), just to see how the steel would respond to it. I'd always been aware of ceramic hones' tendency toward heavy burring on low-alloy stainless like this, and I was testing the hone and blade to see if my impressions of that burring tendency still held up (they did). After stropping, I thought there was just a fiber on the edge from a microfiber towel I'd used to wipe the oil off the blade. By naked eye, that's what the burr first looked like. I didn't realize what it was until examining it with a magnifier, and decided it was 'worthy' of a few pics. :)

As to microbevels, it's just my preference not to use them for most of my knives. I do have one or two knives that I thinned a little too much near the edge and sharpened to pretty acute angles (sub-25° inclusive), and they became a little too delicate for some uses. I've since applied a little bit of microbevel to those, just to help them hold up a little longer.
 
Last edited:
After stropping, I thought there was just a fiber on the edge from a microfiber towel I'd used to wipe the oil off the blade. By naked eye, that's what the burr first looked like. I didn't realize what it was until examining it with a magnifier, and decided it was 'worthy' of a few pics. :)

Hmm.. maybe I've created a wire like that before but just didn't realize it. I'll be looking for it from now on and trying to create one.

Thanks!
 
On steel worth using, even down to A2, the bur gets thinner and thinner (I don't try to eliminate it on the first stone . . . I try like heck to keep it as minimal as possible to start) . . . by the last stone of a three, four or five stone run (depending how dull the edge is) the bur just comes off on the stone in little micro fragments that almost look like black dust on the stone or espresso grounds. Never a continuous wire like in David's photo of the low alloy stainless.

Good steel is worth paying for ! ! !
 
Burr removal is also something that I struggled with up until recently. Here is what I do--maybe it'll help you, too:

I don't remove the burr until I finish on my final stone. I usually start with a 300 grit stone and work very deliberately to make sure I form an even burr all the way from tip to heel. Once I do, I don't remove it--I go to the next stone. I start on the side where the burr is laying and work till I form an even burr on the other side of the blade. I then flip it over and work till I get the burr back on the side that I started on. I do this exact thing on every stone. I usually finish on a 6k stone. The burr is fairly small at that point.

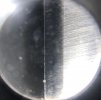
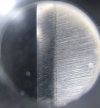
Below is a pic from my sharpening last night. Steel is M390.

First pic shows right after I finished on the 6k stone, and you can see the burr as the reflected light (thin white line) along the apex of the blade. From there, I usually do four or five *very* light edge leading passes on the burr side at the same angle I sharpened at, then I do the same thing on the other side. I then inspect with a loupe, but it's usually time for strops at that point.

I start on 4 micron poly diamond on basswood. I strop with slightly firm pressure and continually check the burr under the loupe. This strop will remove any burr that's left on the edge. The second pic shows the same edge after the 4 micron strop. As you can see, the reflected light (burr) is completely gone.

I then go to 1 micron and 0.25 micron poly diamond strops on balsa. The resulting edge whittles hair.

If you're struggling with this, get a loupe. The one I use has an LED light and has 30x and 60x loupes. It cost $10 on Amazon (Dreame brand).

IMG_1651.jpg
IMG_1652.jpg
 
Back
Top