Hello all, Ive been a member here for some time now but Ive been in the learning phase of this hobby and havent had all that much to show. Ive mostly just purchased blade blanks and maybe applied my own finish and a set of scales then made a sheath and stuck it in the drawer.
This knife was mostly learning the beveling process with a file and jig and heat treating. The steel I used certainly isnt the best either but it came to me for free and it took a nice edge. I definitely need to get a forge sorted out before next round as a couple Map gas troches didnt seem to be efficient but it worked. Its my understanding I had a piece of 1018 which is said to be bottom shelf but still heat treatable. I just got it cheery hot and a magnet on a stick didnt stick anymore and I quinched it in canola oil and gave it a ride in the powdercoating oven.
Anyway, its pretty much a flat out copy of a Becker BK-2. I found a drawing online and imported it to autocad and made it suit my needs. Wanted to make sure the blade was legal in Texas as we have some goofy knife laws for being a toughguy state. You can tote a pistol in your car without need of paperwork, no questions asked but you better not have a blade longer than 5.5 inches?
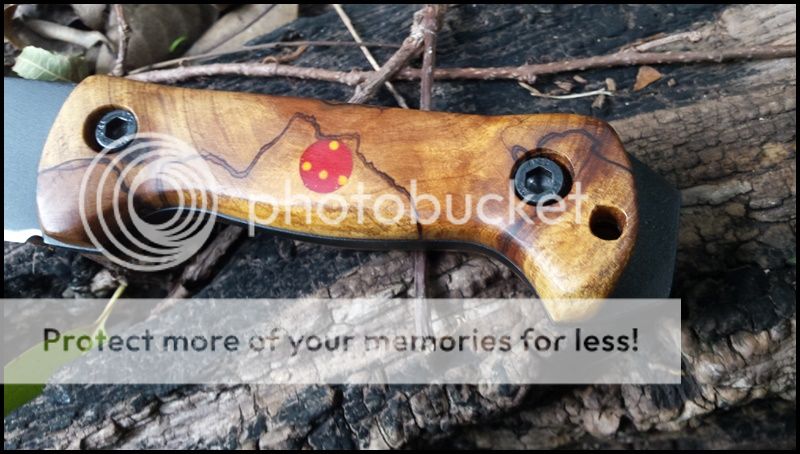
Instead of countersinking nylock nuts into the scales I chose to counter bore and then drill and tape threads into the tang see that it was a full 1/4" thick. The socket heat screws needed to have their length adjusted so they didnt bump in the middle and I added a dab of blue locktite on the final assembly. The scales came from an Elm tree which got in the way of my buddies new garage. Found the spalted sections and saved them for a couple years before remembering I had them. The red dot is just a fix. The originals used 3 sets of hardware to secure the scales and I was going to as well but I screwed up drilling the middle holes and it was going to be start over on the scales or make ugly adjustments or fill the holes so some testors model paint mixed into some 5 min epoxy and there you go. The yellow dots are repairs to the repairs! I walked away and bubbles surfaced in both repairs so I drilled the craters they left and filled with yellow epoxy. I know someone does something similar as a makers mark but my only intent was filling the holes.
This is the blade after cutting it out and filing the bevel. I also gave it a ride in the blast cabinet. Its time to buy a proper 2x72 type sander as the file thing wasnt much entertainment.

The spalted elm scales I made. Notice the center holes which were filled later.

Murphy's Law was in full effect when I powdercoated the blade. I had enough little blimishes in the finish I decided to sand it all down and give it another try. Turns out that powedercoating bonds to media blasted steel rather well so in the long run im real pleased with the results.

Spalted Elm scales with a super glue finish. I started using super glue for a finish while making some fancy slingshots. Its a nice hard finish which drys fast and buffs up well after sanding.

All put together and sharpened.
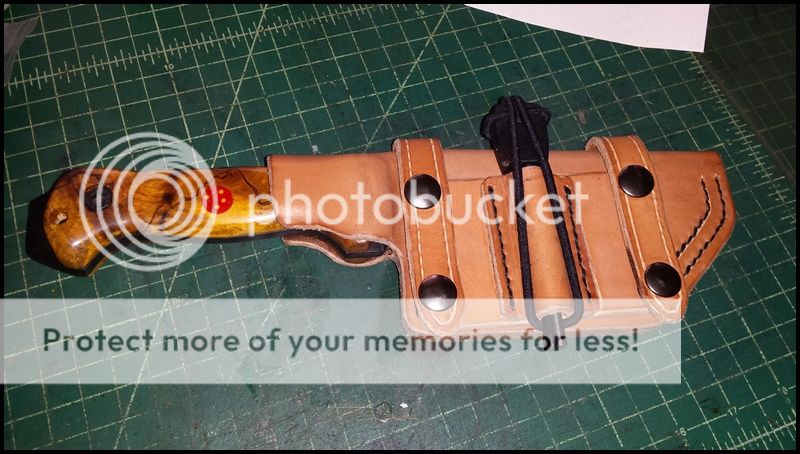
The making of the sheath. I still need to work on burnishing the edges but the blade retention is a bit different. Given the compound shape to the scales I wet formed the leather to be very snug and allowed the leather to dry overnight. This produced a nice secure fit but over time the snugness would go away for sure. I then floated a pool of thin CA glue inside the areas where the retention of the blade takes place and allowed that to kick off and harden. Then I gave the inside a light sanding. The results are impressive as hell. Its a spring steel like snap feeling when the knife is inserted or drawn. Note, I used some painters tape to hole the retention zone closer together than they would be with the blade inserted. This adds additional pressure against the scales. I can invert and vigorously shake the sheath and the knife hasnt moved at all, and its a 1/4 thick blade about a foot long!
Anyway, Im enjoying this so there will be more to come from me.

Here is a bought blade I did scales and a sheath for. My first wood sheath from that same spalted elm.


This knife was mostly learning the beveling process with a file and jig and heat treating. The steel I used certainly isnt the best either but it came to me for free and it took a nice edge. I definitely need to get a forge sorted out before next round as a couple Map gas troches didnt seem to be efficient but it worked. Its my understanding I had a piece of 1018 which is said to be bottom shelf but still heat treatable. I just got it cheery hot and a magnet on a stick didnt stick anymore and I quinched it in canola oil and gave it a ride in the powdercoating oven.
Anyway, its pretty much a flat out copy of a Becker BK-2. I found a drawing online and imported it to autocad and made it suit my needs. Wanted to make sure the blade was legal in Texas as we have some goofy knife laws for being a toughguy state. You can tote a pistol in your car without need of paperwork, no questions asked but you better not have a blade longer than 5.5 inches?
Instead of countersinking nylock nuts into the scales I chose to counter bore and then drill and tape threads into the tang see that it was a full 1/4" thick. The socket heat screws needed to have their length adjusted so they didnt bump in the middle and I added a dab of blue locktite on the final assembly. The scales came from an Elm tree which got in the way of my buddies new garage. Found the spalted sections and saved them for a couple years before remembering I had them. The red dot is just a fix. The originals used 3 sets of hardware to secure the scales and I was going to as well but I screwed up drilling the middle holes and it was going to be start over on the scales or make ugly adjustments or fill the holes so some testors model paint mixed into some 5 min epoxy and there you go. The yellow dots are repairs to the repairs! I walked away and bubbles surfaced in both repairs so I drilled the craters they left and filled with yellow epoxy. I know someone does something similar as a makers mark but my only intent was filling the holes.
This is the blade after cutting it out and filing the bevel. I also gave it a ride in the blast cabinet. Its time to buy a proper 2x72 type sander as the file thing wasnt much entertainment.

The spalted elm scales I made. Notice the center holes which were filled later.

Murphy's Law was in full effect when I powdercoated the blade. I had enough little blimishes in the finish I decided to sand it all down and give it another try. Turns out that powedercoating bonds to media blasted steel rather well so in the long run im real pleased with the results.

Spalted Elm scales with a super glue finish. I started using super glue for a finish while making some fancy slingshots. Its a nice hard finish which drys fast and buffs up well after sanding.

All put together and sharpened.

The making of the sheath. I still need to work on burnishing the edges but the blade retention is a bit different. Given the compound shape to the scales I wet formed the leather to be very snug and allowed the leather to dry overnight. This produced a nice secure fit but over time the snugness would go away for sure. I then floated a pool of thin CA glue inside the areas where the retention of the blade takes place and allowed that to kick off and harden. Then I gave the inside a light sanding. The results are impressive as hell. Its a spring steel like snap feeling when the knife is inserted or drawn. Note, I used some painters tape to hole the retention zone closer together than they would be with the blade inserted. This adds additional pressure against the scales. I can invert and vigorously shake the sheath and the knife hasnt moved at all, and its a 1/4 thick blade about a foot long!
Anyway, Im enjoying this so there will be more to come from me.


Here is a bought blade I did scales and a sheath for. My first wood sheath from that same spalted elm.

