Finishing wrought iron

kuraki

Fimbulvetr Knifeworks
Joined
Jun 17, 2016
Messages
4,679
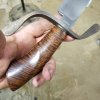
I am working on this bowie with WI guard and spacer. Etching shows some pretty great figure and I forged it the way I did so it would be on display.

Now how do I bring out that character? Is it just etching? I've seen WI look black, gray, grainy etc, these great antique like appearances but so far all I can make this piece look like is shiny low layer damascus or red/purple forge scale.

Any tips would be appreciated. IMG_20180805_175950_883.jpg
 
+1 on etching. A few minutes in ferric chloride is all I’ve ever done, but I know the look your talking about and I’d love to hear if anyone else has any other methods for achieving it.
 
Interesting. Maybe I need to change out my acid. It still does hamon and damascus fine but I soaked this guard a good 30 minutes and got almost no topography change.
 
For wrought iron and mild steel, in the past I have hit them with the ferric, then with Super Blue paste. Then polish. Fishish pretty fine before etching, etc. You get kid of a "French gray" look color wise.
 
I soaked mine for a couple hours recently in ferric, cleaned, washed and soaked again for another hour.
 
On mine I do 10 minute cycles 6-7-8 times until I reach the depth of character I like.
0000 steel wool between each etch and at the end.

6oDiFMg.jpg


QIwZUZL.jpg
 
Forge, grind to shape, run it through an induction forge to desired color, then coat it while still hot in paste wax. Looks amazing done this way and gives it a pretty peotective finish too.
 
My treatments for WI are:
Etch in FC with removal every 60 seconds to scrub off with a veggie brush.
When the etch is deep enough, wash and boil in water with a Tbs of TSP.
Dry well in the oven for an hour at 300F and wire brush clean. It is very important to drive all moisture out of the WI before applying any finish. I don't like chemical bluing solutions becaus sooner of later rust creeps out of the fibrous structure of WI.

To color the part after fully dried:
Heat to 1000+F and then coat with Blacksmith's polish/black ( see below). After cooling to room temp, rub hard with an old cotton T-shirt and hand buff with a clean cloth.
or
Put in 550-600F molten nitrate bluing salts. (low temp salt pot will work, too). Washing well with hot water and then dry in the oven again. Wire brush and wax with beeswax while hot from the oven and buff with a soft cotton cloth after cooled to room temp.

Blacksmith's Polish: For getting that shiny black you love on hand forged blacksmith items ... and knife fittings ... this recipe works well.
Get a quart can of turpentine
Get a pound of beeswax
Put the ingredients in and empty new 1 gallon paint can (Unused paint can - ebay or paint store)
Melt the beeswax slowly and when just melted, REMOVE FROM HEAT and stir in the turpentine.
Warm can to use until melted, stir with a wooden paint stir stick.
Use cheap disposable 1" natural bristle brush ( not synthetic/plastic) to apply polish.
Heat object to about the first hint of red (1000F if using an oven to heat up)
Let cool a bit to black heat (900F), testing with a cotton cloth. You want the piece to cool enough so the cloth doesn't catch fire, but chars and smokes.
Immediately paint the beeswax polish all over the piece heavily. Do this over a foil pan to catch the drip off (Put that back in the storage can for re-use).
Rub the piece briskly with the charred up cotton cloth until it stops all smoking.
Let cool and cloth buff again.

Precautions/Tips -
Heating wax and turpentine wax mix must be done slowly and carefully. It can catch fire. Have a lid or metal plate handy to set over the can if needed.
Wear heavy gloves.
Have a fire extinguisher handy.
Use a large foil roasting pan to catch the debris/drips and to drop the cloth in if necessary when testing (it may catch fire). The pan can be reused over and over.
Setting the wax can or the drip pan out in the sun on a hot summer day will melt it most of the way.
Getting char in the wax mixture in the pan won't hurt anything, so when done with blackening the pieces, wrm the pan and pour the drips into the wax storage can.
 
Last edited:
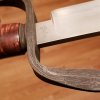
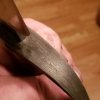
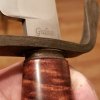
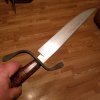
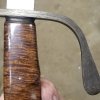
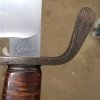
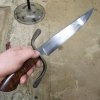
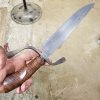
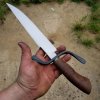
Well after looking at it for a day I scrubbed it clean of all that black carbon and did the heat color beeswax thing. Here's a tip if you do that, wear gloves unless you're into dripping hot wax :D Anyway this looks cleaner and probably easier to maintain than what I had before. Again thanks for all the info here. IMG_20180806_40649.jpg IMG_20180806_31810.jpg IMG_20180806_49504.jpg IMG_20180806_56651.jpg IMG_20180806_1848.jpg
 
Love the blade! I've never been a big fan of those big guards on some Bowies, but to each their own ;)

Still, great work!
 
Somthing I've been wanting to do is all. I'm not sure if I'm the biggest fan either. I wish I had done a D guard. But between the distal taper and weight of that guard it balances right at the face of the guard, so it still feels pretty nice.
 
On mine I do 10 minute cycles 6-7-8 times until I reach the depth of character I like.
0000 steel wool between each etch and at the end.

6oDiFMg.jpg


QIwZUZL.jpg


Looks Great. I have to remind myself to remember to remove the oxides like Mr. Anderson notes.

Kuraki that added quite a bit of character. That baby looks fast.
 
Back
Top