First Katana Tsuka

T.Saslow

Periodic Thinker
Joined
Jun 12, 2013
Messages
479
A few months back, a buddy of mine asked me to strip the ugly maroon lacquer off his Katana's Shirasaya. I was pleased when I found that the Saya was a fairly nice wood of unknown species and a bit of figuring at the top. Unfortunately, the Tsuka was some ugly lookin' wood, similar in hardness and grain pattern, to White Oak and had many worm holes and voids filled in with some form of Wood filler. In all honesty, this was uuuggly and we both (me and the owner) agreed it should be replaced. This decision ended in a bad way, and a good way. Good, because, despite some highly noticeable blemishes, the Tsuka came out beautifully. Bad, because I never want to make one again xD
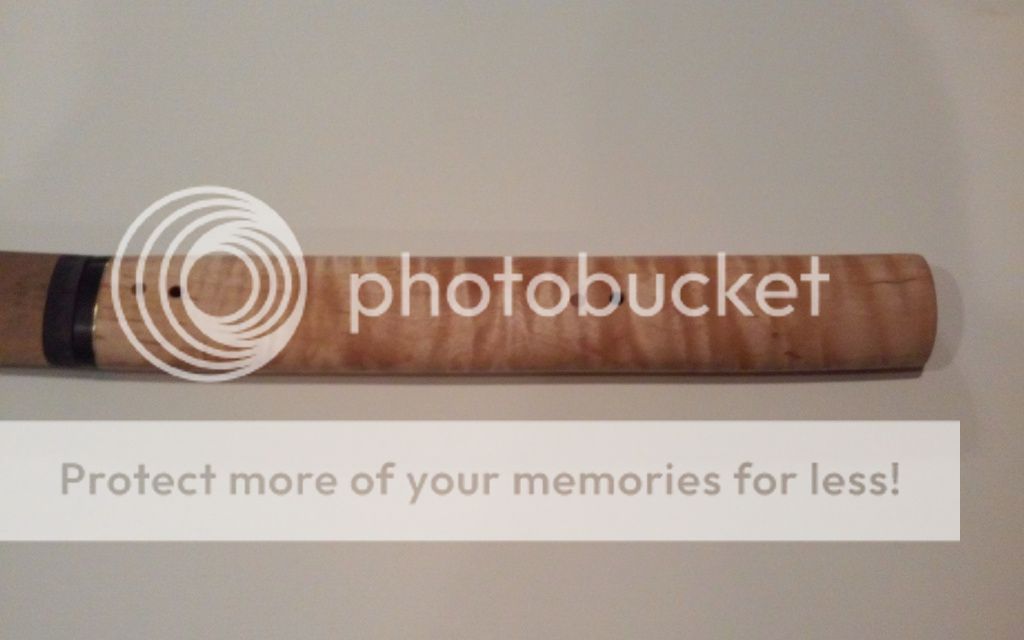
Here she is fellas-

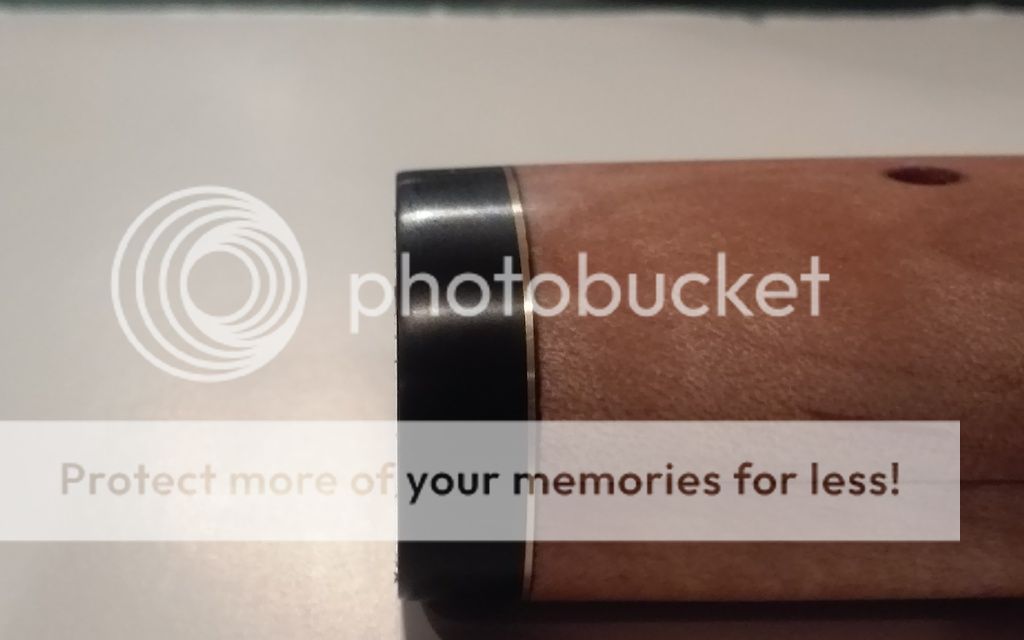
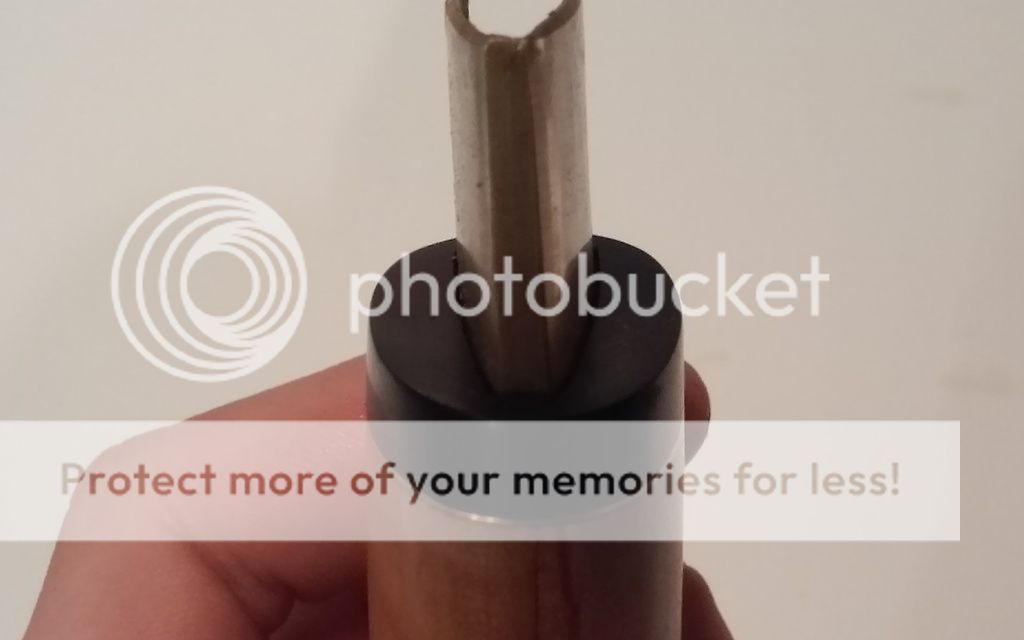
The main part of the handle was Tiger maple (not book matched) with some nice figuring to it. There was a small void about 1" long that I filled with Super glue and sanded down to 600 grit (along with the rest of the Shirasaya). The two sides were glued together with Tite bond 3 wood glue. The bolster is Gaboon Ebony, apx. 1/4" thick, that is bolstered by a thin (1/32" or so) piece of brass. The brass was epoxied both to the maple, and the Ebony using G-Flex Epoxy.

Some photos-


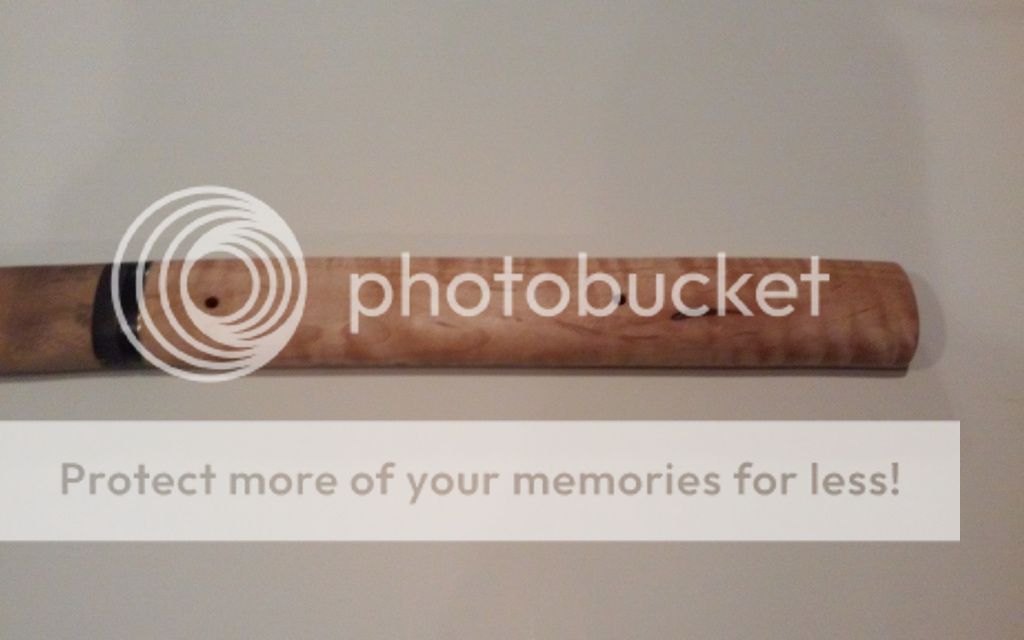
Critiques welcome, I know I made some mistakes (the blatant mis-drilling of two holes :rolleyes: ) so I don't think a comment could be as devastating as that was!My terminology may be incorrect as well so sorry in advance ;)
FYI- I talked to the customer about the two mis-drilled holes and he said to just fill them with plugs and not bother with re-making the Tsuka... contrary to what i suggested.

Sorry for the bad pictures, I don't have a nice camera and the only camera I do have that takes decent photos is on my free tablet that came with my moms cell phone :o:o Someday... SOMEDAY I'll invest in a nice camera!
 
Last edited:
Well, at 16 that's not too bad.

There are obvious errors that should be avoided on the next one ( or other knife handles).

Take a single block of wood and split it in half, or use bookmatched scales. A mismatched handle is going to draw the eye away from the good work.

Measure for the mekugi ana and mark it on the tsuka before it is glued up. Drill a 1/8" hole through one side and use it after the tsuka is assembled to make the through hole. I like to make the final length just about 1/4" too long, and carefully shorten it until the mekugi (peg) fits perfect.

When something is messed up, make it a feature. The extra holes could have been disguised by putting a third hole on the other side of the mekugi. Use two light pegs to fill the blind holes and a dark mekugi. The other side could be left as it is with one hole, but would be a better match with the three holes as the other side has. One larger dark bind plug in the center could simulate the menuki.

The dark glue joint is also off putting. Sometimes it is unavoidable, but try to use a resin that is clear or matches the wood type. Clear epoxy, like T-88 is a good choice. Sand both surfaces to dead flat and double check that there are no gaps. 120 grit works well as the grit to prep the mating surfaces. Don't go much finer.
 
Thank's for the input!
It did occur to me that perhaps drilling through to the other side of the Tsuka through the accident holes and pegging those as well would help with the symmetry. In other words, replicating the "Pattern" on the other side. As you mentioned simulating the menuki with a dark plug, I had the idea of using a mosaic pin to act as a menuki. If I make another of these, I may try that out. However, I do like the idea of having two pegs on either side of the mekugi and incorporating that into the design.

If I ever happen to do a job like this again, I will most definitely purchase a solid block and split it down the middle. It still bugs me that the flame patterns are so different from side to side. For future reference, would it help to have that block stabilized or would un-treated wood suffice? As for the glue joint, that too is something I knew would be a problem immediately after taking the first pass with my spoke-shave. I contemplated using more g-Flex but I knew that the Tite bond would be plenty strong for wood to wood bonds. Looking back, I don't think it would have made a difference, regardless of the adhesive used; there would have still been a line. I'll keep the T-88 in mind for other "Seamless" glue ups.

I would like to point out that, for the plugs, I used some maple from the same board I used in the Tsuka. I was surprised to see such a drastic difference between the plugs and the surrounding material. I did slightly oversize the plug to make a nice, tight fit so the compressing of the fibers may have effected the color...it may just be a different shade of wood.

Thanks again, Stacy, For your kind words. It means a lot :)
 
The plugs are different looking because they are end grain and the tsuka is long grain.

FWIW, I use Tightbond-II for much of my tsuka/saya glue up with nearly invisible seams. On woods that are harder to glue due to density or oil, I use structural resins like T-88 or G-flex. Tightbond-III is an exterior adhesive and shows a line more.

Mosaic rivets make good looking mekugi for permanently glued up handles. They can be a bit of a problem if used as removable mekugi, but a drop of CA can fix them in place.


Here is how I do pseudo- menuki and pseudo-mekugi. The finished look is complex, but is actually very simple to do. This works fine on any hidden tang knife or sword handle as well as Japanese blades.

Pseudo-Menuki and pseudo-mekugi are inlaid using contrasting wood. Ebony or African Blackwood is very good for this. Other hard and polishable woods are also good. What you want is lots of contrast with the handle wood and something that sands and polishes well on the end grain. Choose you wood and turn it down to the sizes you want on a lathe ( 1/2" and 1/4" are the normal diameters and 3-6" lengths are good). Drill test holes in a block of hardwood with the bits you will be using and turn the dowels so they fit just right. If the wood chosen is a good candidate for it, it should be stabilized first, then turned. Of course, you can also buy hardwood dowels in walnut, or make your own colored and stabilized dowels. ( see tip below)

Pick a block of tsuka wood that has lots of pattern, like flame or curl, or a bold pattern like burl. Some of the Ausi and other burls (amboyina, cooliba, and malee) are really stunning as handles. Again, if it is a wood that stabilizes well, send it off. Dying and stabilizing some woods is really good. Box elder burl as well as curly and birds-eye maple look great in brown and red. Stabilized wood will sand and finish much better for a handle project like this.
While you can use book matched scales, they often don't align at the top and bottom well, and the line is off putting. Splitting a solid block makes the tuska pattern ( grain, burl, curl, etc.) continuous around the top and sides.

If putting on a bolster block and/or a butt block (as well as spaces between them), glue them on the tsuka block ends while it is whole and has square sides. Sand them flush on the four sides and continue on with the project. This assures perfect alignment when finished.

Before you split the tsuka wood, mark and drill holes through the block where the menuki and mekugi will be. Use a good bit and a backer board to drill a clean hole through the block ( brad point, Forstner, or sharp wood bit ). Good sizes are 1/2" for the menuki and 1/4" for the mekugi. You want the holes to be sized so the rounds just slip through smoothly. Not tight - Not loose. It is best to drill the holes and adjust and sand the dowels as needed to fit the holes you drilled. Cut pieces of dowel that are about 1/2" longer than the block thickness. Sand the ends so you can see the grain well. Glue in the contrasting wood dowels with Tightbond-II or slow cure epoxy ( one hour or longer type). As you install the dowels, look at the end grain and align with the tsuka grain ( or at 90° to it for accent). It will stick out badly if all the pegs don't line up properly. After it is dry, sand/cut the excess flush with the surface and then split the block on the table/band saw. Continue inletting, gluing up, and finishing the tsuka as normal. When the handle is done, the pseudo-menuki/mekugi will be perfectly inlaid and exactly aligned from side to side.


TIP:
A good tip is to send several 12" sections of 1/2" and 1/4" hard maple or walnut doweling to the stabilizer with the tsuka wood being processed. Have them dye the maple rounds black and/or red and stabilize it. Do several of each color and size, and have it on hand for wooden rivets and other handle projects. It ends up really cheap to do this, as there is no waste and the dowels are very light. $20-30 worth of stabilizing and dying will give you a years worth of dyed and stabilized wooden pins. Just sand lightly when they come back and you are ready to go.
 
Thank you for the tips Stacy, I look forward to using them sometime in the future :) The end grain plugs explains a lot, I suppose it never occurred to me that having the grain alignment the same as the rest of the Tsuka would be a good thing :eek: Would you recommend using a contrasting wood for the mekugi as well? or should i stick with the maple?

Just a quick update: I drilled holes for more plugs on both sides (one on either side of the mekugi hole) of the Tsuka so hopefully, assuming I use end grain maple, everything will look symetric. I will upload pictures as soon as i get the plugs glued up and sanded flush.
 
Alright, she's done! Thanks a bunch Stacy, your suggestions helped make this 100% better!

I followed the same procedure I used for the other plugs: Cut some 2" x 1/4" x 1/4" pieces of the maple, sand down to an octagonal shape, and chock it up on the drill press. Sanding it down to a nice, tight fit and gluing it up in the hole (being mindful not to push it to deep into the hole so as to not restrict the fit of the nagaka...I think that's what it is :rolleyes:). Then cut off the excess with a flush trim saw and sand to 600 grit.

Here she is again:


Hengelo- Thanks! It's much appreciated :)

Stacy- I think so too, The extra time really saved this project!
 
excellent. now the extra holes look like you meant them to be there as a design.
 
Last edited:
Yep! I'm thinking of using some Bloodwood or Amazonian rosewood as the Mekugi so that will add to the design and serve as a good contrast to the gold colored maple. Should be interesting when it's all put together!
 
Back
Top