- Joined
- Feb 9, 2016
- Messages
- 64
Well, I've lurked around here for a few months soaking up the good stuff and perusing the FAQs and WIPs. I've been working on my first knife on an off for a few weeks now wanted to share my progress. I wanted to make a skinner type knife and I really like my Sharpfinger so figured I would emulate that to a degree. I ended up at dcknives.blogspot perusing the knife templates he has generously put up there and my eye caught the design inspired by Bona's "Lizard". Beautiful simple knife with good lines, I love it.
I settled on O1 and picked up a 5/32" x 1.5" x 36" piece as well as some 1/8" brass rod for pins. I scavenged some walnut chairrail cutoffs from work so that is what I will use for scales. I don't have any photos of the rough cut, but used my angle grinder and a 4"x36" belt sander to cut and then smooth out the rough cut. I used a small spindle sander mounted in my die grinder to clean up the finger groove. I then laid out and drilled the handle pin holes. Using an 1/8" drill bit I scribed two lines down the center blade to give me something to file to. I built the Aaron Gough (thanks!) file guide and went to town on filing. It was at this point that I learned the joy of filing a recurve blade. I realized I had to switch between my larger wide file and a narrow 3/8" wide file in order to keep the bevel at the inside curve section even.
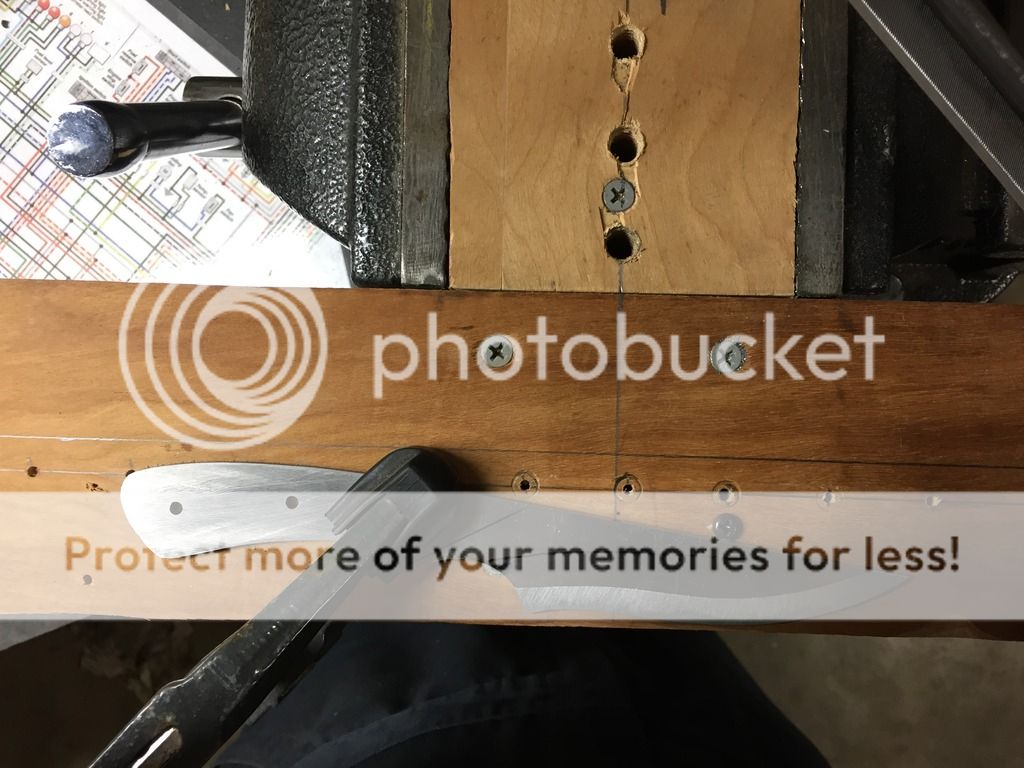
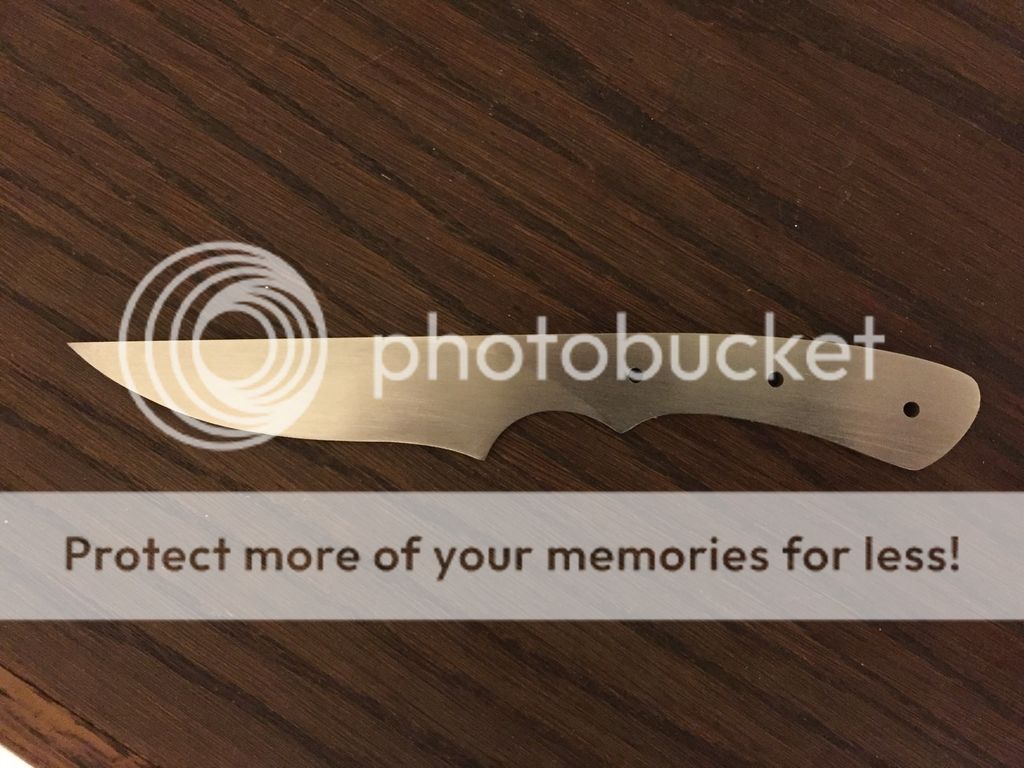
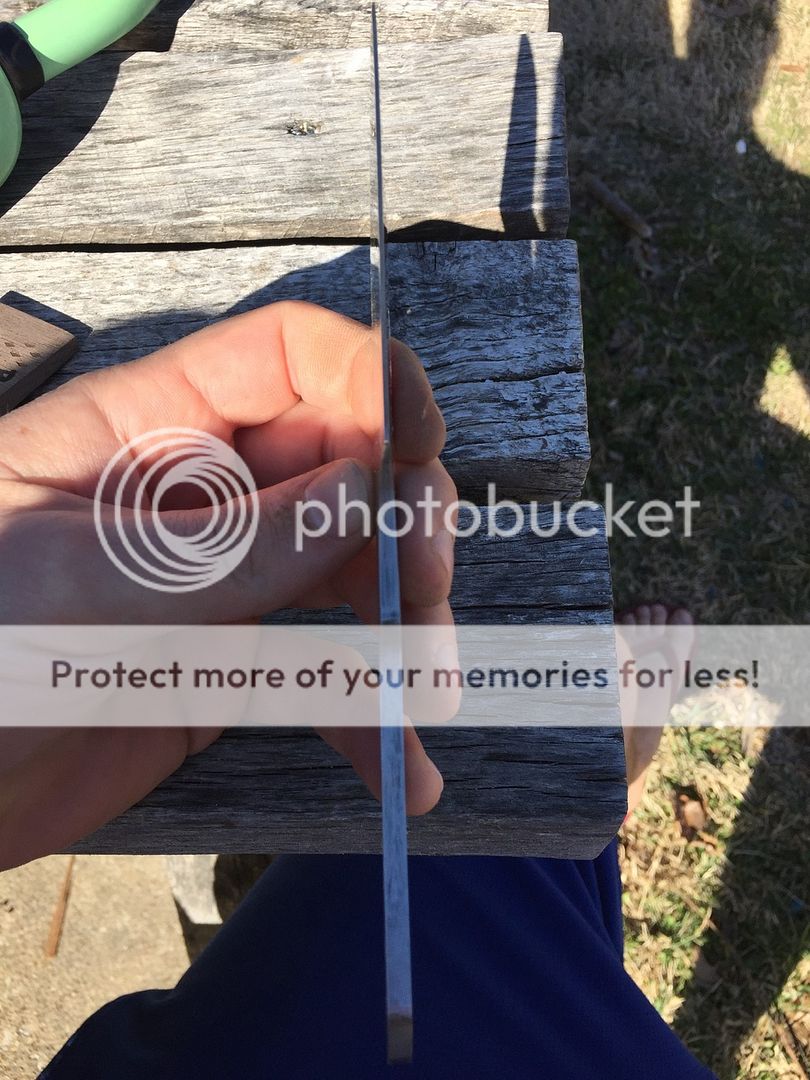
I was going to stick with the bevel following the blade edge, but with the somewhat thick piece of metal I was working with, I elected to go to a mostly flat grind. Here is after all the bevel filing, then draw filing and sanding to 220:
I then drilled some bigger weight reduction/epoxy puddle holes in the tang:

I rough cut out my walnut scales, drilled the pin holes and cut my pins:

Then for fun, dropped my scales into thinned poly and pumped it down to 25" mercury with my brake bleeder pump and held it there for a few hours. I have no idea if this is beneficial or not, but it bubbled like crazy and sucked up the combo so it may have done something:

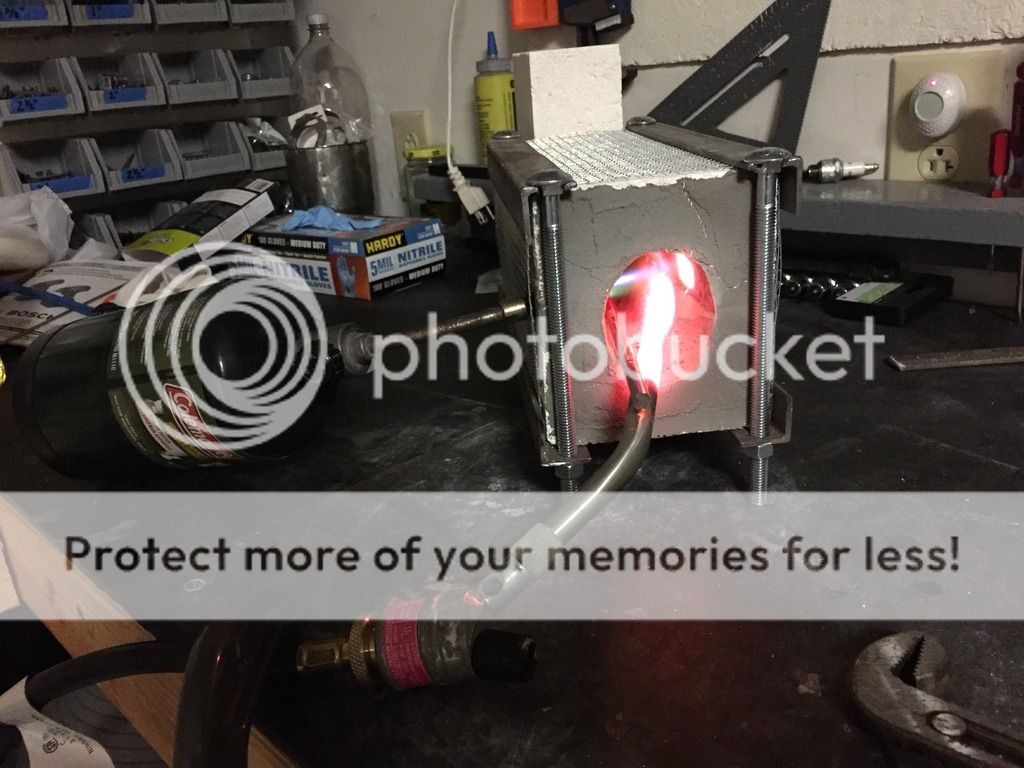
Heat treating was next, I built a 2-brick forge with some K23s sourced form a local pottery shop. I lined it with furnace cement and wrapped it in mesh. I botched the first attempt at treating and didn't get it hot enough. The second time I took it to non-magnetic then let it heat for a few more seconds and plunged into canola oil:
I file tested it for hardness then tempered it in oven at 400 twice. It warped a little in the quench, and I had to clamp it to something straight for the tempering. It came out as close to straight as I could hope. I hand sanded it up to 1000 then epoxied on the scales:

I chucked up my small spindle sander attachment into my router table, slowed my router way down and sanded the scales to match the tang. That leaves us here:

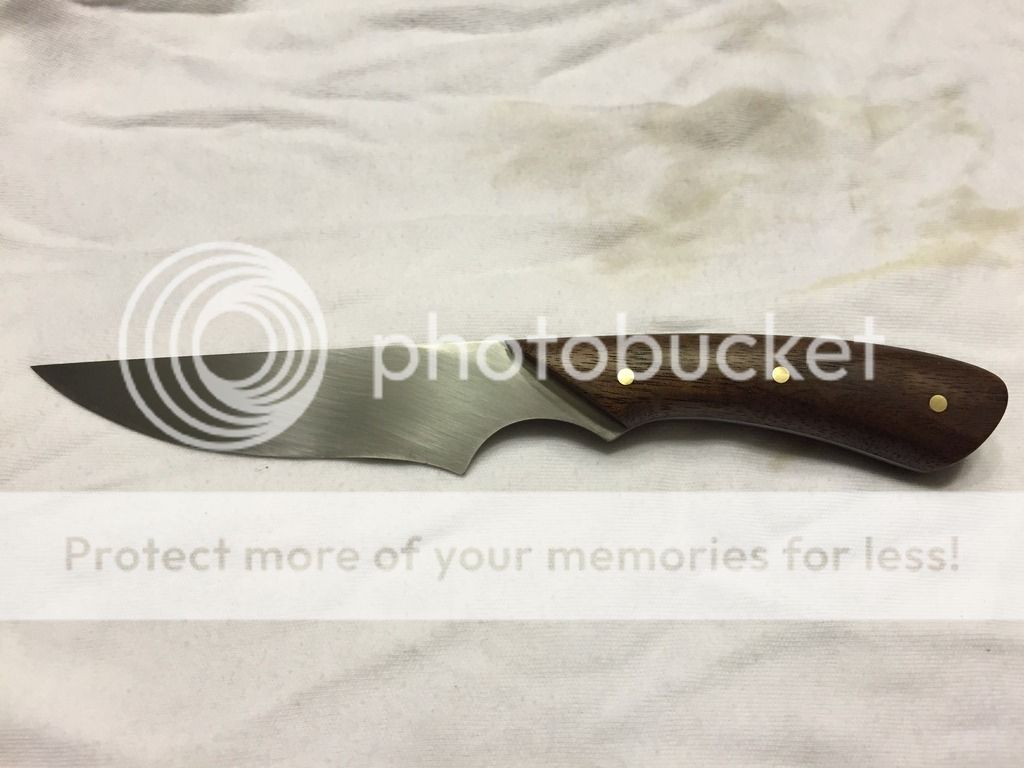
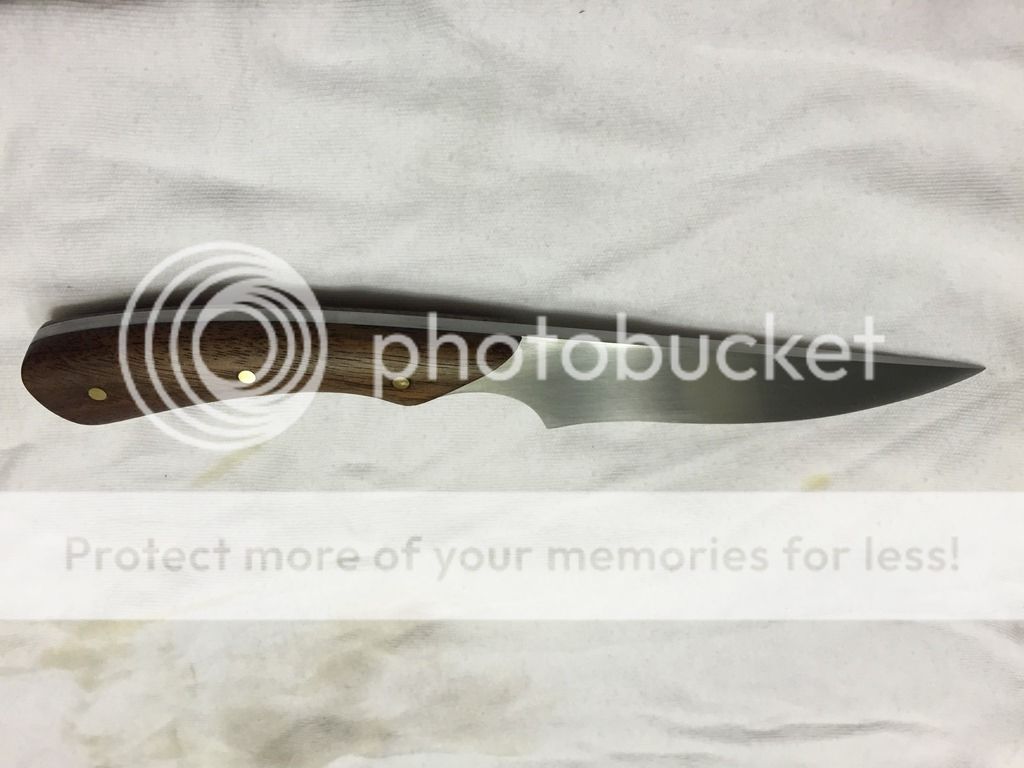
I cut then 1/4" and 1/2" strips of sand paper, clamped the knife blade in my vise and rounded the scales over to where I like them. I sanded up to 1000, then coated it in boiled linseed oil and here we are:
On the next one I work a little longer on hand sanding the bare blade before putting the scales on to get the sanding grain I want. I think I will also leave a nub metal at the tip of the blade so that it isn't so easy to accidentally ruin the tip with lazy file stroke. I learned that trick from someone on here (can't remember who) but forgot to implement it. Well, there's lots I'll do different but I'm thrilled with this one so far. Hopefully I can get it to take an edge well. I will be using my Lansky 5-stone kit to set the edge, hopefully that goes well!
I appreciate any constructive criticism, thanks for looking!
I settled on O1 and picked up a 5/32" x 1.5" x 36" piece as well as some 1/8" brass rod for pins. I scavenged some walnut chairrail cutoffs from work so that is what I will use for scales. I don't have any photos of the rough cut, but used my angle grinder and a 4"x36" belt sander to cut and then smooth out the rough cut. I used a small spindle sander mounted in my die grinder to clean up the finger groove. I then laid out and drilled the handle pin holes. Using an 1/8" drill bit I scribed two lines down the center blade to give me something to file to. I built the Aaron Gough (thanks!) file guide and went to town on filing. It was at this point that I learned the joy of filing a recurve blade. I realized I had to switch between my larger wide file and a narrow 3/8" wide file in order to keep the bevel at the inside curve section even.

I was going to stick with the bevel following the blade edge, but with the somewhat thick piece of metal I was working with, I elected to go to a mostly flat grind. Here is after all the bevel filing, then draw filing and sanding to 220:

I then drilled some bigger weight reduction/epoxy puddle holes in the tang:


I rough cut out my walnut scales, drilled the pin holes and cut my pins:

Then for fun, dropped my scales into thinned poly and pumped it down to 25" mercury with my brake bleeder pump and held it there for a few hours. I have no idea if this is beneficial or not, but it bubbled like crazy and sucked up the combo so it may have done something:

Heat treating was next, I built a 2-brick forge with some K23s sourced form a local pottery shop. I lined it with furnace cement and wrapped it in mesh. I botched the first attempt at treating and didn't get it hot enough. The second time I took it to non-magnetic then let it heat for a few more seconds and plunged into canola oil:

I file tested it for hardness then tempered it in oven at 400 twice. It warped a little in the quench, and I had to clamp it to something straight for the tempering. It came out as close to straight as I could hope. I hand sanded it up to 1000 then epoxied on the scales:

I chucked up my small spindle sander attachment into my router table, slowed my router way down and sanded the scales to match the tang. That leaves us here:

I cut then 1/4" and 1/2" strips of sand paper, clamped the knife blade in my vise and rounded the scales over to where I like them. I sanded up to 1000, then coated it in boiled linseed oil and here we are:


On the next one I work a little longer on hand sanding the bare blade before putting the scales on to get the sanding grain I want. I think I will also leave a nub metal at the tip of the blade so that it isn't so easy to accidentally ruin the tip with lazy file stroke. I learned that trick from someone on here (can't remember who) but forgot to implement it. Well, there's lots I'll do different but I'm thrilled with this one so far. Hopefully I can get it to take an edge well. I will be using my Lansky 5-stone kit to set the edge, hopefully that goes well!
I appreciate any constructive criticism, thanks for looking!
Last edited:


")