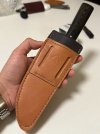
First leather sheath - kitchen table edition

fq55

Knifemaker / Craftsman / Service Provider
Joined
Feb 27, 1999
Messages
2,308
I actually had some time and decided to do something that had been on my list for years.

Make a sheath for one of my prized possessions. A PJ Tomes Clip Point Hunter that I carried on my second tour in Iraq.

The original sheath had stitching come come loose and was not in the best shape

Let me preface this by saying that I do not have the proper tools or materials and made due as best I could. I’m not thrilled with the results as the sheath is a bit ugly but in a way it makes sense.

I used one of Horsewright Horsewright sheaths as inspiration.

The material I used were 5.5oz Wickett & Craig tan English Bridle and Horween 2oz Roadmaster.

I just used what I had and at the moment this Bridle was the thickest Veg tanned leather I have on hand.


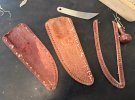
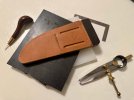
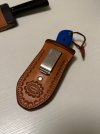
Here is my sheath I have from Horsewright
84AAB11E-9DE7-465B-AE2A-96DB5933B799.jpeg

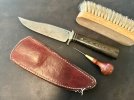
First thing I did was take the original sheath apart to use as a template.
C49A9217-BE52-4A88-8431-259D8D9A6273.jpeg

437DDF6C-5C66-451E-B2FE-0502E49154D8.jpeg

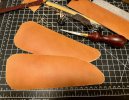
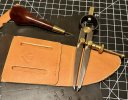
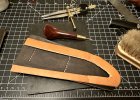
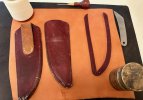
I didn’t know how good my tracing would be so I decided to trace on the flesh side. I traced only one side and used that as my template for the other panel.
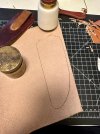
6B119511-FB58-43F8-A206-5F7843921DB3.jpeg

6FACD9FA-285B-4F66-B7C1-48625BDD3F8B.jpeg

I used a utility knife holder to cut the straight lines and a Warren Thomas Kiridashi for the round portion.
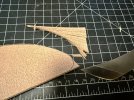
1E3E25D8-F71C-4BFE-A1E2-0CD97B8F486F.jpeg

Now for the lining I had some Horween roadmaster leftovers that I thought would work well. It’s a very soft distressed cow leather that hides scuffs well.
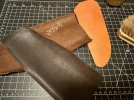
490CAFD4-4753-479C-B239-BDCC177ADFF1.jpeg

I don’t use barge cement and instead have used intercom eco stick 1816B with good results. Time will tell if it’s good for this application.
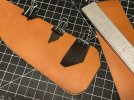
ABBD5ADB-2950-4A96-90F3-18EA3B342808.jpeg

I let this dry for a bit and to be continued down below.
 
Last edited:
So once the everything was settled I decide to make a simple crossdraw belt loop or pass through. I wanted it to be unobtrusive and low profile.

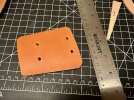
I don’t have belt loop punch so instead I punch four holes and hand cut out the space between them.

44C0A4FB-CA14-4122-97C0-731AB6F13BB4.jpeg19E53FE2-AB72-43EE-9686-7301FB0DE227.jpeg

When it came time to stitch this piece on I decided on hand saddle sewing. I don’t have a sewing machine or pricking irons that are long enough to punch through 6 layers of leather.

This was my major hurdle, and it’s something I really need to improve on.


AF173822-89BF-4E5F-859F-8405D60E8AF3.jpeg

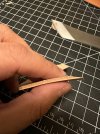
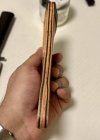
For the welt, the leather I had was not thick enough especially at the bottom to keep the tip from puncturing through the sheath. I decided to skive an additional piece to reinforce the tip area.

C100728C-D727-48BC-A051-0DCE50CC4393.jpeg59C7026F-85E1-43E8-BBC2-A236355377BC.jpeg

Once everything was fitted and glued together the nerve racking task of punching every individual hole needs to happen. In retrospect I should have taken more time to do it. It turned out well enough.

1AAEDC9A-BE47-4F1E-82C1-C59CCF5F0CCC.jpeg

And after a couple of hours and one broken needle it was time for the finishing touches. I decided on a simple sanding and burnish with tokonole.

And here we are.

61C56DAE-54C3-4634-9FB7-72F1484B027D.jpeg

2AF42443-6BBA-4FCC-8B70-6D8855284BDF.jpeg

I am more than open for tips and criticism, it’s one of the reasons I am posting. Would love any feedback that may improve my next results.
 
Last edited:
So once the everything was settled I decide to make a simple crossdraw belt loop or pass through. I wanted it to be unobtrusive and low profile.

I don’t have belt loop punch so instead I punch four holes and hand cut out the space between them.

View attachment 2106979View attachment 2106980

When it came time to stitch this piece on I decided on hand saddle sewing. I don’t have a sewing machine or pricking irons that are long enough to punch through 6 layers of leather.

This was my major hurdle, and it’s something I really need to improve on.


View attachment 2106999

For the welt, the leather I had was not thick enough especially at the bottom to keep the tip from puncturing through the sheath. I decided to skive an additional piece to reinforce the tip area.

View attachment 2106990View attachment 2106991

Once everything was fitted and glued together the nerve racking task of punching every individual hole needs to happen. In retrospect I should have taken more time to do it. It turned out well enough.

View attachment 2107017

And after a couple of hours and one broken needle it was time for the finishing touches. I decided on a simple sanding and burnish with tokonole.

And here we are.

View attachment 2107020

View attachment 2107022

I am more than open for tips and criticism, it’s one of the reasons I am posting. Would love any feedback that may improve my next results.
Well done! and that says it all. Excellent stitching and execution.
 
I certainly don't see anything to criticize and a whole lot to compliment! Your work is very nice. Great design, clean stitching, good edges, and functional. You checked all the boxes.
Randy
 
It looks great to me. I must say that for really thick leather, or multiple layers creating a rather thick piece, and assuming the thread spacing is not that tight, I have always drilled my threading holes with a 1/16" drill bit in my Dremmel tool. Works like a charm, and I do not have to "huff, puff an swear" making stitching holes with an awl.
Regards,
Raul
 
Well done! and that says it all. Excellent stitching and execution.

Thank you Sir, that means a lot coming from you.


I certainly don't see anything to criticize and a whole lot to compliment! Your work is very nice. Great design, clean stitching, good edges, and functional. You checked all the boxes.
Randy

Thank you. Appropriate the kind words.
 
I wish my first sheath looked that good! Lots going on there too.

Good job, love that diamond awl btw.
 
It looks great to me. I must say that for really thick leather, or multiple layers creating a rather thick piece, and assuming the thread spacing is not that tight, I have always drilled my threading holes with a 1/16" drill bit in my Dremmel tool. Works like a charm, and I do not have to "huff, puff an swear" making stitching holes with an awl.
Regards,
Raul

Thanks. That’s something I will try. I just got a Fallkniven S1 and will order some 10oz Russet Horsehide strips. I have some nice tools but they are more for thinner projects.

I’m also going to pick up stitching groover too.
 
Very nice job and do like your nice tools. Noticed them right away. On the stitching groover thats one tool where for me the cheaper ones work better. we've got several of the name brand tools and keep coming back to the $15.95 Tandy groover. They have two sizes and I have both. The wife has 2 or 3 of the smaller ones. We have set where we use them and don't adjust. We use this groover for that kind of project and that groover for this one.
 
So once the everything was settled I decide to make a simple crossdraw belt loop or pass through. I wanted it to be unobtrusive and low profile.

I don’t have belt loop punch so instead I punch four holes and hand cut out the space between them.

View attachment 2106979View attachment 2106980

When it came time to stitch this piece on I decided on hand saddle sewing. I don’t have a sewing machine or pricking irons that are long enough to punch through 6 layers of leather.

This was my major hurdle, and it’s something I really need to improve on.


View attachment 2106999

For the welt, the leather I had was not thick enough especially at the bottom to keep the tip from puncturing through the sheath. I decided to skive an additional piece to reinforce the tip area.

View attachment 2106990View attachment 2106991

Once everything was fitted and glued together the nerve racking task of punching every individual hole needs to happen. In retrospect I should have taken more time to do it. It turned out well enough.

View attachment 2107017

And after a couple of hours and one broken needle it was time for the finishing touches. I decided on a simple sanding and burnish with tokonole.

And here we are.

View attachment 2107020

View attachment 2107022

I am more than open for tips and criticism, it’s one of the reasons I am posting. Would love any feedback that may improve my next results.
Very nice work! I drill the stitching holes with a 1/16" drill instead of punching them through.
 
Back
Top