- Joined
- Dec 13, 2008
- Messages
- 2,986
We were playing around yesterday whiel making a rasp hawk and decided to take some pics. This is the traditional way tomahawks/trade axes were made. When we say the wrap and weld method this is what we mean.
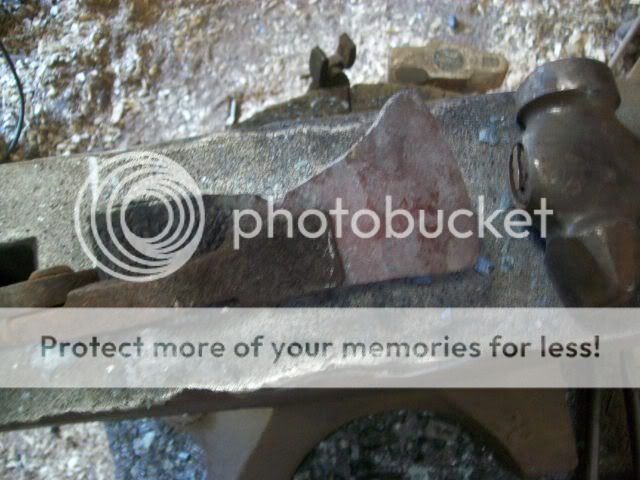
We start with a rasp, cut off the 10" long and folded over on itself. You can also see a wedge shaped chunk on 1095 laying there for the cutting bit.

Next we see the hawk roughly formed with the bit between the cheeks.

Next we see the hawk being heated for its first welding pass. We use straight borax for flux. You can see the hawk under the coke there if you look.

This is the hawk after the first welding pass. Not completely welded but on its way.

To me this is an important step. We forge in the notch. It could easily just be ground in but when you forge in a notch you know right then waht kind of weld you have. If its not a good solid weld it'll bust apart in a second. It make be ground out clean later but we always do this step.

Then after forging out the blade we do another important step. Upsetting the blade edge. We hold the hawk with a large pair of tongs while doing this. Someone usually says "You cant hammer on the end of a welded hawk like that without busting it" To which we usually say "If its welded right you can hammer on it anyway you want" Then I get the stink eye Anyway, it is another test of a good weld. Draw it back until you have wide enough blade. You have to use a hammer to draw it back because wrapped and welded hawks/axes are lighter and thinner so you need the added control of the hammer. We use a light two pound hammer for this part.
This hawk has a 1095 bit so we harden in *125-*140 peanut oil and temper. Clean it up a bit and it looks something like this..

We start with a rasp, cut off the 10" long and folded over on itself. You can also see a wedge shaped chunk on 1095 laying there for the cutting bit.
Next we see the hawk roughly formed with the bit between the cheeks.
Next we see the hawk being heated for its first welding pass. We use straight borax for flux. You can see the hawk under the coke there if you look.
This is the hawk after the first welding pass. Not completely welded but on its way.
To me this is an important step. We forge in the notch. It could easily just be ground in but when you forge in a notch you know right then waht kind of weld you have. If its not a good solid weld it'll bust apart in a second. It make be ground out clean later but we always do this step.
Then after forging out the blade we do another important step. Upsetting the blade edge. We hold the hawk with a large pair of tongs while doing this. Someone usually says "You cant hammer on the end of a welded hawk like that without busting it" To which we usually say "If its welded right you can hammer on it anyway you want" Then I get the stink eye
Anyway, it is another test of a good weld. Draw it back until you have wide enough blade. You have to use a hammer to draw it back because wrapped and welded hawks/axes are lighter and thinner so you need the added control of the hammer. We use a light two pound hammer for this part.
This hawk has a 1095 bit so we harden in *125-*140 peanut oil and temper. Clean it up a bit and it looks something like this..
") Its just a bare bone tutorial, next week when lisa is working on one ill take good pics of the whole process..
Its just a bare bone tutorial, next week when lisa is working on one ill take good pics of the whole process..