Recommendation? Forgot to drill pin holes before HT

Do you drill pin holes before HT?


  • Total voters
    24
Joined
Sep 22, 2017
Messages
28
Hello forum members. First, let me say thanks to anyone who has contributed to these pages. I have absorbed a huge amount of information here and I hope I will gain the experience to help other beginners. That being said, I am a beginner myself. I have practiced some grinding and drilling on mild steel. I have a 1x30 with the Norton belts. No problem with the grinding. I also have a 5 speed bench top drill press. Again, no problem with the soft steel. Start with a punch than drill with a center drill. Step up to a 9/64 bit followed by a #24. Then I ream with a 5/32 carbide reamer. Perfect fit for my 5/32 SS pin stock. Practice went well and I moved on to a 5/32” piece of 01 ground flat stock. All good, nice shape, feels great in hand. Sharp alignment of plunge lines. Finished it down to 120 grit and anxiously did a HT in a forced air hardwood charcoal setup. Magnet test. Go a little past then quench in fresh canola oil. Passed file test and on to temper. Two 2 hours cycles in oven at 425 with cool in between. Everything looks and feels great. Feeling proud. Then I go to drill the pin holes. Darn it! Broke two center drills and barely made a divot. Tried carbid bits, diamond bits. No go. So, now I realize I probably should have drilled the holes before HT. So, here lies my question. I was planning on annealing the blade again by bringing just to magnetism loss and then turning off the air and letting it cool in the coals. Then I was going to drill the holes with the #24 and re-HT and temper. Once done, I plan on reaming with the 5/32 for sung pin fit. Will that work or should I ream before HT. I am worried the holes will change. Any advice, criticism or tasteless jokes will be appreciated.

Thanks
 
I think you are over thinking it. You want a nice press fit for pins, but this can be done with the right drill bit. For instance, I use a letter f bit for 1/4" pins. To answer your question, YES, drill before HT.
 
If you don't mind spending $30-40 on a drill, order a 5/32 either MA Ford twister hiroc, or a 5/32 square die drill from KBC tools or another machine shop supplier. They'll both happily drill through a file, and leave hole not far behind a reamed finish.

For things like this I wouldn't bother reaming though. If anything a hair oversized wouldn't hurt. Holes generally end up shrinking in heat treat (I'm talking tenths to thou, but it happens) and more importantly pin stock is often oversize. You'd be surprised how often 1/8" nominal pin stock is really a few thou oversized
If I drill anything other than nominal, its a letter or number drill of the next size up
 
Definitely before HT. Why wouldn't ya. F drill for 1/4" pins and #30 for 1/8" pins. Good to go. I also use a step drill to make lightening holes in the tang that are predrilled with a #30. I make lots of different knife models and standardized some years ago on just the two pin sizes. Helps keep life simple instead of having 4 or 5 different sizes. Also gave me more shop space. Went from 5 different drill presses to just two.
 
Thanks for the fast replies. I will definitely be drilling my holes before HT from now on. I looked up the MA drill bits and will definitely consider them in the future. For now, I was hoping my annealing approach would work. What do you guys think? Is what I described a good plan of attack or should I just hang the blade on my bench as my first lesson learned? I do want to experiment a little but if the re-anneal and HT will just make a crappy knife I will start over. Thanks again.
 
While not standard procedure I'd try a ghetto version of annealing with a small torch in the localized area where you need to drill. You can wrap a wet towel beyond where you heat to keep the heat from traveling.
I'd do it before I gave up on it.
 
I hold the blade under water and heat the blade with a propane torch when I forget. I'm using 1084 and it work fine for me. Don't know how well it would work on a air hardening steel but that doesn't sound like what you are using anyway.
 
People try to make the tang holes a snug fit. The only place it needs to be a perfect fit is the scales. It is actually beneficial to have the tang hole about 25% larger than the pin. This allows for misalignment and some room for epoxy to be in the hole to act as a shock absorber. Also, your scale material may lengthen of shorten due to temperature and humidity. hat was a perfect fit when drilled may be a few thousandths off when assembling.I drill my tang holes nearly 50% oversize most of the time. The first time you go put in a front pin and then can't get the second and third pin through the tang you will understand the reasoning.

My tang drill recommendations are:
3/16 for a 1/8 pin
1/4 for a 3/16 pin
 
I agree with Stacy, tang holes can be oversized, the epoxy takes care of the slop.
As far as driiling a hardened tang, I agree with those using a torch to anneal while keeping the blade cool. If you try this, make sure you don't heat the tang till it is red. My experience O1 is it will harden past machining hardness very easily. I've found that when cutting O1 with a band saw, if I stop and try to start again, I've created a hard spot at the end of the cut and have to complete the cut from the far side. This also holds true with drilling at higher speeds, stop and it won't start again.

IF you are good with a cutting torch, you can blow holes for the pins and grind them round with a carbide burr in a die grinder. Not recommended for the weak at heart.

If you are a patient person, you can take a small ball carbide burr in a Dremmel tool, tilt it say 45° and grind a crater in the tang on one side. Then flip the blade over and do the same from the opposite side until you break through. Then take a conical carbide burr and enlarge the hole. Run circles around the edges. If you try to use it like a reamer, it will crab and stop the rotation.

Don't feel bad about forgetting to drill the holes before heat treating, most, if not all of us have missed at least one hole if not all of them. Otherwise we wouldn't have all these suggested fixes.
If you have a bladesmith in your area, you might ask for his or her assistance, most are happy to help.
Good luck.
Jim A.

;) 67 Hrc HSS steel
2zg4z90.jpg

2vjuexf.jpg
 
You can also use masonry bits from your local hardware store. They are cheap so buy several as ya might break one or two but you will get your holes drilled.
 
Good morning all. Thanks for the wealth of information! I have added a lot to my arsenal of knowledge. I was able to get the holes drilled with a $4.75 carbide tipped masonry bit chucked up in the drill press. It cut right in and drilled the holes no problem. I got a nice satin finish on the blade last night up to 400 grit and put a nice sharp edge on it. I plan on working the scales out tonight. Thanks again for all the advice.
 
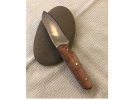
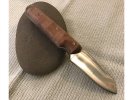
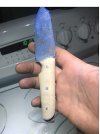
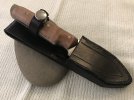
Hello all. I really appreciate the advice. I learned a lot during this first knife process. It did not come out perfect but I am very pleased with the outcome. I feel really confident that this hobby will give me years of satisfaction and enjoyment. I included some pictures of my first knife and custom sheath. Let me know what you think.
20DBA21B-E7E0-4E2F-8CF9-9A64C0C167DA.jpeg D11CE498-A130-464A-82CA-B08689BB9CEB.jpeg 0A826916-FDF1-469E-A3E4-F27FC98BDBE0.jpeg 90B22F4B-8A10-421C-B1C2-B1C8D40DC2F6.jpeg
 
Last edited:
Sheath is very impressive for a first effort. But the placement of the retaining strap may let knife slip up too far. Alternative would be to put strap where handle is cut away for index finger.

Working with another maker is best source of info for a beginner, but hard to set up. Second best source is internet. Look at "Stickies" at top of this forum. Search Google for knife making tutorials, knife grinding, sheath making, etc. Also search You Tube. Seach Google for "knife images" and more specific topics to see pictures of knives. Looking at the work of others will give you ideas of how you can improve and show you designs you might like to try. There is a "Sheath" forum here on Bladeforums, which I find helpful. Always remember there is no one best way to make a knife. Keep learning and keep experimenting.
 
Back
Top