Bühlmann
North Lake Forge
- Joined
- Jan 6, 2022
- Messages
- 475
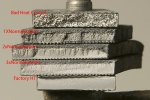
I had a little W1 I wanted to use to make an inexpensive starter file guide for plunge lines. Measured 2” between machine screws.Took it to critical temperature in my little gas forge and quenched in room temp water. Upon cleaning up I saw tons of fine linears at the surface and a few that clearly wrapped around the edges. I was pretty certain I was doomed, but I finished up and tested hardness with my file set. The 65 HRC didn’t scratch a bit. Cool. Put it on a scrap piece of 1075 stock to test with a round file to make a practice plunge. As soon as I put the tiniest amount of even torque on the screws she snapped. Dammit. Oh well. Below is a few pics of the grain structure I thought I’d post to try and learn what anyone may say about the size and disposition of the grains. Pure curiosity on my part, as I’m totally cherry on destructive testing. Let me know the good and bad:
Pieces are around 0.75” wide by 0.25” thick.
Pieces are around 0.75” wide by 0.25” thick.
Last edited:


