jdk1
Gold Member
- Joined
- Apr 21, 2010
- Messages
- 2,057
Hopefully this is the right place to post this. Anyway, I've made a few khukuri sheaths. The first was crap, but worked. The second looks alright and actually works well. I recently traded into a Tops TB1 Tracker, It came with a decent sheath, but I wanted one of those dandy looking scout sheaths. I didn't want to have more cash tied up int the sheath than the knife. So, I made my own. I used scrap I've accumulated. Some graciously provided by Dwayne, of Armorall Leather, a few years back.
I went with the general design of what seems popular. It involved using several techniques I've not used before, including wet molding. After a little research, I found it simple and straight forward. I also encountered a problem, such is life right, but figured out a solution. That's actually a fun part of making your own stuff.
I began by making the paper "model".


It's hard to see the tracing on this. I do it with pencil for the inevitable mistakes.

I apologize, I got busy and forgot to document a few steps. Anyway, here's a wet molded sheath being glued. Of course, there is a welt in there. Hopefully enough of one! It takes very little water to wet mold. I found a guy on the 'Net saying to soak for 20 minutes. That'll make leather soup. I just got the tap hot and ran it over each side of the leather. Worked like a charm for me. While shaping, I would apply heat via my wife's hair dryer. I would also stick it into the toaster oven on very low, like 150 degrees, while working the areas I wanted fitted. It worked outstandingly well. Too well. I'm still trying to loosen it up!

Oops, those clamps leave nasty marks on wet leather. Crap!

Luckily, I also realized the sheath I was making was way to thin for a 1/4" thick Tracker. It just didn't feel right at all. So, I grabbed a thick piece of scrap and made a "vest". Note: this piece had a number stamp from the factory and a nasty fold (probably why it was in Dwayne's scrap pile), but I kind of like the character it added, as I knew my finished product would be a little rough anyway.

Glued and sewed. I left places to drill holes for chicago screws to secure the belt straps. BTW, all my stitching is by hand with two needles, and not pretty. The back is worse as it's impossible for me to get the awl through 1/2" of leather straight. It's a real PITA for anyone who hasn't done it.

Did i mention I skipped documenting a few steps? Well, I trimmed the edges as best I could (I don't even have an edger) and sanded things a bit (by hand). Tried to burnish the edges and welt. I just use water and another piece of leather to rub. My tendons are killing me. It's finished with a few light coats of Saddle Butter. Again, the hair dryer works wonders for heating the leather and allowing this stuff to soak in.

Notice the retention strap. The "1/4 round" on the WSK design is a strap cutting SOB! I had to devise a free falling strap using a metal strap keeper loop. Works like a charm so far.
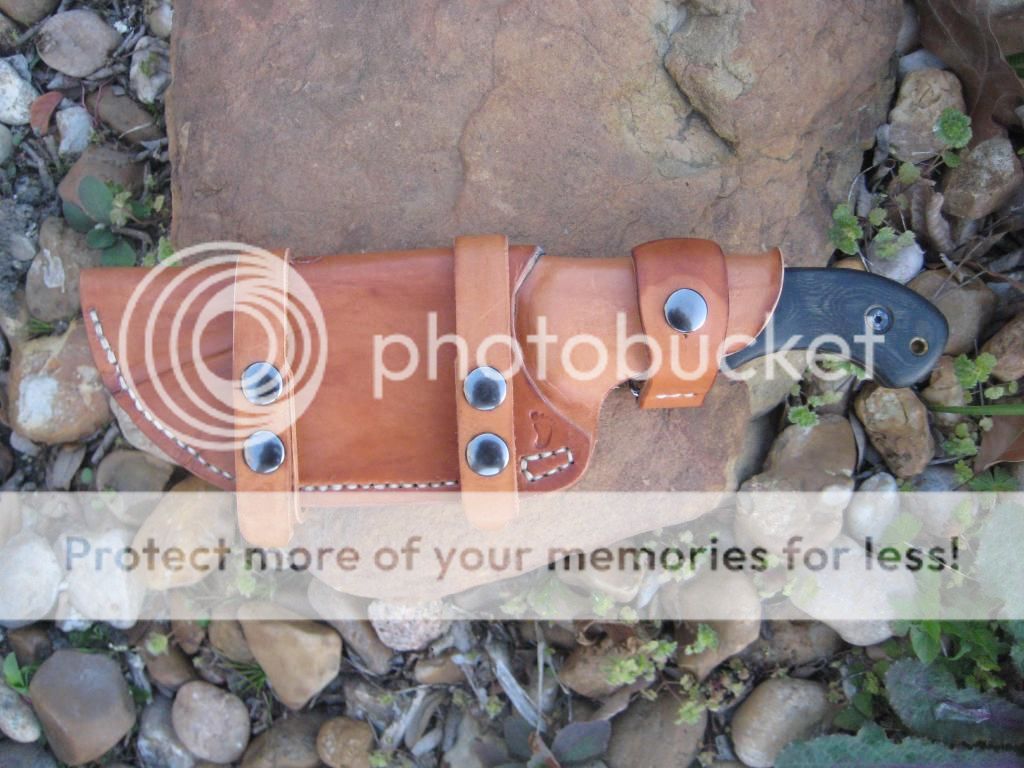
Top, with cheesy number stamp!

Bottom.

Final thoughts: it works well, but is a little rough. Between work and kids, I don't have the time or energy to put too much effort into this stuff. It is fun though, for a while, then you're just ready to get finished! One problem I have is the handle is so heavy the sheath tilts on the belt. My buddy has one of the expensive big name Tracker sheaths and says his does the same. I've worked a solution out in my head, but have to wait to fix it. I'll try to update the thread when I do. I hope y'all like it. Thanks and take care.
I went with the general design of what seems popular. It involved using several techniques I've not used before, including wet molding. After a little research, I found it simple and straight forward. I also encountered a problem, such is life right, but figured out a solution. That's actually a fun part of making your own stuff.
I began by making the paper "model".
It's hard to see the tracing on this. I do it with pencil for the inevitable mistakes.
I apologize, I got busy and forgot to document a few steps. Anyway, here's a wet molded sheath being glued. Of course, there is a welt in there. Hopefully enough of one! It takes very little water to wet mold. I found a guy on the 'Net saying to soak for 20 minutes. That'll make leather soup. I just got the tap hot and ran it over each side of the leather. Worked like a charm for me. While shaping, I would apply heat via my wife's hair dryer. I would also stick it into the toaster oven on very low, like 150 degrees, while working the areas I wanted fitted. It worked outstandingly well. Too well. I'm still trying to loosen it up!
Oops, those clamps leave nasty marks on wet leather. Crap!
Luckily, I also realized the sheath I was making was way to thin for a 1/4" thick Tracker. It just didn't feel right at all. So, I grabbed a thick piece of scrap and made a "vest". Note: this piece had a number stamp from the factory and a nasty fold (probably why it was in Dwayne's scrap pile), but I kind of like the character it added, as I knew my finished product would be a little rough anyway.
Glued and sewed. I left places to drill holes for chicago screws to secure the belt straps. BTW, all my stitching is by hand with two needles, and not pretty. The back is worse as it's impossible for me to get the awl through 1/2" of leather straight. It's a real PITA for anyone who hasn't done it.
Did i mention I skipped documenting a few steps? Well, I trimmed the edges as best I could (I don't even have an edger) and sanded things a bit (by hand). Tried to burnish the edges and welt. I just use water and another piece of leather to rub. My tendons are killing me. It's finished with a few light coats of Saddle Butter. Again, the hair dryer works wonders for heating the leather and allowing this stuff to soak in.
Notice the retention strap. The "1/4 round" on the WSK design is a strap cutting SOB! I had to devise a free falling strap using a metal strap keeper loop. Works like a charm so far.
Top, with cheesy number stamp!
Bottom.
Final thoughts: it works well, but is a little rough. Between work and kids, I don't have the time or energy to put too much effort into this stuff. It is fun though, for a while, then you're just ready to get finished! One problem I have is the handle is so heavy the sheath tilts on the belt. My buddy has one of the expensive big name Tracker sheaths and says his does the same. I've worked a solution out in my head, but have to wait to fix it. I'll try to update the thread when I do. I hope y'all like it. Thanks and take care.
Last edited:
")
 I showed this to my buddy and he said, "you could sell these for $65 as a rough finished option and sell a ton". I'm thinking, "that works out to about $2 an hour for me!" That doesn't even account for any supplies! No thanks! I do, however, highly recommend anyone who's interested in this stuff to buy some basic tools from Tandy and give it a try. It can be very gratifying to make something with your own hands. Thanks again and take care.


")