How do I make a quality Saya?

Joined
Feb 5, 2010
Messages
3,911
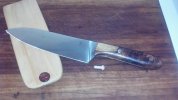
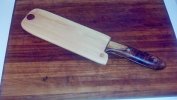
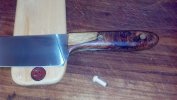
I just finished the second (of two) kitchen knives for my left handed chef buddy. I'd like to make a nice saya for the one I just completed. I bought the nice natural saya slabs from Burl Source when they were offered, and I have a GENERAL idea of how this is done... but I don't want to ruin the wood with my half ass general idea. I'd like some tips from those who know more than I on the matter.

So please, can someone give me some tips on making a quality saya?
 
I've only made one, and it turned out ok. I just used 1/8" bass wood from my local hardware store. I cut three pieces so they were long enough to cover the blade. I then took one of the pieces and traced the blade shape on it. I cut out the blade shape and then glued all three of them together. I had wanted to take two thicker pieces and use a router to cut away the slot for the blade, but my router skills are not so good. I'm looking forward to trying it again when I build another kitchen knife. I would love to see pictures when it is done.

2013-12-10_14-44-59_940.jpg2013-12-10_14-43-33_497.jpg2013-12-10_14-47-20_485.jpg
 
I need to make a saya for some of my kitchen knives.
I will try to take some photos and post how I do it.

Greg,
If you mess up, let me know and I will send you some replacement wood.
 
afaik, Eamon Burke has been inactive in knife world for almost a year now ...


Goes to show that time flies. I could have sworn it was just a few months ago that I'd talked to him about sayas. Thanks for the heads up, I'll have to stop recommending him. :D
 
the absolute easiest way is to use three pieces of wood. a thin center section and two sides. trace around your knife leaving about 1/4 inch of wood around the blade. taper the center piece of wood from spine to edge leaving the spine just a tiny bit thicker than the spine of your knife. trace your knife onto this again and cut out the center so the knife just fits into it. you want the saya to come past the heal of your knife far enough to put a pin in it. glure the three pieces together and sand to final shape/dimension. I like the saya to be fairly thin (about an 1/8th per side) and reasonably close to the shape of the knife.

alternately you use two pieces of wood and carve the knife shape out of one or both sides then glue together and shape.

P.S. sand carefully and use a good wood glue and the seem will be all but invisible.

Thanks, Bill. I really appreciate the advice. Clear, concise, and seems easy enough to follow. I am emboldened to give this a try.
 
For kitchen saya, I use three pieces of wood, too. Somewhere around is an old tutorial I posted on doing it.
 
These may show a three-piece saya fairly clearly:

The one-piece "welt" is exactly the same thickness as the blade. The pins are tapered as are the holes they fit into.


-Peter
 
Additionally, wood choice is important.

Use acid free wood that is dry.
The wood should not be hard or it may wear the edge. The center layer is the important one...make it soft.

Bass wood works well for a kitchen saya. Ho is the traditional wood, but not readily available in the USA. Alder works well and is not hard to get. I also have used holly and magnolia.
If using stabilized burl woods, add a thin liner layer of bass or something on each side of the blade.

Avoid oak and similar acidic woods.
 
Additionally, wood choice is important.

Use acid free wood that is dry.
The wood should not be hard or it may wear the edge. The center layer is the important one...make it soft.

I'll be using natural (unstabilized) tiger maple obtained from Mark for the outer layers. I haven't picked the inner layer yet.
 
Would natural myrtle wood be a good choice for the center slice? I have an old dry slab of that laying around.
 
Assuming (as I always do) that I'm correct that Myrtlewood is a good choice, I have sliced off a piece and sanded it down to size. I have also book matched the side pieces, so they will look right when assembled. Unless someone pipes up and says "STOP! Myrtlewood will kill the edge!" I'll probably assemble it later this afternoon.
 
Those woods should be Ok. My only thought is that tiger maple only developes its stripes boldly by being reacted with an acid mixture. This will put an acid into the wood....exactly what you don't want. If you are just using it as is, then it may take a little work to get the stripes to show. After sanding to the final grit, burnish/buff to caramelize the sugars in the wood stripes.
 
I'm not so concerned about getting the stripes to show. I'm more concerned about making a proper saya.

Thanks, Stacy.
 
P.S. sand carefully and use a good wood glue and the seem will be all but invisible.

Good point about the glue.
This is one where I used epoxy and you can see the joints. There are other mistakes as well.
It bugs me to look at it so I will be making a replacement soon.
002_zps3332285d.jpg
 
Back
Top