How to get my knives/swords sharp?

Joined
May 9, 2022
Messages
1
Hey all! I have been making knives for a month or so, but I have been picking it up pretty quickly. I have figured out how to cut, shape, harden, temper, and finish my knives. I have struggled with a few things, however. The major issue I am having is my inability to get my blades to be really sharp. Sure, I have cut myself with a katana (a very small one) that I made, and that cut was clean and made me proud of myself, but I don't know how to get the blades to be incredibly sharp. I have tons of sandpaper, I have different sanders (orbital, belt, etc.), I have a dremel, I have an angle-grinder, honing-rod, file, etc., but I can't get this figured out.

Also, I am talking about sharpening knives that have already been heat-treated.

Thank you all, and God bless!

P.S. Have any of you figured out how to make damascus without welding? I thought about wrapping pieces in some kind of steel wire, putting it all in my forge, and welding it that way, but I don't know if that would be the best way to go about it.
 
I sharpen my knives on a variable speed belt grinder that's slowed way down, and I have also used paper wheels on a buffing arbor.

What are you using to establish your primary bevels/grinds?

There's always a good old fashioned bench stone. ;)

As for making damascus/pattern welded steel without welding your coupons together first... I believe most guys just wrap it tightly with a stainless wire. That said, 110V stick welders or flux core wire welders are dirt cheap now days. Even brand new, I think they're well under 200 bucks at your local Harbor Freight or big box store, and I just found several on my local Facebook market place for less than $100 used.
 
Whetstones. You have to take time to get good consistent geometry before you start sharpening, with it quite thin at what will be the top of the secondary bevel. Grind in the secondary bevel on a coarse stone, keep going using finer stones, and strop when you think it's done. (then usually go back a couple of grades because you missed something)
For a chef's knife I find a good cheat is to grind the primary bevel it until the edge starts deforming/chipping, then take the secondary bevel back until it's stable in use.

I've successfully forge welded two pieces by sitting one on top of the other. If you keep doing that you'll have damascus, but it might be inefficient (arguably appropriate for damascus).
Didn't the traditional Japanese approach use sheets of paper and clay?
In your position i would save up for a welder
 
OK, let's talk about sharp.
Most folks can get a blade sharp - You can use a rock to do that - What escapes many new makers is the ability to get a blade sharp enough to be "Really Sharp" or "Scary Sharp".

So, here we go:
1)
The WIRE - A sharp blade is often hiding behind the edge burr called "THE WIRE". This is especially true on blades worked on belt grinders and one direction sharpeners. The edge gets thinner and thinner until it starts to bend over whenever pressure is applied. To remove this the edge is STROPPED on a leather board charged with a fine compound like green chrome. Five to ten strokes at an angle a bit higher than the blade was sharpened at and the "wire" will pop off, leaving a very sharp edge. Use a fair amount of down pressure when stropping. After stropping, remove any remaining wire by cutting through a piece of card stock or light cardboard a few times. You will feel the knife suddenly become much smoother. I use old postal advertising mailers. If you have a friend who works in a business that sends out advertisements, they may give you a box of hundreds of these left over from a mailing campaign. I cut up an entire 4X6" card into many strips after sharpening every knife. This improves the cutting immensly.
2) Edge and bevel shape - The old saying is "GEOMETRY CUTS" This is a simple statement that escapes most new makers. The shape of the entire cutting surface is part of how sharp the edge gets. They make an edge that is far too thick before sharpening and far too high in angle.
When I was a newer smith, I made a friend a large fillet knife for rockfish. I asked him how it worked. He said, "It worked very well once I put an edge on it." I had sharpened it until I thought it was very sharp. He told me, "Yes, it had an edge on it, but it was way too thick and blunt angled." He took it to his stones and reduced the Thickness Behind the Edge (TBE) and then resharpened it at around 10 degrees per side. It cut many fish before needing to be resharpened after that.
3) Edge smoothness - Looking at the edge with a 10X loupe, or a 30X microscope may show the edge looks like a photo of the Rocky Mountains. Using reducing grits and harder surfaces will slowly wear down the ridges until they are plains. Smooth and even edges are what cuts. Many people use grinders and sandpaper to put on an edge, and that may get it shaped to the right thickness and shape, but you have to remove all those micro-serrations to get it really sharp. This is done either by using water stones, finer belts, and hand sharpening on strops and other surfaces ... and finer and finer compounds and grits. Some folks take this to an extreme degree and end up with 50,000 mesh diamond paste, but for most knives a final grit of around 1000 and a stropping using something equivalent to 8000 (green chrome, white rouge, red rouge, etc.).
If using the belt grinder, use the flat platen, very slow speed, and a fresh belt to sharpen a knife. The slack belt if OK for final sharpening if you like a slight Apple-Seed grind, but for true scary sharp you want a hard and flat surface behind the abrasive. If using papers, place them on a granite surface plate or sheet of glass. If using felt or leather, get the hardest grade you can (Horse Butt leather is the best).
4) Finally, equipment and methods - As I said, a rock will sharpen a knife, but to give i a good long-lasting edge, you have to have some things in place. First, sharpening speed is critical. Let me rephrase that ... sharpening slowness is critical. Using a bench grinder, angle grinder, non VS belt grinder, or other fast-moving system is going to destroy the edge. Maybe not so much that it turns blue, but it will create issues in hardness and stresses that will affect the final outcome. So, slow it down. Variable speed tools slowed down to the lower end is what most folks do. The real purists only use hand sharpening to avoid ruining the edge that they spent so much effort to forge and HT. Same goes for stropping. paper wheels are popular with some folks (not my favorite) but used wrong they can damage the edge more that they improve it. The 3 main rules are simple - Go slow, take your time, and go slow.
Keeping a constant angle and moving the edge across the sharpening surface at an even speed are also professional techniques.
A proper sharpening of a katana is considered a task to only be done by a Togishi with decades of experience by many people. I am not one of those people. If it is a National Treasure, sure, send it to a NBTHK listed professional, but if it is a sword that you or another normal smith made, you can do it yourself. The trick is taking your time. A proper sharpening, be it knife or sword, takes time. A quick edge can be put on in 60 seconds on a VS grinder with a 220 to 400 grit belt by an experienced smith. This is what I do for most kitchen and fishing knives. When I want a really sharp edge, it takes up to 10 minutes an inch.
5) Jigs and Fixtures - We all see lots of special jigs and things to sharpen knives. Most of us have bought several of them. These can run from $50 to well over a thousand dollars ... plus the stones and abrasives needed. They don't have any magic and don't do anything you can't do for less that $100 worth of DMT stones and practice. Most won't hold a candle to a well sharpened knife on water stones. Learn to do it by hand first and the machines will make it easier. Try to let a machine do it before you have spent the time learning to sharpen is just wasting both time and money. If going into the sharpening business, special tools and jigs make for consistency, but as a hobby maker they make you a fool most of the time. Most of the pricey systems - Pro-sharp, Lansky, Wicked Edge, Apex, Tormek, etc. just do a mediocre job. It is the users skill that makes them work. Buy them if you want, but don't expect them to do the work for you.

I suggest a newer smith get of 8" or 10" DMT stones/plates in four grits. Extra-Coarse, Coarse, Fine, and Extra fine. The Duo-Sharp combo stones are the best bang for the buck. Get the base holder for the stones/plates, too. That plus a leather strop and a a stick of green chrome will sharpen knives for the next 20 years. Probably $150-$250 total. They sell the set as a package with the base for a little over $200. (search DMT 10" package. Here is just one hit - https://www.sharpeningsupplies.com/...aspx?msclkid=db3cafe0d05911ecb5b2b7f9d9dd8030)
Buying expensive waterstones when you are just learning is like buying a Corvette to learn to drive. It will cost you a lot and teach you very little. While waterstones may be the Rolls Royce of sharpening, DMT stones are the Chevvy Trucks.

There is more than this, but if you follow these simple principles you will learn the rest pretty much automatically.
 
You got all the advice and some more from Stacy. I learned to sharpen with a 20 dollar water stone (1000/3000) from Amazon and YT videos before I started to make knives. In hindsight a 400/1000 stone would have been better and faster. Take your cheap kitchen knives and once you get better do it for your friends, family and so on. You will learn to hold the angle and this will come in handy when grinding the knives as well. Stropping can be done with and old leather belt or a piece of cardboard as well. You can "load" your old leather belt with the slurry from the water stones. I rarely use the stones these days, but they still come in handy and will last you a life time if used and taken care of properly. Buy the largest stone you can afford. 8x2" is a good starting point.
 
I rarely use the stones these days, but they still come in handy and will last you a life time if used and taken care of properly.
I'm curious what you use instead of stones? I'm mostly using diamond stones these days for convenience...
 
I'm curious what you use instead of stones? I'm mostly using diamond stones these days for convenience...
I sharpen on the grinder now and at home I use a 400/1000 diamond stone. I have a 1000/6000 water stone and a natural water stone in 2000-3000 range that I use rarely. My old water stones I keep in my parents place so I can sharpen their knives as well.

I would like to build something similiar to a Tormek arm or Nathan's hanging jig for the grinder to be able to evaluate the performance of the grind/steel at different angles better. But I am not sure of the real performance gains without serious testing (which currently I have no time for).
 
practice practice practice. It's something you have to do a lot in order to get good at it, regardless of your methodology
 
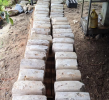
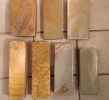
I didn't get good until I went to Thailand and started sharpening a big, cheap knife/machete using a local natural stone. They vary a lot. Here's some various stones. I brought back a couple big ones, sort of medium grit (see pic). There's a long video here ... not so much about sharpening but showing how the various rocks behave. However, you can see the back and forth method (rock and roll) of sharpening which is good for convex knives, IMHO.


1652215124167.png

Lots of different grades ...

1652215171087.png
 
I watched a lot of videos from Burrfection on YouTube. His earlier stuff was great, but his newer stuff doesn't interest me as much. Here is my simple guidance.

1. Pressure - not too much, but not too little. More on trailing strokes and less on leading strokes. More when you start setting the edge, and less as you get close to sharp.
2. Angle - don't over think it. Just hold the same angle, be consistent, and follow the curvature of the blade profile. You have to be a little more aggressive near the tip on blades with a belly.
3. Burr - don't switch sides until you can feel a consistent burr along the full length of the edge. Learn what the burr feels like on your thumb/fingers. After one side is done, do the same on the second side.
4. Burr removal - once you got a good burr on both sides (one then the other) do single passes on alternating sides. Reduce your pressure as you go. Work that burr from side to side until it is gone.
5. Grits - don't go too high. Start coarse, and make the knife SHARP on the coarse grit before you move on. 1000 grit stones are a good stopping point, but coarser will leave some teeth in the edge that in some cases is better than a fine polished edge.
6. Strop - finish with a few edge trailing passes on a leather strop (leather glued onto a flat surface with some compound on it). This will clear off any remaining burr and leave the edge screaming sharp.
7. Check your work - as you progress, look at the edge straight on, and feel it with your fingers, gently. Look for reflections, or changes in reflections. Feel for burrs or bite in the edge. Cut some newspaper and make sure it passes through effortlessly and makes a clean, consistent cut over the entire edge. Bonus for push cutting (no slicing motion).

Be safe!
 
I have been into sharpening since I was a kid and I got a bit carried away with the fundamentals that I think are important and I have to split this into 2 post because I reached the character limit.

Focus on what you are really trying to do. No matter what method you use the goal is always the same. You can break down edges into basically 2 types that also have sub -types. There are some blades that use a secondary bevel and those that follow a primary bevel. From there you have symmetrical, edges meaning that the edge apex is on center and asymmetrical edges. Asymmetrical edges can mean that the edge is placed off center but still has a double bevel such as a 70/30 grind or they can be placed completely to one side like a chisel grind. There are valid reasons for all of them and understanding how they work with guide your sharpening.


Knives that do not have a secondary bevel will allow you to use the primary bevel as a guide and it is layed flat on the stone. You might run into something that has both options available. It doesn't affect what you are trying to do and so long as you understand what you are sharpening you can fiind what works for you and your equipment.


The basic goal when sharpening is very simple although at times can be harder in practice. With any sort of cutting implement 2 angles will be ground to the point where they intersect. I would recommend reading about the testing that Larrin Larrin has done at his Knife Steel Nerds website. When you sharpen there are 2 things to keep in mind.

1. The blade itself. This takes in the material its made out of, the way it has been constructed including heat treatment and current condition etc.

2. The intended use.

I will talk about things to consider at the end.


Sharpening is often made over complicated and it isn't that hard to get something sharp. You just need to grind away material until it forms an apex. There are a few common ways that people use to know if they have reached the apex. Some find it helpful to use a sharpy to black out the bevels to make where it contacts the stone visible. The more useful method is to grind until a burr can be felt on one side. Honeing is basically just very careful grinding. If you see a piece of metal where the edge has been freshly cut or ground you will see foil like burrs at the edge. While it isn't usually visible to the eye the should be felt. When the steel gets harder it can form less or even no burr. Pulling the edge across a thumbnail can help detect very small burrs. Depending on how you sharpen and the actual blade you may notice that a burr forms in some areas faster than others. Since the edge gets thicker as more material is removed it is best to stop as soon as an apex is formed and if one area is taking longer it's a good idea to just address that area until the entire edge has been brought to an apex. At this point you need to remove the burr. This part is often called stropping but the goal is the same. People tend to think of stropping as what you see in old movies with a guy getting ready to shave. A knife and a razor are not the same thing. Razors tend to work with a wire edge and the edges are to fragile for most cutting task. There is nothing wrong with using a leather strop but you have to be careful to not let the leather be depressed and to bulge up and at that point it is also polishing the tip of the apex. This tends to lead to an edge that has a mirror polish and looks sharp but doesn't cut well. My preference is to use a softwood strop. I dress mine with green chrome polishing compound like is used with a buffing wheel. I use paint stirr sticks since they work well and are convenient. Just pull the edge across the stick. Often the burr will switch sides but you can usually feel it dragging. Once you feel that the blade stops dragging on either side you are probably done. This is where paper testing comes in handy. As you slice through the paper make sure you run the full length of the edge. If there are any spots that drag try the strop again and if needed go back to the stone.

When it comes to grit selection types of stones and methods used there is a bit of controversy. So from here on I will be stating things as I understand them and my personal theories based off of my experience and what information I have been able to find. If anyone has any research that gives better information I would like to read it.
 
Just to understand a few points about sharpening and blade geometry. Most western knives use a secondary bevel to form the apex. If you are cutting something under tension the apex is the critical part. However most of the time we are not cutting something that will pull away from the cut and while the apex starts the cut the secondary bevel will be pushing material away to allow the blade the pass through. This is one of the reasons hand made knives can out perform production knives since if the blade is going to go to a skilled user it can be made as thin as possible so the minimum amount of material has to be displaced. My chef knives can cut as well as cheap knives with the blade completely blunt. A very thick knife might benefit from having the shoulder removed on the secondary bevel to help ease its progress through material. Larrin Larrin 's testing has added some interesting detail to standard sharpening methods. While people have sharpened things for a very long time we don't tend to think about how materials have changed and how that might affect sharpening. The most common way to sharpen knives and tools throughout history was to use natural stones. Most of the time people used relatively coarse stones to maintain working tools. Razors on the other hand would be taken to a high grit for a comfortable shave. Standard advice is that you would put a lower angle and use finer grits for a sharper edge and a more obtuse angle for a longer lasting so called working edge. Working edges also tended to use lower grits since they qere going to have to be touched up more often with rougher work. Most people who really get into knives start looking for that unicorn where the steel is just so good that its possible to have a razor edge that will stay sharp forever and they do change angles based on how "good" they think the steel is and they tend to be careful and not damage their edges. Really there wasn't much more to do since until relatively recently blades were all some form of simple carbon steel. There are just some rough basics that are good to understand when it comes to understanding what sort of edge to put on a blade. The first is failure modes. The right edge along with everything else on a blade will be at peak performance if it is as close as possible to the minimum before it will experience some sort of unexeptible failure. What is exeptible? Wear. Wear is the one thing that cannot be prevented if a blade ia going to be used. The most common signs of failure are chipping or deformation. Very small chips can be felt by very lightly pulling the edge across a thumbnail or notice that it catches when cutting paper, latger chipswill be visible. Deformation can be seen as glinting while looking at the edge or by the edge rolling to one side. However keep in mind that European kitchen knives were often made with relatively soft and very tough steel and when the edge deflected it was pushed back into alignment using a butchers steel. Since you are in the makers area thats probably not where you were wanting to go. Assuming that I understand everything correctly from Larrin Larrin 's testing the standard old school rules of thumb were often right in practice but are technically completely wrong. The thinnest and most accute blades and edge bevels that don't fail will stay sharp the longest and also be sharper. It makes sense since as the edge starts to wear there is simply less material behind it. So long as the edge is only experiencing wear it has to wear straight back and the point where you feel that it is dull is when the cross section becomes to wide. Another thing to keep in mind is that in a similar vain the harder to steel is the better it will support a finer edge and harder is always better unless you once again experience a failure because of insufficient toughness. This is one of those areas where people like to argue and pick their favorite material properties. However there is a priority. Toughness has nothing to do with edge retention or how sharp you can make your knife. However if there is not enough the edge will fail. I know I'm being pedantic and more of either will be better and sacrificing one for the other beyond the intended use will lower performance. I guess the last thing to consider is the profile of the secondary bevel. A flat low angle bevel that doesn't create sharp shoulders as it meets the primary bevel or better yet no secondary bevel will give the highest performance. This sort of bevel would be done with some sort of guide or by resting a portion of the blade directly on the stone to achieve an extremely flat bevel. However if the edge is going to take heavy use it is possible to make the bevel somewhat convex. This is a stronger shape and there are many ways it can be useful. You will see it on very hard use knives but it might be useful in the kitchen since if the grind has a mild convex the angle might be lowered even further without causing problems. Since it's almost impossible to keep the angles perfect when freehand sharpening a very mild convex will typically form. Depending on the person and what they arw trying to do freehand sharpening might be just as effective as a guided system and it is definitely more convenient.
 
The last thing is what type of system is best. When it comes to sharpening this is probably the area where the strong opinions come out. I feel like my theories fit well with the testing and well understood mechanics but since I can't prove them so take them as you will. One thing that can also bring out strong feelings is using power tools to sharpen. The area near the apex is so thin that it is very easy to over heat it. There is going to be a point where things are slowed down enough and with proper techniques that the edge will not be heates beyond where it was tempered. For myself since I don't have a mysting system I use a spray bottle with water and a bit of dish soap in it to spray down the belt and I don't notice detrimental affects. The soap cuts surface tension in the water and allows it to wet out the total surface area of the belt and at low speeds the belt stays wet for longer than one might expect.


The controversy comes down to traditional sharpening methods vs course grit sharpening. There are a lot of people doing testing and making claims about one being better than the other. I was a reluctant convert to low grit sharpening. Since I have heard claims about skill being a factor I will just say that I shave with a straight razor that I keep a polished edge on and don't find that skill is what is moving the needle from one camp to the other. There is a fair number of test that seem to indicate that a low grit edge has significant increases in edge retention and it often cuts more aggressively. For anyone who worked hard to get good with traditional methods this seems very wrong. The edge is often called toothy and is likened to micro serrations and being somewhat saw like. I have heard some say that for some uses for instance in sushi prep that this type of edge will not cut as cleanly and might damage the food. If there is any data to support this I would be super interested in looking at it. I am somewhat skeptical of this or at least as a blanket statement. The photos from the study Larrin Larrin did seemed to show that the highly polished edges were far more ragged at the apex than the lower grit. My theory to explain this is just understanding how abrasives work. For abrasives to cut well they should be harder than what is being ground and then they need to ratio of pressure to contact points and area to be high enough for cutting to take place. This is something that we run into all the time when grinding blades. As we get into higher grits it becomes harder to cut rather than burnishing the steel and glazing belts. Throughout history blades tended to be much softer than we run them at today. Many modern performance steels are filled with carbides that are far harder than natural and aluminum oxide stones. This was not much of an issue with older simple steels. Since the area near the apex is so thin we are really limited on how much pressure we can apply. That means that if we do not reduce the amount of grit present as we go up in grit we are going to have a hard time getting the grit to cut at all and then we are just burnishing the edge and adding in fatigue. I believe likely that some of the difference in results is do to what abrasives are used and how sharp they are and how they interact with that individual blade and its heat treatment. Very small carbides can be scooped out by a largwr abrasive size and the carvide itself doesn't need to be cut. From personal experience and what I have read the 300-600 grit range is a sweet spot. I have some very hard bladea that will handle a very low apex angle and just using a course DMT diamond stone followed by deburring and it ia getting very near to the sharpness of my straight razor. This stone makes quick work out of anything I have tried so far and because of how quickly it sharpens 3 to 5 stokea per side one a month keeps all my knives easily shaving hair off my arm. For me at least this gives me everything I want and ita what I recommend. However I don't think this is q hqrd and fast rule. If you can keep this number of contact points low enough for any given material ita probably possible to put a mirror polish on an edge and still see higher levels of sharpness but unless there is something very special that the blade will be used for the returns hardly seem worth it. When it comes down to the "toothy" edge and causing food damage I don't know if I believe it. As far as blade finishes go 300-600 is pretty common for a kitchen knife. People say that mirror polished blades tend make food stick worse and if the apex surfaces really have damage at high grits I don't know why the secondary bevels would perform better at a higher polish. I think that really aggressive feeling comes from a more refined apex and the knife is actually sharper.


But...... A lot of this ia just my educated guess and if anyone can explain something that im missing I would find it really interesting.

Final edit. I forgot to add that I recommend getting a course diamond bench stone. I use a DMT. The one I currently use is one without the holes. A combo stone is often not that much more and gives another option. For those who haven't really tried course grit sharpening it's hard to believe how sharp it is. Leaving out the different schools of thought about cut quality with pished edges so long as the apex has been cut cleanly in in theory maximum sharpness is simply a combination of the apex angle and a clean deburr. I have a personal EDC out of 66Rc M4 that when sharpened on just a simple course stone that has a usable working edge and shaves about like an inexpensive razor. It's not as comfortable as the polished edge on my straight razor but it doesn't give up much and its a working edge. There may be applications where a more polished edge is better but it will follow the same fundamentals that are required for a course edge. If there is a difference in cut quality unless cutting very soft material that difference will quickly degrade. I like my knives to be sharp and expected them to at least easily shave hair off my arm(shaving hair off your arm is no where near shaving the tough stubble off your face like a true razor) or cut paper towels or TP. Its possible to get a good knife far sharper but that is well above average for a working edge and can be maintained in 30 seconds or if the knife is in really rough shape may take 2 minutes. The edge is super agressive and tomatoes are a breeze. Some testing results claim a 40% increase in edge retention but the big advantage is that it is very easy to learn and takes so little time that its so quick and easy that if I notice my knife isn't cutting the way I like its resharpened on the spot. If you have to take an hour out of your day to bring back a polished edge most people are going to wait much longer before they resharpen.
 
Last edited:
Great insight, S Storm W ! Never gave it so much thought, but it makes a lot of sense to me.

If some of the "old guard" and pros chipped in their 2 cents, maybe Stacy E. Apelt - Bladesmith Stacy E. Apelt - Bladesmith could make this a sticky?
I may have given it more thought than is needed :rolleyes:. My interest in knives goes back to when I was a kid. The whole mystery of finding the ultimate blade steel and lost technology of Damascus was something that I just lapped up. It had a big influenceon me and I wanted to work with metal and landed me in the welding trade. Those fairytales that my dad thought were a total waste of time actually ended up being a decent career choice. The funny thing is that the further I got in and expected people to understand metals I found out that most don't. Now that I finally had the cash to get into knife making I'm noticing that there are different schools of thought still but it seems likely that we probably have the information to understand what we are doing but we have a lot of standard practices that have a proven track record but people end up in different camps still. Once we get down to the abrasive size that we sharpen with we can no longer see what we are doing and have to interpret results. The big thing that I never see considered is that the high alloy steels that have a lot of ultra hard carbides we are starting to add new interactions that never existed in The past. My personal testing with steels in the Z-Wear to M4 range at high hardness is the first time that I have been able to get away with significantly more acute apex angles that were not so fragile that they ended up as more of a toy to show of how sharp your knife is but were easily damaged in regular use. Grinding those steels really demonstrated to me that as things get harder besides just being limited to hard abrasives pressure was also critical. When you are freehand Grinding the amount of pressure available is limited and anything that reduces surface area really helps. Switching to hollow grinds or using a wheel makes a big difference and when i ordered 1" belts by mistake there was a word of difference. For me at least it really makes sense that the same thing applies to sharpening. I am big into history as well and it just makes sense that when we are making huge changes to material properties we should expect changes in how they perform. Like a lot if things in life its not really that one camp is right and one camp is wrong. It more like they are bith right but just don't notice that they really aren't dealing with the same thing and both are correct.
 
Regarding coarse and polished sharp, I think you are mostly right. Coarse stones cut aggressive and will easily cut off a remaining burr. Finer stones create a finer burr that is itself pretty highly polished. That burr will be more difficult to remove because it just slides over the high grits. So, you end up with a standing burr.

The standing burr is a problem. 1. It gives a false sense of sharpness since it is super thin and in line with the cutting direction. 2. It is weak and it will eventually roll or micro chip off. 3. After it wears off, you get a polished yet slightly rounded apex which will skate over smooth surfaces like tomato skin. It will feel sharp, and cut paper well, but just doesn't bite in aggressively.

I think this is why some people like the "micro bevel" because it more aggressively removes the standing burr. Really, they just need to remove the burr more thoroughly. Just my $.02
Learning to fully remove the burr is where the magic happens. I think running though the grits for most people was just a way to deal with the burr. Learning how to use a strop correctly was where my sharpening totally changed. Cutting through end grain Softwood or a cork or something else using a sliding cut can really help with blades that have a super stuburn burr that is hard to remove. Thata just one more reason that I like very hard steels since they hardly form a burr.
 
Back
Top