HT kiln temp control question

Nate Webb

Gold Member
Joined
May 30, 2023
Messages
58
Morning all. I've had an old 110V Norman 48R kiln for a couple of years now. It's a small 14 amp model with an 8x9" internal capacity. The size works just fine for my smaller knives, but temperature control is problematic. It's an old kiln with "low, medium, high" temp settings. Fortunately the medium setting sits right at 1475, which works great for W1 and 1085, which are my two most commonly used steels.

That being said. I would like to have actual temperature control (crazy, I know). I've seen inexpensive temperature control units on amazon and ebay that advertise plug and play functionality. I'll post a link below. I don't know jack about electronics, so does anyone have any experience with this sort of thing? I'd hate to spend the money and have it not work, or worse yet, break something in my kiln.

Thermomart Plug & Play PID Temperature Controller Box Kiln Probe Pottery Glass Annealing​

 
Last edited:
A pre-build unit like the one you found will work fine. That one is a 15-amp unit and will be just barely current capable. I would recommend a 20 amp unit for your kiln.

If you like to build things, you can make a more robust one. It is really easy. Probably less than $75 for all parts. You can cobble the parts together individually, but a "kit" is wiser unless you already are familiar with PID control (which your question says indicates you are not).

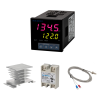
Get a kiln control package from eBay or Amazon. it will have a PID, an SSR, as heat sink for the SSR, an 8-to-10-gauge type K TC, and the TC wires. All you need for that kiln is a single 40-amp SSR kit. (80 amps is even better - bigger SSRs last longer.)
Mount the TC through the kiln wall as needed (most likely the top). Optimally, the tip will be in the center away from the coils as far as possible. You can shorten the TC and remove insulators as needed. Be sure to wire the + and - properly from the PID to the TC with the wire provided. The wire is polarized, too. All + to + to + and same for negative.
Wire the rest together in a small plastic toolbox and cut a short extension cord in half to make the in and out power cords. Turn te kiln power switc on and set the kiln on HI. Plug the kiln into the control box socket cord. Plug the plug cord into the wall and set the PID for the desired temp. Done! It may need to auto-tune a bit, but will control the temp to a set range nicely.

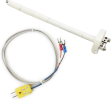
The TC is the most important part. You need one like below, or similar, and a matching wire unit.

K-Type Thermocouple Block Ceramic Kiln Insulator Kiln Probe The Highest Temperature can be Measured 2372 °F(1300 Degrees Celsius)​


1735913455471.png

The kit should be something like this (throw away the cheap TC that comes with the kit):

Inkbird PID Temperature Controller Kit, High Voltage 100ACV to 240ACV, Comes with SSR 40DA Solid State Relay, K Type Thermocouple, and White Heat Sink​

1735913205687.png
 
Last edited:
This 20-amp one on eBay would be better for a plug-and-play unit:
Plug Play PID Temperature Controller Box Kiln Probe Pottery Glass Annealing 20A
This one has ramp-soak, which is nice to have for stainless steels:
Plug & Play PID Programmable Ramp Soak Temperature Controller Kiln Glass 20A °F

Nate - if you decide to build one, send me an email. I can help with many of the parts needed -
sapelt@cox.net
 
Last edited:
I really appreciate that offer Stacy. I think I'll order that 20A unit from ebay. I don't doubt the build would be approachable, but my shop time is limited, and I'd rather spend what time I do get in there making knives, not playing with wiring any more than I have to ;)

Thanks so much for your help!
 
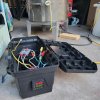
I built one for my Kiln a while back. 110V, kept it super simple! TC, PID, SSR/Heat Sink and some wiring. No protective fuses, kill switches, etc. I just used a cheap plastic toolbox for my project box, some 12ga wire and connectors and a short extension cord cut in half for the plugs. Once I had the wiring figured out what went where, it was pretty quick. Plug in, crank the kiln up to High and let it run off of the PID! I just had to remember to turn the kiln itself on....forgot one time and couldn't figure out why it wasn't working! LOL.

PID working.jpg

My 240V oven I did a box for was a LOT more complicated! I did a ramp/soak PID with WIFI for that one, fuse on each leg of the 240V, fuse to protect the PID, Element manual kill switch, door kill switch, 2 SSR/Heat Sinks, 2 terminal blocks, etc. The Wifi PID is much easier to program than pushing the buttons on the PID itself!
 
Back
Top