Intro to Bladesmithing - 2015 - With Photo Goodness!

Joined
Oct 9, 2014
Messages
694
Day One: Stay awhile and listen...

Hey Gang,
I’ve wanted to post this for a couple weeks now but I’ve been busy and haven’t had a chance to get the details and photos put together. I figured some of you would enjoy it though, so I’m probably going to post this in parts to get it out there.

As the title implies I was fortunate enough to take the ABS Intro to Bladesmithing course that was held here in Ohio several weeks ago. While I’m still new to bladesmithing the driver behind my wanting to take this class was due to the difficulties I had in trying to forge anything knife shaped. I could hammer out a decent profile but to me that was not really worth the time and coal it took, when I could use my grinders and saws to do the same work a lot quicker. I was looking to forge close to finish…

Enter the ABS course. The course was held at SOFA a large blacksmithing organization in Ohio that I check from time to time for events. I was late to the game finding out about the course only a month before the start but I found out there was a slot open so I jumped on it. I had to make some arrangements to be sure it was a go and my money didn’t end up arriving until a few days before the course started, the guys at SOFA are first class, they made sure this wasn’t a problem.

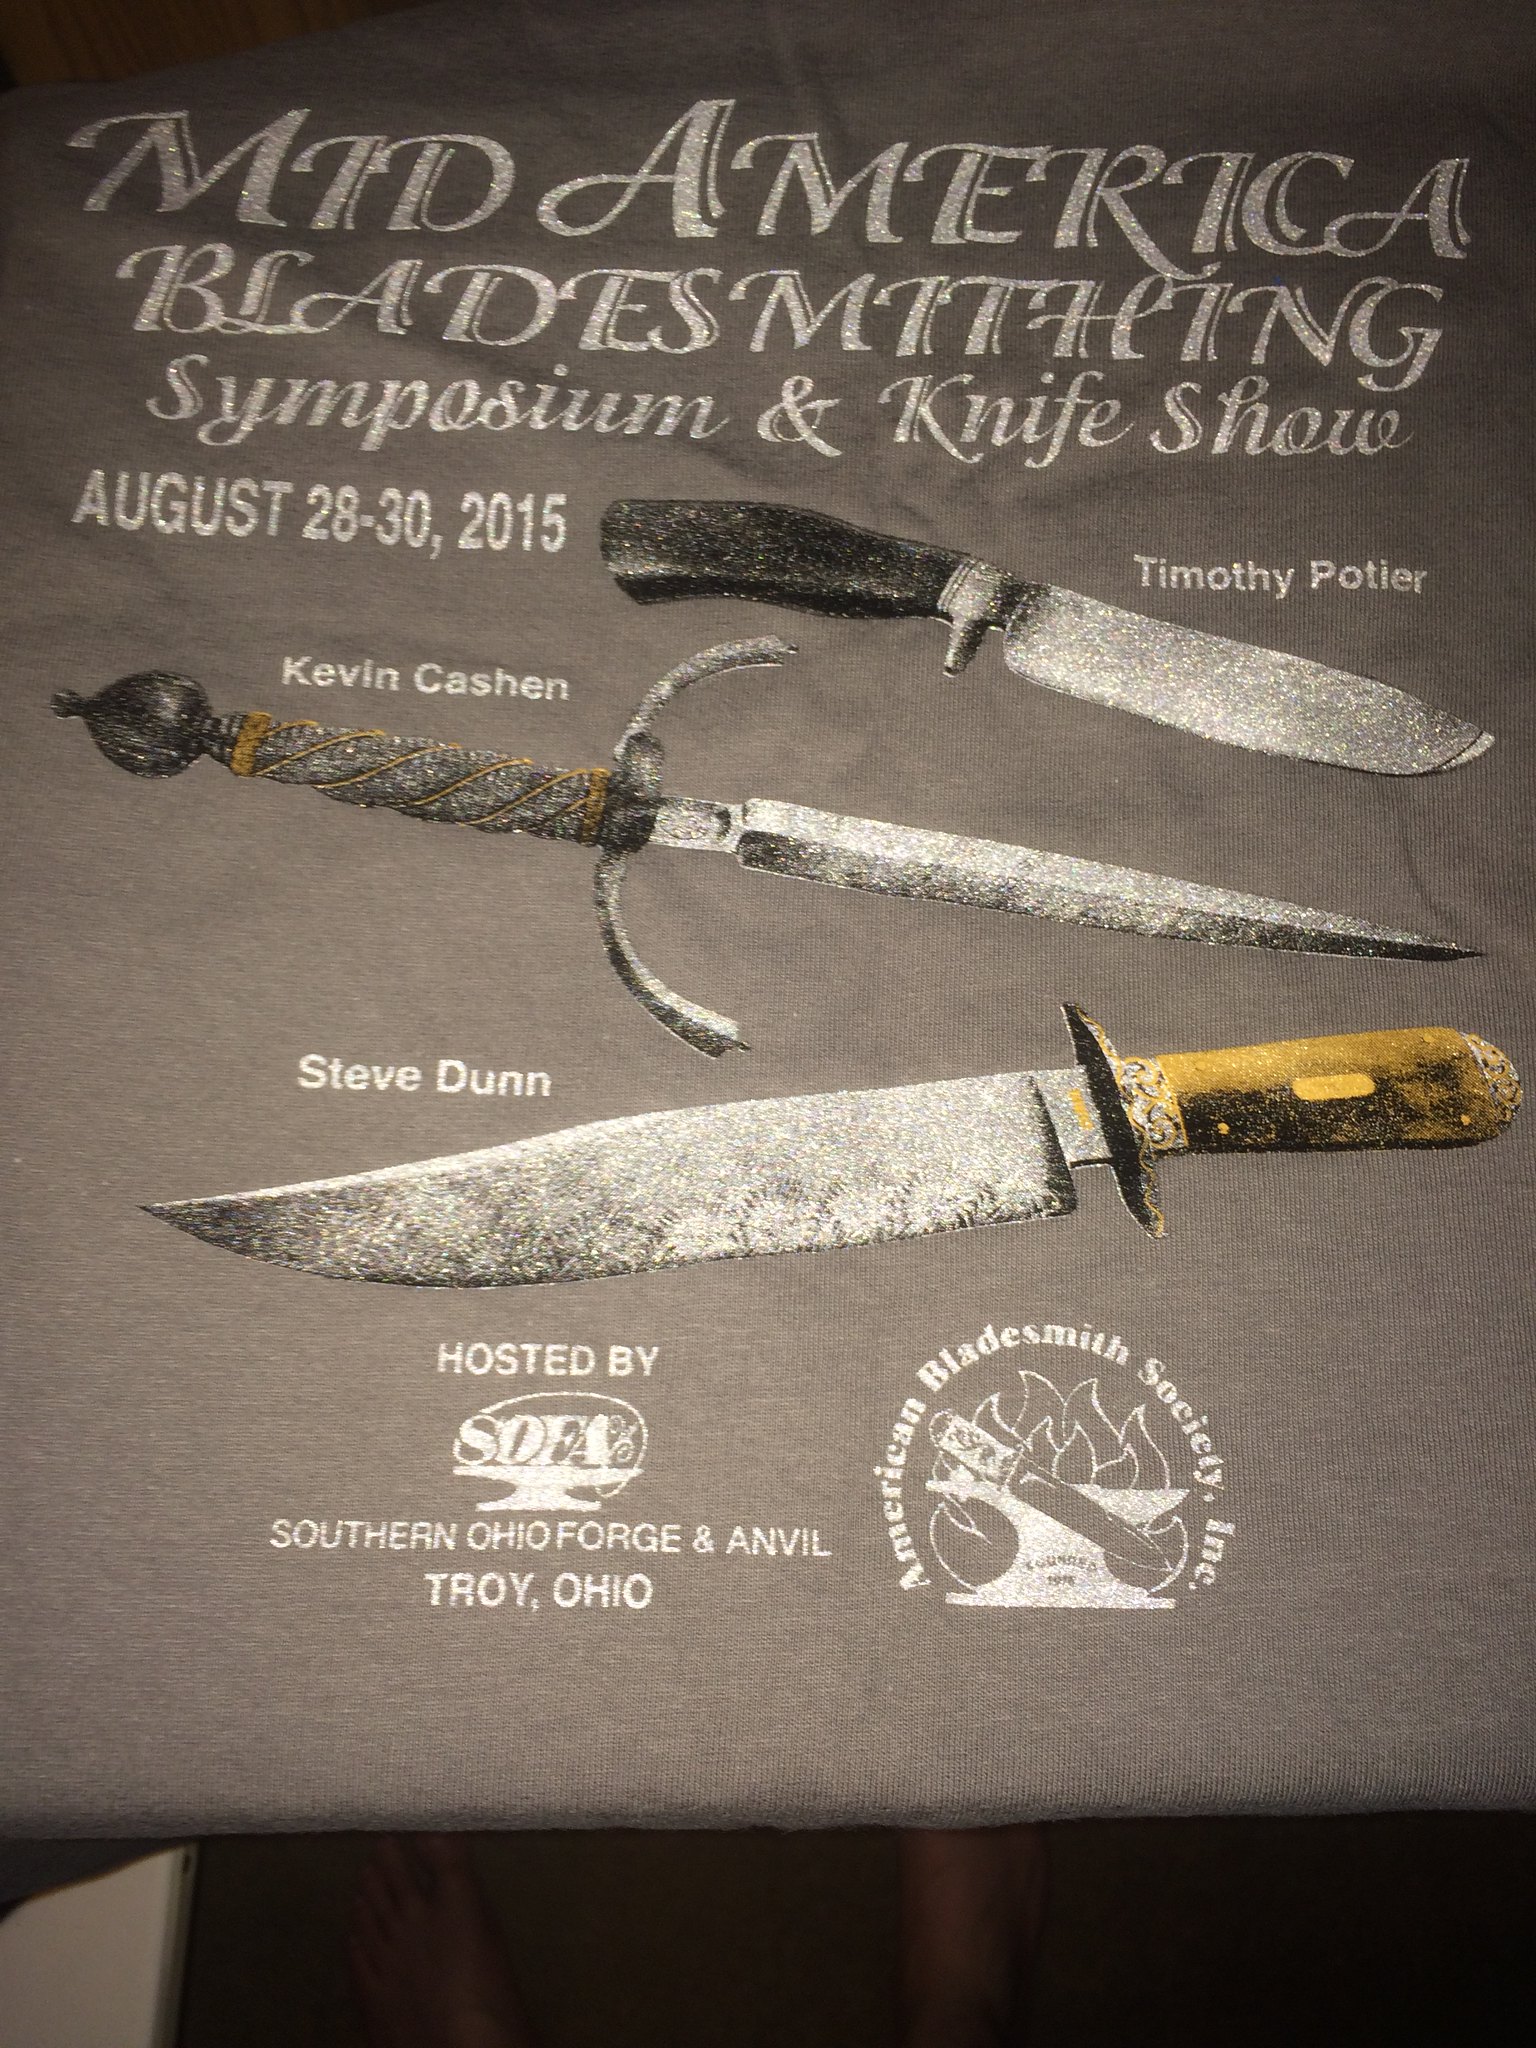
The master smith teaching the class was Timothy Potier, The Ragin’ Cajun. And he was indeed both a master and a Cajun :D I’ll admit to having a little nervousness showing up the first day. Due to what I stated above I hadn’t used the forge much so I was worried I’d be out of practice or worse out of shape lol. Two weeks of hammer swinging is a lot. But it all worked out in the end.
After some introductions class started with a lecture from Timothy on basic knife, steel and heat treating fundamentals. I was educated on much of this but I went to this class as a "tabula rasa". I intended to soak up every bit of knowledge I could. After the lecture we got to watch Timothy forge a small hunter.

(Apologies I have a new phone and some of the photos are out of focus)
IMG_0099 by Clint, on Flickr
IMG_0098 by Clint, on Flickr

Once you see him start swinging on hot metal I could sense the excitement and giddiness of my four fellow classmates. Immediately I realized I got my money’s worth just a few hours in. After getting the blade close to the 80% finished mark we were told to go fire up our coal forges.
IMG_0089 by Clint, on Flickr

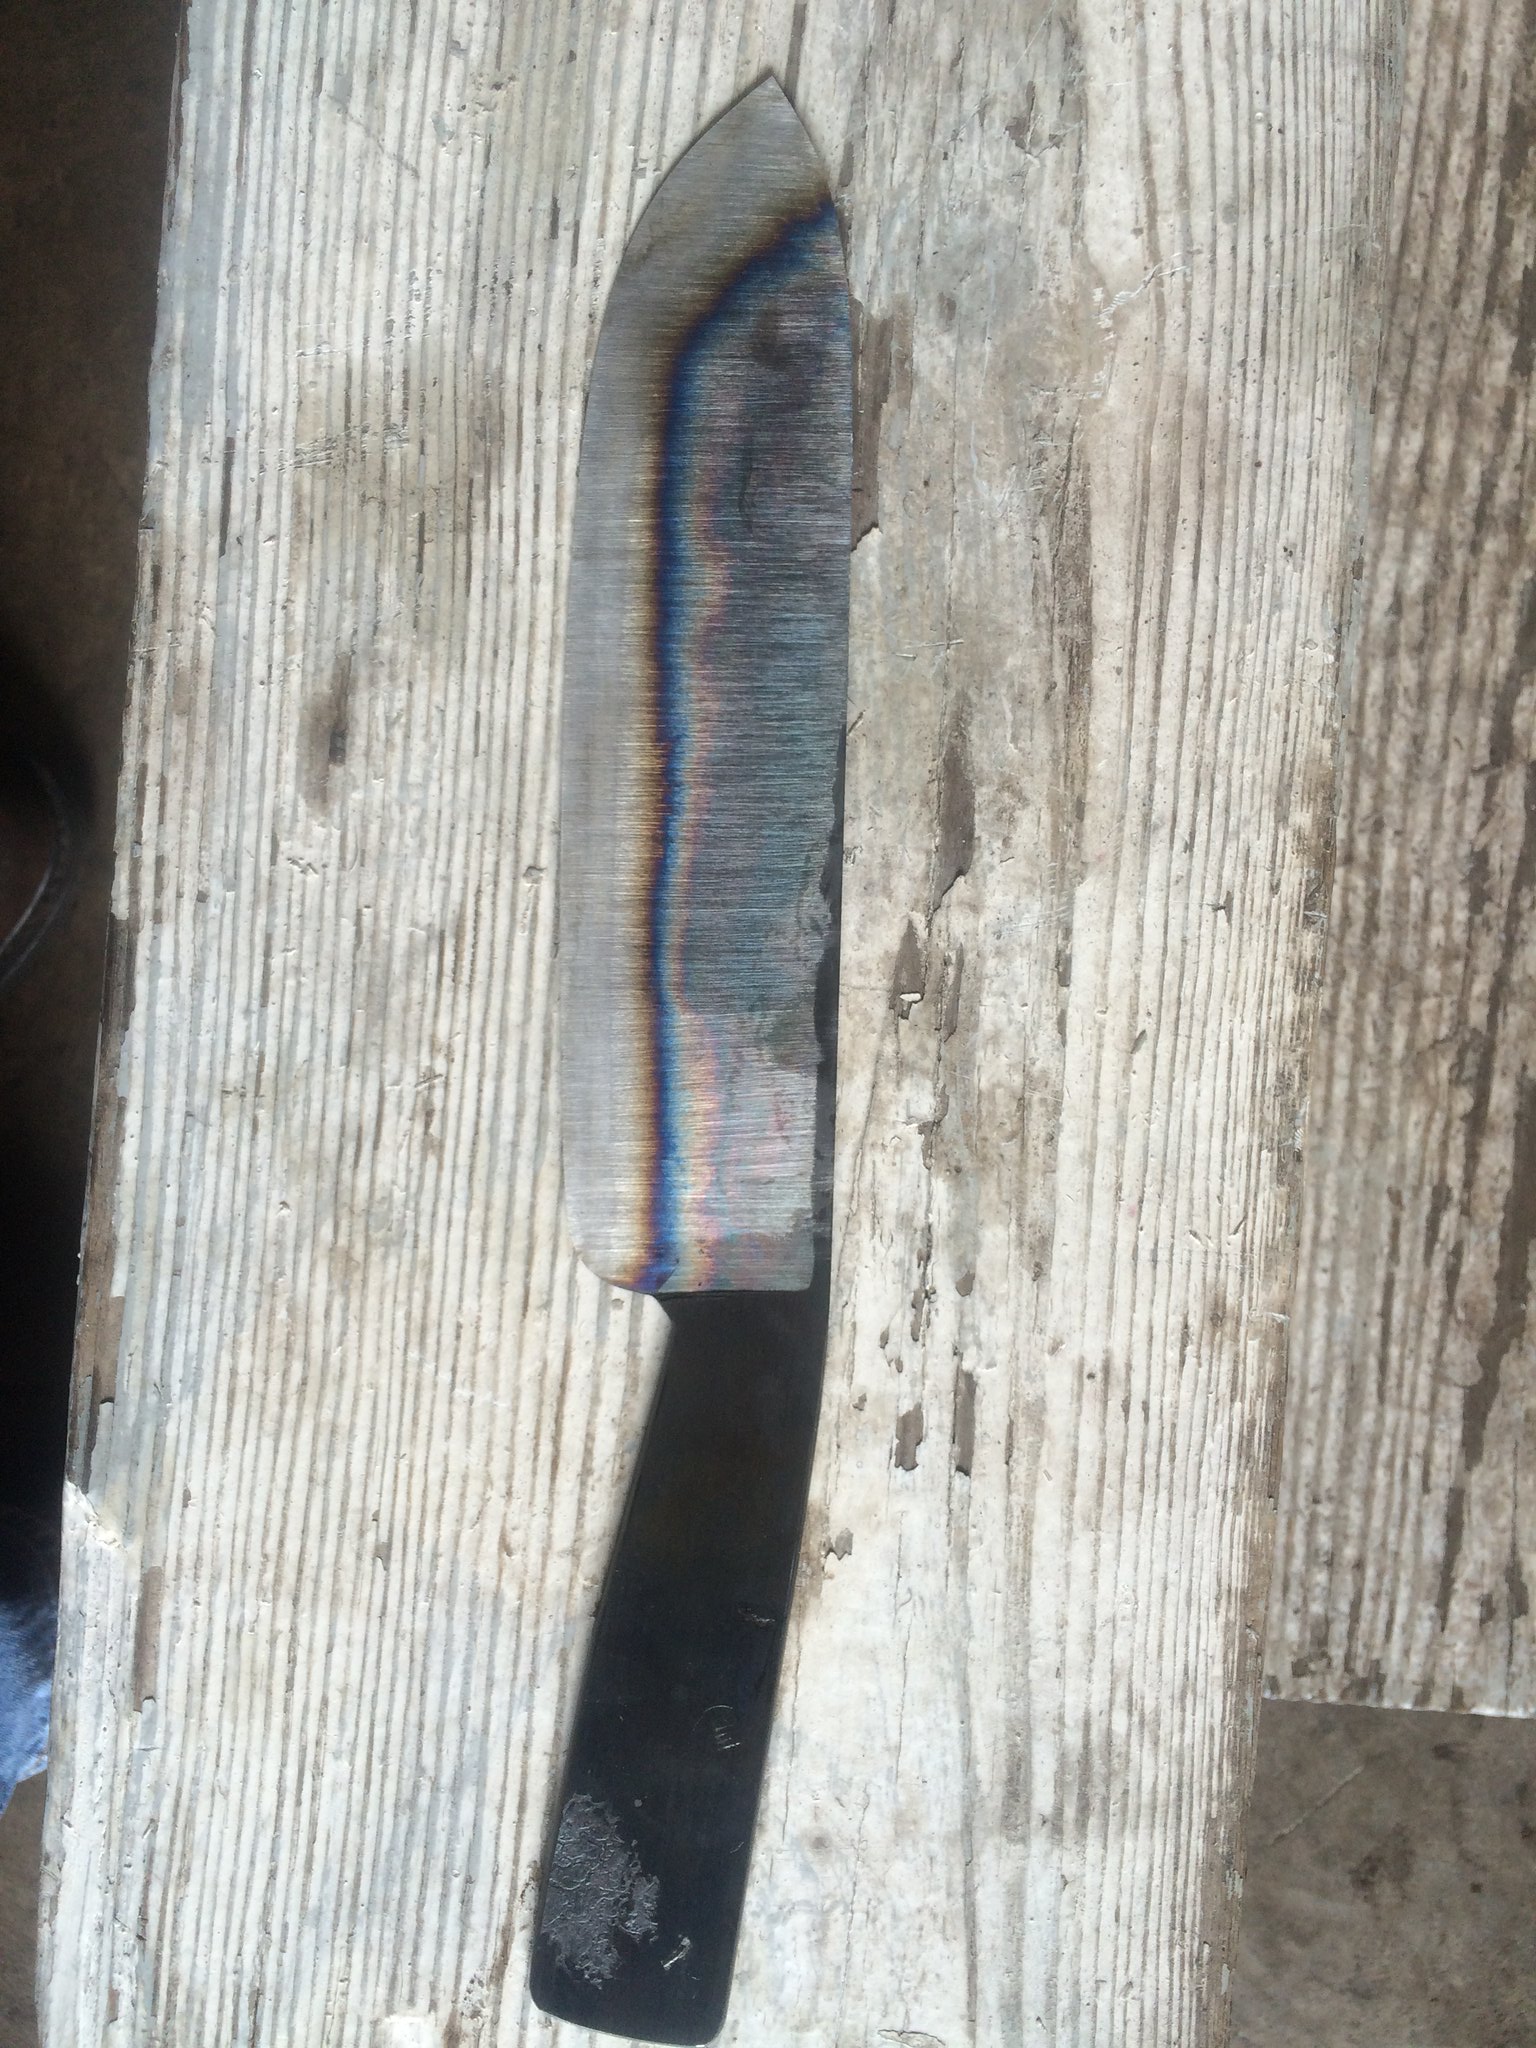
I got the 1075 heated up and started hammering. It was recommended we use our own hammers (but their great Tom Tongs) and I was surprised how much my 40$ Amazon smithing hammer grew on me. After some slow going we started to produce some knife shaped objects.

IMG_0091 by Clint, on Flickr
IMG_0093 by Clint, on Flickr

I planned on taking a lot more photos but honestly I was so focused on learning I had to make myself stop and pull out my phone. I forged much of the blade as a 3 foot bar then cut it and shaped the tang. No wasted metal here!

That’s about it for day one. The class moved quick after this. The goal was to get you geared up for week two which was making your chopper and going through the testing process. And I found out on day two my class would be shortened by a day that week. This was a bummer but turned out to be a blessing in disguise. More on that later…

Thanks for following along and feel free to ask questions.

-Clint
ABS Apprentice
SOFA Member
:D
 
Last edited:
Looks like it was fun. I was planning on going to a forging class taught by G.L Drew in Tryon NC but I'm not sure if they are doing it anymore. I will keep searching.
 
Very cool! I will be watching this intently. I was all set to go to the intro course in Arkansas this November but, I have too much going on. I am instead spending a week with J.R. Cook in his apprentice program in October. Hoping to get much of the same instruction. I'm really surprised they have you using coal forges, they seem pretty unforgiving. Thanks for posting this.

Bob
 
Sorry for the delay guys. New job has me short on time and I'm headed to the quadstate blacksmithing conference tomorrow. After that I'll post the next update.

Matt it was a blast, made me feel like a kid again. I highly recommend it if you can make it to one.

Bob I have to confess you played a part in my searching out a class. I read your post on your class with Johnny Stout and have followed your work since I started. It reminded me how much an experienced instructor can shave off the learning curve. Your work is top notch! It's a shame you can't make the intro class but I have no doubt you will learn a lot from J.R.

I thought the same about coal and have melted my share of steel in my forge, but watching Timothy and some help from several others at SOFA and I feel I have much more control over the fire now. It won't replace my evenheat for heat treating but I am much more confident forging at my shop than before the class.

-Clint
 
Thanks for sharing!
I must ask though... That photo of Timothy Hammering at the anvil with that cold pc of steel... Is he using that to keep the hammer side flat and using the anvil side to forge the plunge line?
Thanks,
Thad
 
I was wondering the same thing, to me it looks like he's establishing the bottom of the ricasso, behind the choil.
Whatever he was doing that technique gives me inspiration, thank you very much for reporting your experiences!!!!
 
Thanks for sharing!
I must ask though... That photo of Timothy Hammering at the anvil with that cold pc of steel... Is he using that to keep the hammer side flat and using the anvil side to forge the plunge line?
Thanks,
Thad

For the most part. He is making a notch and he doesn't want to ding the spine side of the bar. You don't want to hammer your spine if you can help it. So the piece of steel makes sure he gets the notch but doesn't put any marks in his spine.
 
Thanks for sharing!
I must ask though... That photo of Timothy Hammering at the anvil with that cold pc of steel... Is he using that to keep the hammer side flat and using the anvil side to forge the plunge line?
Thanks,
Thad

It is done to keep from getting hammer marks in the spine when establishing the notch hes working on.
 
Are we going to get any more updates on this or, should I quit getting excited every time I see there's a new post?

Bob
 
Day 2
Forged in fire

Sorry Bob, some of us actually have day jobs ;)

Day two started out similar to the first day, we gathered around Timothy and he announced he was going to forge a hidden tang bushcraft knife. Timothy explained the principles of a hidden tang and shoring up the shoulders. This knife was going to be about 2” longer than the small hunter we forged. The same principles applied; forge the tip, the notch then the bevels. Though things did change when we got to the tang. Because it would be very difficult to forge the ricasso to tang transition with a hidden tang either a guillotine or an adjustable contraption I have never seen was used. They were either hardies or fit into the post vice. If you’ve seen a guillotine then you will know exactly how we used them. Timothy instructed us to leave about an inch for the ricasso then use the guillotine to define and draw out the tang a little. Once established hammering out the rest of the tang was pretty simple.

Upon finishing the demo we gathered around and Timothy began explaining normalization and why it is important prior to heat treating and grinding. We didn’t have a working kiln, the shop kiln was out of order during our class. Owning a kiln I was a little bummed, but afterwards I’m glad that was the case as I learned something new.

Normalization was accomplished by heating the entire blade in the coal forge to bright orange/dull yellow then holding it in a bucket with a pair of tongs to watch for the recalescence. Being a member here I’ve seen this before in videos and such but doing it myself outside the kiln was pretty cool. We did that twice then it was ready for grinding.

With that we were off to the forge to fire up the coal and start on #2. It was pretty impressive to see Timothy do all this in an hour or so and then watch the entire class take most of the day to replicate his steps. We all got started, didn’t finish then took a break for lunch.
I’ll pause here and note that some of the guys stayed and ate a bagged lunch but I ended up eating lunch with Timothy every day and have to say it was a real pleasure getting to know him. He was open, easy to talk to and went into great detail about his knifemaking career which I found invaluable and entertaining.

Back from lunch Timothy called us in for another demo. Time to start grinding on the 2x72’s and SOFA had a nice selection. Being here in Ohio many were Rob’s KMG platform. I was excited to see Timothy’s technique and as expected he made it look effortless grinding freehand. I’ll dive into this more later as I learned a bit here but it really clicked with some one on one time the following week. To summarize he ground a steep angle almost to center first, then a large flat spot for indexing, then the plunge and finally evened it all out. I was the only guy with a 2x72 so afterwards I went back to the forge while the rest of the class hit the grinders.

Normalizing

IMG_0102 by Clint, on Flickr

Two days hard work
IMG_0110 by Clint, on Flickr

Timothy making it look easy at the grinder

IMG_0096 by Clint, on Flickr

That pretty much concludes day two. Days three and four were a lot of recap with a few new things thrown in that I will cover in my next post. Sorry again for the lack of photos and my poor journalistic abilities! But I really enjoy sharing this with you guys as you all understand the addiction and very few want to talk about this stuff for more than five or ten minutes :D

I’ve already started on the next updates so I can get them out sooner and wrap up this great experience.

-Clint
 
Day 3 and 4

Make haste slowly

Days three and four review much of what I have covered. We did forge a new knife each day starting with a full tang drop point hunter then a larger hunter with hidden tang. I forgot to mention that Timothy had us tapering all the full tang knives while forging.

Day three covered heat treating and using a gas forge. This was my first time at a gas forge and also my first time heat treating without a kiln. Using the gas was interesting, watching from afar I always assumed it was much better than coal but after using one I’m not sure I still hold that to be true. Right off the bat something I didn’t like was you can’t really isolate your heats. Unless you’re working on the tip you pretty much have to heat the entire blade, at least to the area you want to work. It also heated the entire bar up more and I had to make sure I had the gloves on when not using tongs. This all seems obvious in hindsight but wasn’t at the time. What I did like was once it was tuned there was little risk of burning my steel if I wasn’t paying attention. I found that both coal and gas took about the same time to get up to temp.

IMG_0115 by Clint, on Flickr

The first heat treatment was interesting. We used an oxy/propane torch to heat the edge for the first go. I’ve seen this in photos quite a bit and heard Ed Caffery talk about it but I have to admit the first few times I tried, it was harder to keep the edge even than I thought it would be. We also learned how to produce a “hillbilly hamon” with the torch. I’m guessing most would consider this a temper line but it did work better than I thought it would. Fairly straight forward process though, heat the ricasso and thick part of the spine near the tip then go back and forth across the edge. Once evenly heated to a bright orange / dull yellow, it was into parks 50. After this it was makers choice: coal, gas or torch.
After the demo it was straight to the forge for me. I did some finishing and tweaking on knives 3 and 4 and by now things were falling into place for me. Though the grinder was going to reveal a few follies, but that is why I paid for this class.

IMG_0100 by Clint, on Flickr

After lunch I hit the grinders. At our disposal was 3 or 4 KMGs, a Burr King, a Bader II and most interesting to me was a Bob Dozier! Having a KMG that is where I started to get comfortable. Immediately I missed my 3HP Baldor… You don’t need it but I did notice a difference when hogging. I’ve only recently started grinding without a table, so I was having Timothy give me pointers. I was using the typewriter technique described here and elsewhere. Basically I was locking my elbows into my sides and shifting my hips. I get more comfortable each time I do it but still felt I didn’t have the control I’ve seen in the pros or even close.

It was at this time I realized how hitting the steel in the wrong spot, too hard or with the wrong area of the hammer can ruin a project… Two of my knives had deep hammer marks that were not going to be fixed without ending up with a fillet knife. Lesson learned.

On grinders I didn’t really care for the Burr King or Bader II. The Bader II would not track if I gave it any pressure. When pulling the blade across I could almost pull the belt off. The Burr King just didn’t do it for me with all the nice grinders out there now. Too be fair though these grinders have seen some heavy use and I’ve heard the Bader III is much better than the II.

The one that impressed me the most was the Bob Dozier. It was a really slick grinder. It tracked really well, had plenty of power and the coolest feature was the air piston on the tensioning arm. Put your belt on and flip a switch and it was like one of those cars with hydraulics :D Just a swish and the belt nice and tight.

A bonus during this time; an gentleman was walking around giving pointers to everyone and I wondered who would give advice like that while the mastersmith was teaching?? Turns out it was Butch Sheely, JS and ABS rep here in Ohio! Butch was a great guy and it was good to chat with him and get some helpful advice.

IMG_0141 by Clint, on Flickr

IMG_0142 by Clint, on Flickr

IMG_0143 by Clint, on Flickr

You can see in the first two photos how improper hammering can get you into trouble. But as mentioned I dropped my perfectionist mantra for this class and went for learning as much in as short a period as possible and I think it worked out pretty well for me.

More on the way…

-Clint
 
Days 5, 6 and 7

Intermission

As I mentioned earlier our class was cut short by a day. Wanting to get as much as possible out of this it was not good news. But I found out it was because the ABS Mid America Bladesmith Symposium was the reason for it and I quickly signed up, sacrificing my respite between weeks one and two.

Fancy new shirt

IMG_0248 by Clint, on Flickr

There was a lot going on in only a few days. Some big names were going to be there: Jim Batson, Butch Sheely, Bill Wiggins, Kevin Cashen, Steve Dunn, B.R. Hughes and Timothy.

Steve Dunn had to pull out so SOFA member and Ohio JS Joel Worley stepped in to take over. Watching him forge a nice twisted Damascus bar on the forge press and big hammer was fantastic. The bar really turned out nice. Joel is also a top notch guy and friend of a friend so no doubt I will be picking his brain quite a bit in the future.

IMG_0127 by Clint, on Flickr

Jim Batson’s Bowie presentation was great. A step back in history and also an eye opener. He had a replica he made of what he called Bowie number one and it does not represent anything we typically see here on the forums. The blade had an interesting upwards curve starting at the ricasso. Sadly I didn’t get a picture of it but here is one from the Arkansas museum, perhaps the original I’m not familiar with its history.

ham_img_bowie1 by Clint, on Flickr

I have to admit, like many, part of what draws me to all this is history and my childhood love of swords, daggers, armor and all things medieval. So when I heard Kevin was going to lecture on historic daggers and then forge one, I was pretty excited, I’m a big fan of his work and methodology. The lecture was great and I learned quite a bit about daggers that I did not know. I knew he was well read, but I didn’t realize he has been all over the world visiting museums and private collections studying different swords and daggers. If you are going for your MS stamp and Cashen will be judging your dagger I recommend going to his lecture or buying the recorded version from the ABS ;)

Watching him forge the dagger was impressive. I know how difficult a knife is so seeing a dagger forged so easily was quite impressive. A lot of the technique was different than what I was learning for knives.

IMG_0128 by Clint, on Flickr

IMG_0129 by Clint, on Flickr

IMG_0131 by Clint, on Flickr

Also picked up this nice fluting jig that he makes

IMG_0266 by Clint, on Flickr

It was a small one compared to most but there was some top notch work on display at the mini show and auction Saturday afternoon.
Some knife porn for you all

Nice Cashen Bowie with fossil walrus tusk and Damascus

IMG_0139 by Clint, on Flickr

Some collaborative knives by Don Fogg, Joe Keesler and Jim Batson – Impressive lineup!

IMG_0137 by Clint, on Flickr

IMG_0138 by Clint, on Flickr

Another collaborative knife Moran style

IMG_0135 by Clint, on Flickr

IMG_0136 by Clint, on Flickr

If you haven’t seen Butch Sheely’s tomahawks, you have now. Top shelf stuff

IMG_0134 by Clint, on Flickr

And Bill Benkhe was a name I recognized but wasn’t too familiar with. One of his folders would have came home with me if all my play money wasn’t wrapped up in knifemaking :D

IMG_0133 by Clint, on Flickr

IMG_0132 by Clint, on Flickr

My first ABS hammer in was a great success. I recommend attending one if you can, they have them in several different states. Lots of learning, great knives and great people!


-Clint
 
Wow, just seeing Kevin Cashen forging a dagger would be one of my most sought dreams!!!
 
I've attended the symposium a few times. It's a great event at a great facility!
Well worth the fee :thumbup:
 
Now we're getting somewhere! This is really good stuff. Honestly, I think anyone can learn to make a knife but, if one is to become truly skilled, you've got to learn from those who have gone before you. Taking classes and attending symposiums, workshops and Hammer-in's are the track to becoming a great knifemaker. Thanks for sharing.

Bob
 
Finis

Week 2 - Part I

Ok guys I’m going to wrap the final week up in one or two posts. I want to preface this by saying that it is not for lack of content, week two was just as fruitful as week one, however a lot of it is going over and improving on what you took in the first week and doesn’t make for an exciting read.

The primary goal of the second week was to get started on your chopper. Timothy wanted everyone to succeed in passing the JS test, however once you were done you were free to create anything you wanted.

To step back for a moment, I’ll touch on some of the non-chopper related items that factored in the second week. First and technically something that started late week one, I began using the power tools which included a 25lb custom mechanical hammer, a 110lb Sayha air hammer and a custom built 20 ton press. I got a lot of hands on with both hammers. I had never used a hammer (despite owning a nice 25lb Mayer Bros, another story…) or a forging press. Even though I really didn’t have a reason to I used that press also. Just because it was there :D

I was surprised how much the hammers helped forging a blade with some proper technique. I was also real surprised by how much control the 110 had, you could really dial it down to just a light tap with some practice.

On the press, it was a beast and honestly it spooked me a bit. I was shaping the ricasso on one of my knives and kept the power on just a tad too long and it squealed at me. About had a code brown moment there and decided it was best not to push it too far. That said I want one even more now!

Another interesting note was “brute de forge”, it was brought up a few times. From my experience here I always thought of it as a blade with unfished flats. Timothy and co. on the other hand referred to it more a knife with unfinished flats and a crude finger guard forged in where the blade drops. After some discussion I realized this was something that Joe Keesler had popularized and passed on. Joel Worley demonstrated this during class.

Now back on track. As I mentioned earlier I was going for quantity over quality. I wanted to try as much as possible under the excellent tutelage of Timothy and the others at SOFA. Which makes it somewhat ironic that the chopper, I was knowingly going to destroy, was the only blade I really put a lot of time into.

We had to make a chopper to ABS specs and it was to have a 9” blade and 4” handle. It was going to be made from 1 ½” 1075 bar stock and should be designed to take abuse. Timothy instructed us to make it similar to a bowie or what I see a lot of here on BFC referred to as choppers. He said he wasn’t a big fan of the competition style choppers for the JS test. With that he went to the forge and hammered out his chopper for the demonstration that day. Then we were off to the forge to get started.

I forged the blade in coal, as I mentioned earlier I really liked the coal the more I used it. I found it to be quicker and I was better able to isolate my heats to where I wanted to work. I sketched out the blade with soap stone on my second anvil and got my plan together. I could feel the training stepping in and I felt real comfortable getting started. It was all starting to come together and forging a knife no longer felt foreign to me. Everything I was going to do while forging this knife was purpose driven. And even though I ran into trouble earlier with hammer marks I was still shooting for forging as close to finish as possible.

Blade forged and starting on the handle

IMG_0100 by Clint, on Flickr

While we forged Timothy was grinding his blade. So after a short break for lunch he asked us to gather around while he went over heat treating. With this knife we were going to use the gas forge and heat treat the entire blade. Once the blade was heat treated and tempered he put together a metal trough filled with water and a fire brick. We were going to use this to keep the edge cool while drawing the temper from the spine down very close to the edge as even as possible with the torch.

Finished forging – This is what I meant earlier; I could forge a point and shape a handle fairly easy. I could teach others to do that. I could hammer a few times on the bevels. But I could not come close to forging a blade to finish as the masters did many centuries ago. This is where the class shines, this is the heart of what I learned. I am very proud of how I forged this blade as I knew I would have a stack of scrap steel waist high if I got to this point without instruction from a master like Timothy.

IMG_0151 by Clint, on Flickr

IMG_0204 by Clint, on Flickr

IMG_0203 by Clint, on Flickr

With the blade forged it was time to head over to the grinders. This is where I had a small epiphany. I went over to the Dozier and put on a 36 grit belt. I asked Timothy to come over and critique my grinding method. This is the kind of stuff where you get your money’s worth. A few pieces of advice and I was getting as good or better grinds freehand than using a tool rest prior to the class. I was really in awe at how easily he corrected some of my bad habits and how much better things were afterwards. I began removing metal and evening up my grind lines and plunge. I took the blade to a 400 grit finish and rounded the corners off the handle. I was very happy with the end result given the time I had and was ready to move on to heat treat.

Nothing special to mention in regards to hardening and tempering the blade. I used the gas forge and parks 50 then tempered at 400 for two hours. After that I went to the water tank to setup my knife for drawing a blue temper down the spine

IMG_0208 by Clint, on Flickr

Success!
IMG_0210 by Clint, on Flickr

Knowing what we were going to do, we used duct tape to give the handles a little mass to hold on to. It was Wednesday and the knife was finished save for the edge. We would be testing the next day and I was feeling pretty good.

I’ll save that for one more post as I do have some pictures and some closing comments. Thanks for following along guys.

-Clint
 
Wow, just seeing Kevin Cashen forging a dagger would be one of my most sought dreams!!!

I hear you, this was a real treat and I'm about 95% sure I will be spending a week with Kevin in the near future!

I've attended the symposium a few times. It's a great event at a great facility!
Well worth the fee :thumbup:

I agree, well worth the money and the drive!

Now we're getting somewhere! This is really good stuff. Honestly, I think anyone can learn to make a knife but, if one is to become truly skilled, you've got to learn from those who have gone before you. Taking classes and attending symposiums, workshops and Hammer-in's are the track to becoming a great knifemaker. Thanks for sharing.

Bob

My pleasure Bob, I'm glad you're enjoying it. I also agree with your sentiment. There is just no substitute for experience and there was certainly a lot of that at this class!

-Clint
 
Week 2 – Part II

When last we left off, it was time to test our choppers. For those that are not familiar with the ABS JS and MS performance testing procedures they are as follows:

Cut 1” rope in one swing
Hack through two 2X4’s checking the edge after each
Shave hair from your arm
Bend the blade 90*

During each phase the edge and blade is checked to confirm there is no damage, chipping, rolling, etc. The same applies after bending, you can’t just bend it and have a crack running up to the spine (I think you can have a fracture up 1/3 of the blade).
As has been the case we started out with Timothy demonstrating. He went through the whole process with the chopper he had forged earlier.

First up the rope test

IMG_0212 by Clint, on Flickr

Next was 2X4 hacking

IMG_0213 by Clint, on Flickr

One down, one to go

IMG_0214 by Clint, on Flickr

Finally the bend test

IMG_0215 by Clint, on Flickr

Our youngest member wanted some up close shots but, as was the case with all of us who have never done this, he was worried a piece of blade would chip off and embed in his chest :D

That did not happen thankfully, but we all got a kick out of the improvised body armor. Timothy had no issues chopping and hacking and made it look pretty easy, despite being in his mid-fifties. You could tell he had some experience doing this!

I had to put an edge on my blade still so I went back and forth between watching the guys and quickly putting an edge on, I thought we were going to have a little time in the morning for this. This was a miscalculation on my part, during the first 2x4 cutting my edge “wrinkled” a bit from being too thin. I showed Timothy and he took the blade from me and resharpened it real quick and said it was fine because my heat treat was ok. He may have been telling me this to make me feel better but either way I’m glad it happened now and not on a real test. Lesson learned for future reference. A chopper is not a kitchen knife!

The test went as planned but I will admit to being a little apprehensive when it came to the bending part. I really knew I would be ok because three others went before me and were fine, it still makes you worry a bit. We used a 2” flattened pipe with rebar welded on for the handle that was emblazoned with the words “The Destroyer” on the side. Appropriately named!

I locked the blade in the vise and gently pulled the destroyer until I heard Timothy yell good. It was definitely a relief when you know you’re done and the blade is still in one piece.

It was a great feeling and also a little saddening. I was thrilled to have passed and excited to take this new knowledge home to my shop, but also a little sad knowing the class was coming to an end. There was only one day left and I knew it would be short.

I got into class about thirty minutes late Friday to find Timothy showing the guys how he hand finishes the blade. He asked me how I finished my blades and I told him I use a variety of Wheeler style sanding paddles and he replied with “THAT’S RIGHT, you guys need to check him out”. Nick’s videos seem to have made him infamous in the knifemaking world as he was mentioned several times by some more experienced smiths during the class and hammer in. I wish he still posted here.

In reflection the class was great and well worth the money and two week sacrifice. I can’t say enough good things about it, the SOFA folks and the ABS. I also want to thank Timothy Potier for answering a constant onslaught of questions, keeping the class engaged and entertained and just being an all-around good guy. And I have to thank my fellow classmates for making the class even better than it would have been. The diversity in personality and age was pretty impressive. We had five guys with unique backgrounds and a crazy age spread between 28 and 72! At the start of class Timothy said we would all be good buddies by the end of week two and he was correct. We all remain in contact through email and some of us met up at the Quadstate.

Thank you all for following along, I hope you enjoyed sharing in the experience.

-Clint
ABS Apprentice

IMG_0221 by Clint, on Flickr
 
Back
Top