Jeff Hubbard and Crew #1 in my book!!!!

Joined
Jul 21, 2016
Messages
3,050
I figured if Tiguy could take all of those knives apart and put them back together and they still worked, I could also. WRONG!! I was messing around with my 186 Titanium and thought I'd take the tool holder screw and go down to the local bolt supply and replace it with a shorter one so I could leave the tool at home and wouldn't have the end of the screw sticking out. Easier said than done... After the 3rd band-aide on the 4th finger and the knife still wouldn't work properly, I emailed Jeff Hubbard. After 1/2 a dozen emails and pictures, he sent me a label and I sent it in...It came back perfectly, with the shorter screws in a plastic bag for any of the carrying options.
THANK YOU!!!
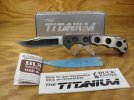
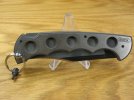
IMG_0504.JPG IMG_0509.JPG IMG_0510.JPG
 
good to hear. sure looks good in the pics.^

I havent taken mine apart. always distracted on other projects to open that door up. maybe a good thing.....:D
 
I figured if Tiguy could take all of those knives apart and put them back together and they still worked, I could also. WRONG!! I was messing around with my 186 Titanium and thought I'd take the tool holder screw and go down to the local bolt supply and replace it with a shorter one so I could leave the tool at home and wouldn't have the end of the screw sticking out. Easier said than done... After the 3rd band-aide on the 4th finger and the knife still wouldn't work properly, I emailed Jeff Hubbard. After 1/2 a dozen emails and pictures, he sent me a label and I sent it in...It came back perfectly, with the shorter screws in a plastic bag for any of the carrying options.
THANK YOU!!!
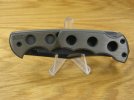
View attachment 1077487 View attachment 1077488 View attachment 1077489

So on top of fixing it they sent you the screws you were looking for at the hardware store?
 
So on top of fixing it they sent you the screws you were looking for at the hardware store?

Yep, it takes 3 screws for the different carrying options. 1 shorter screw to carry without the tool, 2 shorter yet screws for removal of the belt clip for sheath or pocket carry... The screws are a #5 x 40tpi....

Edited; I had the wrong measurement on the screws. They are #5 x 40tpi....Sorry...
 
Last edited:
good to hear. sure looks good in the pics.^

I havent taken mine apart. always distracted on other projects to open that door up. maybe a good thing.....:D

I took the longest screw out, holds the tool, there's a shim/block for the spring and that slipped and that's all she rode...After several hours, different days, and several sore fingers with band-aids, I contacted Jeff for help...
 
Yep, it takes 3 screws for the different carrying options. 1 shorter screw to carry without the tool, 2 shorter yet screws for removal of the belt clip for sheath or pocket carry... The screws are a 5mm x 40tpi....
I don't think it's metric, it is #4-40tpi
 
Last edited:
Yes, it is!! I had it out and went to budget bolt and they gauged it...I didn't think so either. We pulled one off of the shelf and it went right in with fingers. The only problem was the screw was too long and it had a shoulder on it...
 
Last edited:
Yep, it takes 3 screws for the different carrying options. 1 shorter screw to carry without the tool, 2 shorter yet screws for removal of the belt clip for sheath or pocket carry... The screws are a 5mm x 40tpi....

Does it come with those from the factory or is that something the Buck enthusiasts have come up with?
 
View attachment 1077547 View attachment 1077550 View attachment 1077549 View attachment 1077548 A new 186 Titanium came with enough spare screws to configure the knife in 4 different ways. All 4 configurations used 3/8” screws in the pivot and the rocker. The rear end required various combinations. Those screws are called cap screws. See photo.
There are crimping tools available that have #5X40TPI bolt cutters. Top tool in 2nd photo. I got boxes of all 4 sizes and switched the black oxide screws that come with the knives to stainless steel.
An easy way to assemble the 186 is shown in the last 2 photos.
 
I was unable to find th precision bolt cutter like tg's so I am in the process of adding a #2-56 hole to my standard crimpers. Got the hole tapped but other side for clearance hole i have broke a couple bits in it, and havnt got anotherbit yet.
 
It was a little hard, especially with the cheap tap and drills I bought first. wound up going to hardware store and bought an Irwin drill bit and it went right thru, and did both sides and was going to use the cheap bit to make the clearance hole and I managed to work harden it as it wouldn't even touch it. I have broke two bits since.
 
I was a machinist, what size drill about .070 #50 for a 2-56 you need to have a very fast speed on the drill press to use the smaller drills. Then in a little and back out with some cutting oil. If you use it on the clearance side go one size bigger #49 or .073. Little drills are very easy to break, I would use a small chuck that you use your thumb and forefinger to push down. Using the big chuck you don't really know how much pressure you are putting on the drill bit.
 
View attachment 1077547 View attachment 1077550 View attachment 1077549 View attachment 1077548 A new 186 Titanium came with enough spare screws to configure the knife in 4 different ways. All 4 configurations used 3/8” screws in the pivot and the rocker. The rear end required various combinations. Those screws are called cap screws. See photo.
There are crimping tools available that have #5X40TPI bolt cutters. Top tool in 2nd photo. I got boxes of all 4 sizes and switched the black oxide screws that come with the knives to stainless steel.
An easy way to assemble the 186 is shown in the last 2 photos.

Thanks for the illustration Tiguy...I was using the directions that came with the knife...
 
I was a machinist, what size drill about .070 #50 for a 2-56 you need to have a very fast speed on the drill press to use the smaller drills. Then in a little and back out with some cutting oil. If you use it on the clearance side go one size bigger #49 or .073. Little drills are very easy to break, I would use a small chuck that you use your thumb and forefinger to push down. Using the big chuck you don't really know how much pressure you are putting on the drill bit.
The first one I bought on ebay as a set was tap, #50 tap drill and #43 clearance.
The second one from home depot was a pair tap and #51 tap drill this worked well.
Ya I was only using finger tips and light pressure, till it wouldn't go then just kept adding pressure.
 
Back
Top