Kitchen Set WIP

Joined
May 18, 2014
Messages
546
Hey guys, I haven't posted in a while. Went off to veterinary school and had 2 kids since then. Finally getting settled back in where I can work on some knives again (have done a couple here and there since then).

I've been planning a kitchen set for a long while and figured now was a good time to start. I figured I'd post a WIP of it as I go along. It won't be done anytime soon most likely, but slow and steady it'll get there.

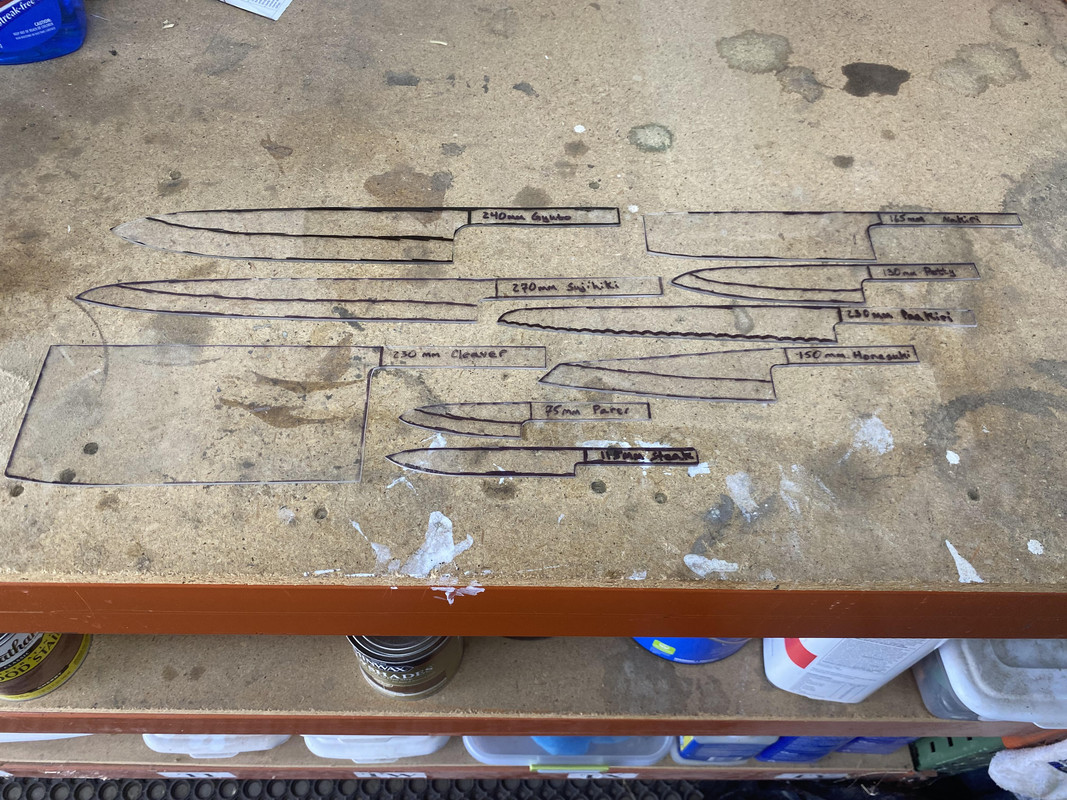
The set I'm planning is a 240mm Gyuto, 270mm Sujihiki, 230mm Bread, 205mm Bone Cleaver, 165mm Nakiri, 150mm Honesuki, 125mm Petty, 75mm Parer, and 8 - 115mm Steak. All will have octagonal wa handles.

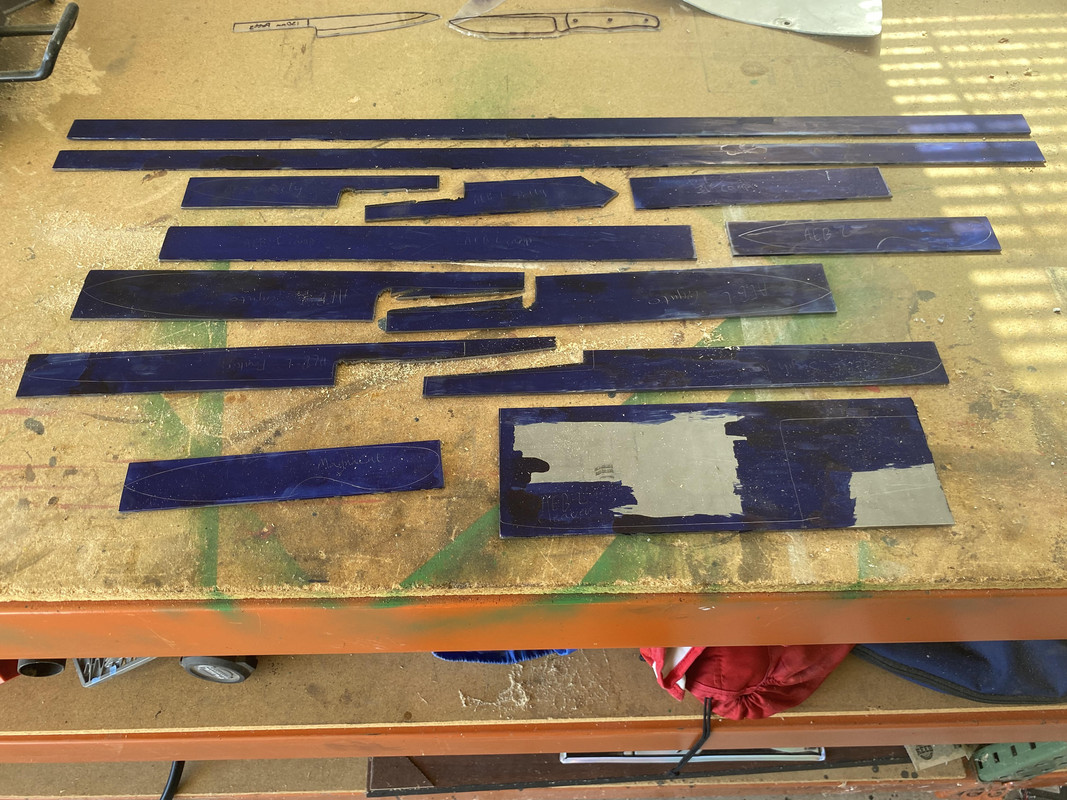
I always make a plexiglass blank first after I draw out the knives of any style, that way I can always go back and make another if someone likes it, or I like one someone requests.

Templates.jpg


I'm using AEB-L for this set. I bought pieces from NJSB and USAKM for these. Dykem layout fluid and scribed profile. Rough cut the pieces out except the steak knives.


Rough-Blanks.jpg


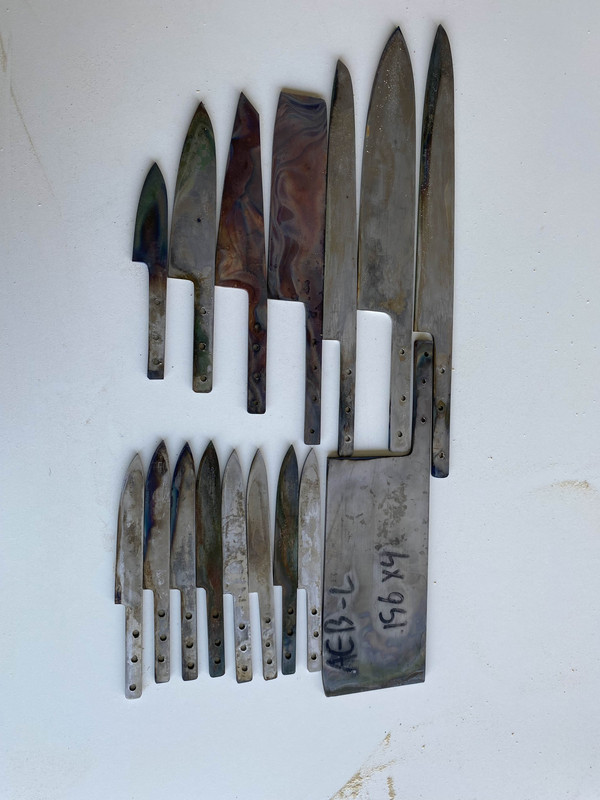
Cut closer to scribe lines on portaband and got the steak knives separated. 2 I had previously made with a different batch, so they have already been heat treated.


Dykem-Rough-Cut.jpg


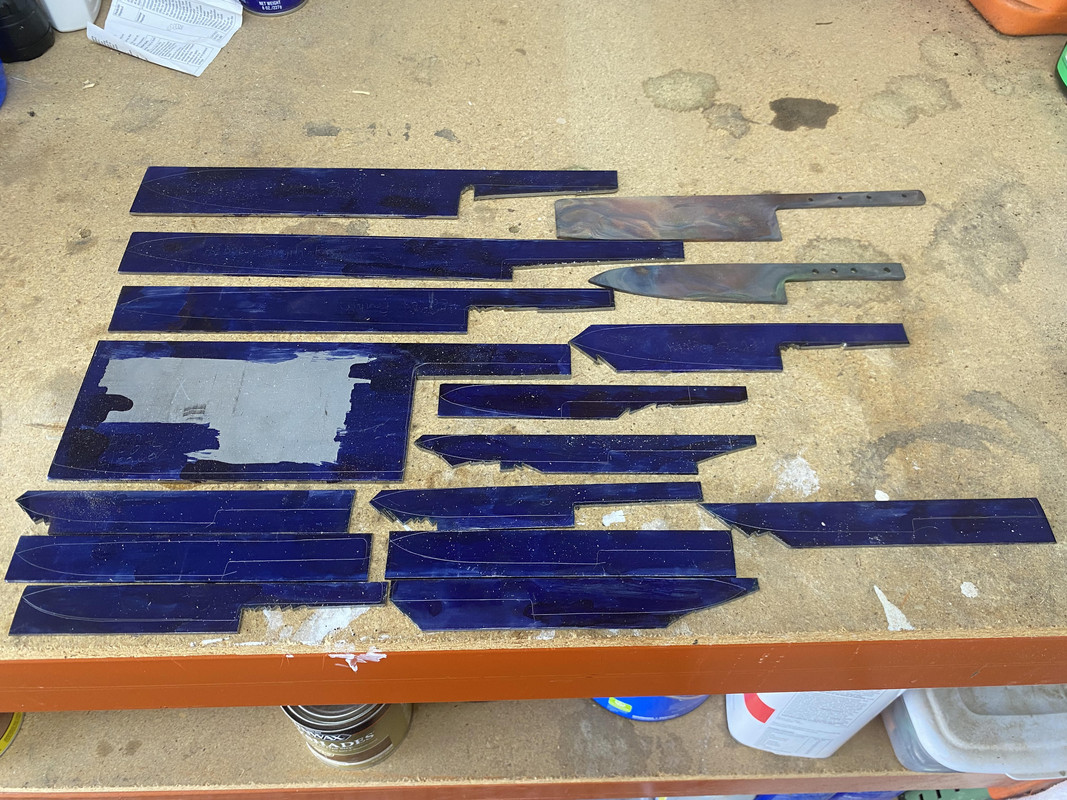
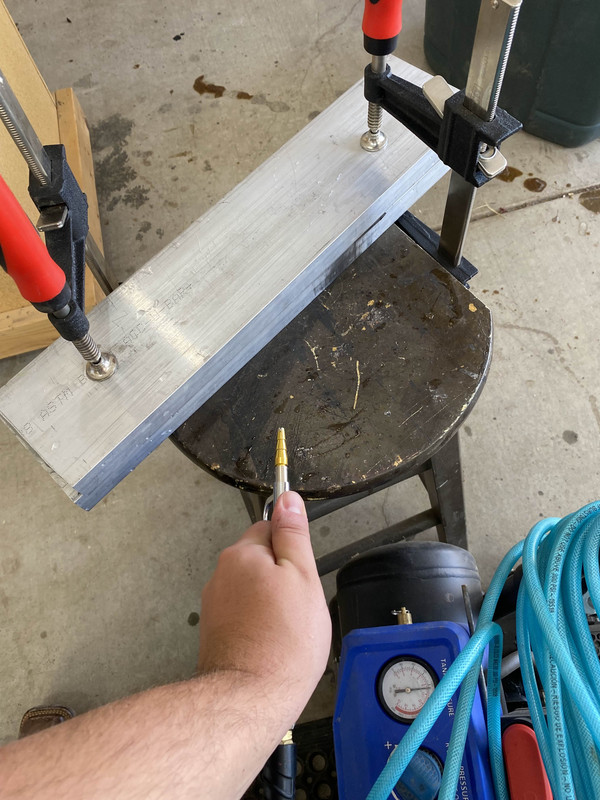
Profiled with a 36grit cubitron belt. Also drilled a few holes in the tangs. I do my handles with epoxy, not burned it, so it gives some extra hold for the epoxy (I use G-flex).

Profiled.jpg


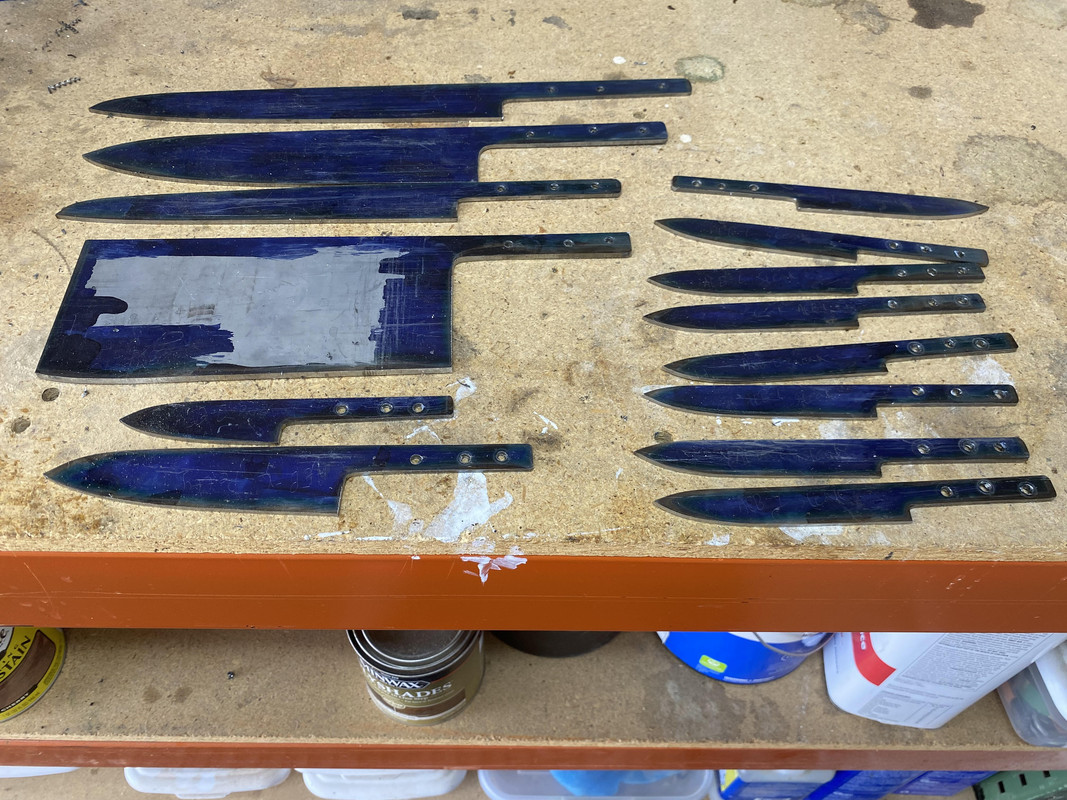
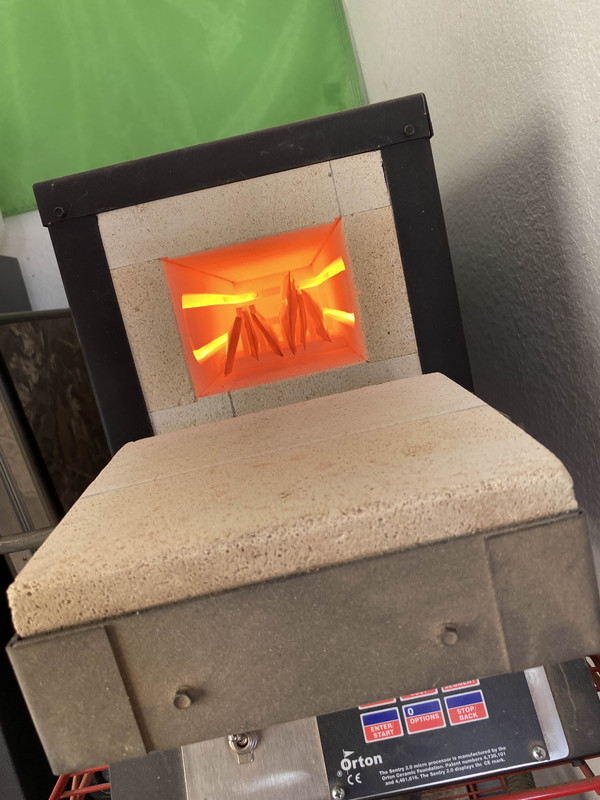
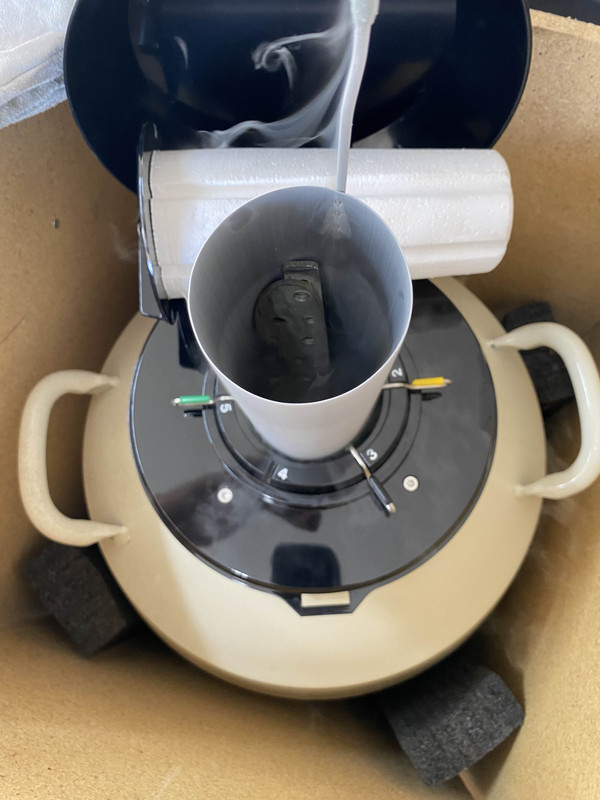
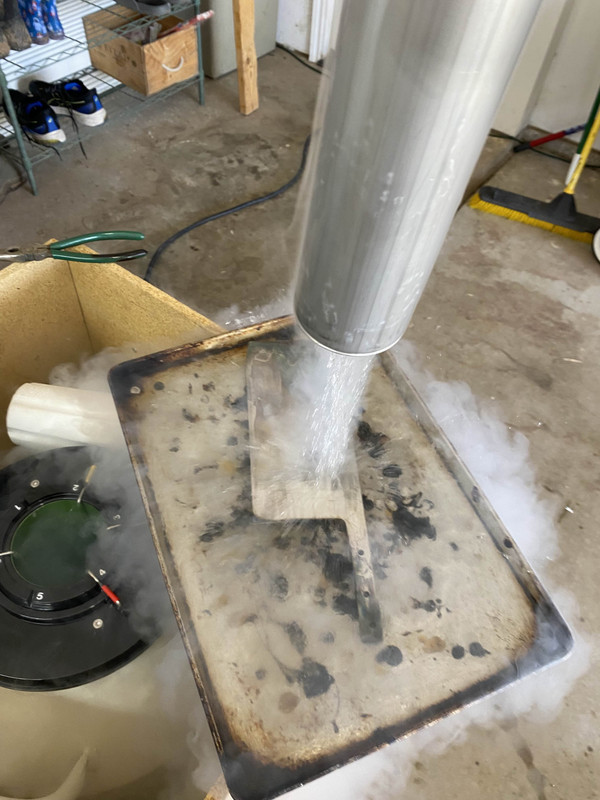
I will do bevels post heat treat, so next step is getting some LN then I'm ready to heat treat.

I'll try to get more action shots. I did most of these when I was home alone, so nobody to take the picture while I was working.
 
Last edited:
They showed up the other day when I first looked, but not anymore for me either.
 
Considering the url mentions "discordapp", and there is this article, and the fact that images worked for at least a little bit (possibly 24 hours like the article mentions?), I call this mystery solved. Those who see the images can try to do a hard refresh (windows: ctrl+F5, mac: cmd+shift+R), or a completely different browser (such as edge instead of chrome), and the images may disappear too.
 
Last edited:
That's a project to keep you busy! I see the pics as well now.

Are they all same thickness? What grinds are you planning?

Also not really easy to say from pics but it seems some of the designs have spines and tangs parallel to the edge, you would typically want to kick the tang couple of degrees up to raise the handle a bit and create a nicer ergonomics for board cutting.
The tangs are, but the way I do the handles, can raise them a slight bit.

The nakiri will be thinner than the gyuto. The cleaver is obviously thicker. The honesuki is also a bit thicker too incase I hit bones. The rest are all going to be pretty thin.
 
I can see the pictures now as well. Looks like a pretty well rounded set. Looking forward to more progress pics!
 
Got LN last week, so was able to HT this week.

I did 2 blades per foil wrap. This was the longer ones, I had already put a few in the oven before I remembered to take pics.

Foil-Packs.jpg


1950*F, hold for 8 minutes for the first and the rest just held at that temp as I worked.

Oven-2.jpg


Aluminum plate quench for 2 minutes with air blown through/over the plates.

Plate-Quench.jpg


I set them all out on the workbench untiul they were done, then into LN.

LN.jpg


The cleaver is too big, so I just laid it on my glueing sheet and pooured LN over it. There are holes at the bottom of the canisters and I didn't have anything readily available that I thought would work, so I just stuffed 2 red shop towels in the bottom of the canister and used it.

Cleaver-LN.jpg


I then tempered the entire batch at 350*F for 2 hours, twice, for an Rc 62-63. I then tempered the cleaver, honesuki and steak knives at 400*F twice the next day to lower them to 60-61Rc. I just have the kitchen oven to use, so wanted to get them all tempered that day. Figured better to do 350 first then 400 next day then just wait to do 400 the next day. No pictures of tempering.

The batch of 16 after HT ready to get bevels.

Batch-Post-HT.jpg
 
I didn't get any grinding done yesterday. We have some 8/4 black walnut and 8/4 rock maple that I'm going to make an end grain island top to replace our current island top. I was working on a reouter sled flattening jig all day yesterday.
 
Got LN last week, so was able to HT this week.

I did 2 blades per foil wrap. This was the longer ones, I had already put a few in the oven before I remembered to take pics.

Foil-Packs.jpg


1950*F, hold for 8 minutes for the first and the rest just held at that temp as I worked.

Oven-2.jpg


Aluminum plate quench for 2 minutes with air blown through/over the plates.

Plate-Quench.jpg


I set them all out on the workbench untiul they were done, then into LN.

LN.jpg


The cleaver is too big, so I just laid it on my glueing sheet and pooured LN over it. There are holes at the bottom of the canisters and I didn't have anything readily available that I thought would work, so I just stuffed 2 red shop towels in the bottom of the canister and used it.

Cleaver-LN.jpg


I then tempered the entire batch at 350*F for 2 hours, twice, for an Rc 62-63. I then tempered the cleaver, honesuki and steak knives at 400*F twice the next day to lower them to 60-61Rc. I just have the kitchen oven to use, so wanted to get them all tempered that day. Figured better to do 350 first then 400 next day then just wait to do 400 the next day. No pictures of tempering.

The batch of 16 after HT ready to get bevels.

Batch-Post-HT.jpg
You are not getting the protection out of the foil that you could. Sealing everything double-seamed, including the long seam, with something like a seam roller or hammering is what produces the least oxidation. Some of your blades show quite a bit of oxygen intrusion.
 
You are not getting the protection out of the foil that you could. Sealing everything double-seamed, including the long seam, with something like a seam roller or hammering is what produces the least oxidation. Some of your blades show quite a bit of oxygen intrusion.
I fold the foil over the blades, then roll that fold and blades over at least twice more, hammering each fold. Then fold the ends over, hammer, fold them again, hammer. What else should I be doing on them?
 
J Jrmysell My mistake, then. I interpreted what looked like cut ends in places incorrectly. Apologies. Yes, double folded and sealed somehow is much better then not.
 
Back
Top