- Joined
- Apr 16, 2008
- Messages
- 814
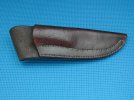
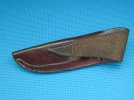
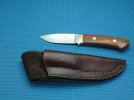
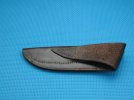
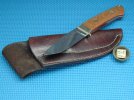
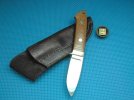
This is the same style as the first although I did improve. Still need alot of work in all areas.
A couple of questions,
8-9 oz. leather was loose on the back side so I skived it down a lot, but don't know how to finish it.
How should I finish the inside? Probably should have already done that?
I put about 4 bags of lead shot on top to wet form it and messed up the finish. Live and learn.
Opinions comments welcome.
Thanks for looking,
Mark Behnke
Attachments
-
 Ludlow Loveless Hunter and Sheath919 2010 010.jpg88.1 KB · Views: 59
 -
 Ludlow Loveless Hunter and Sheath919 2010 011.jpg92.8 KB · Views: 47
 -
 Ludlow Loveless Hunter and Sheath919 2010 012.jpg93.4 KB · Views: 45
 -
 Ludlow Loveless Hunter and Sheath919 2010 016.jpg96.4 KB · Views: 44
 -
 Ludlow Loveless Hunter and Sheath919 2010 019.jpg87.4 KB · Views: 37
")