Ernie1980
Gold Member
- Joined
- Apr 19, 2012
- Messages
- 8,164
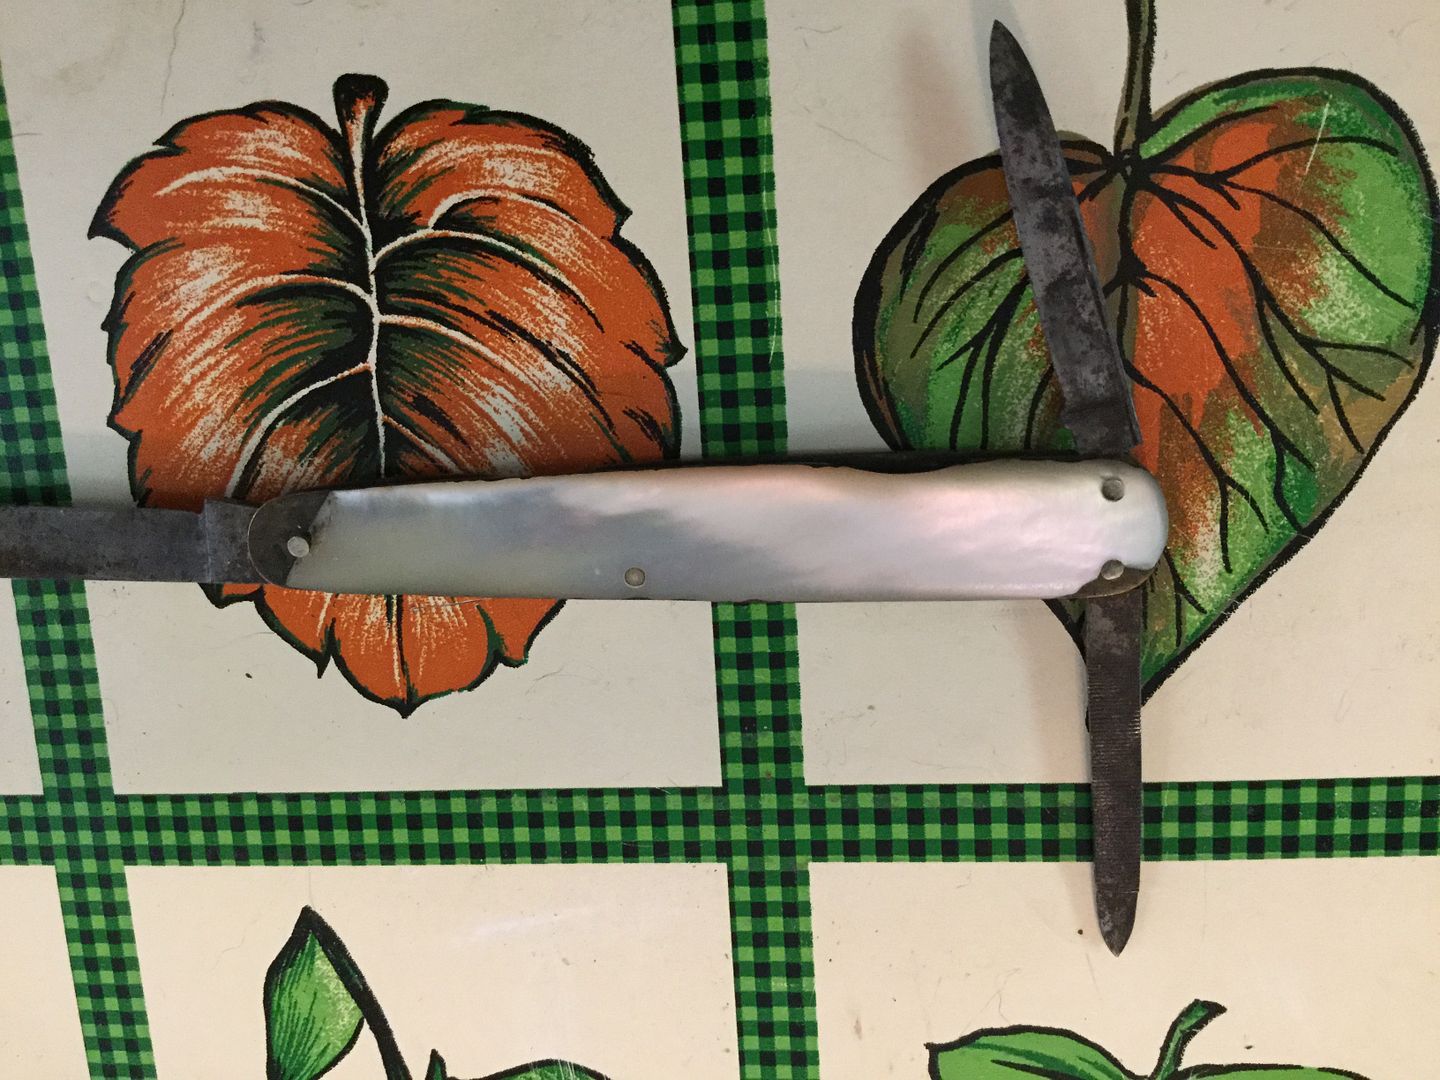
I picked up this rusted and beat up Sheffield lobster knife for $2 for the sole purpose of trying to restore it. Here is what it looked like when I started, the pearl covers were cracked and it was a mass of rust.
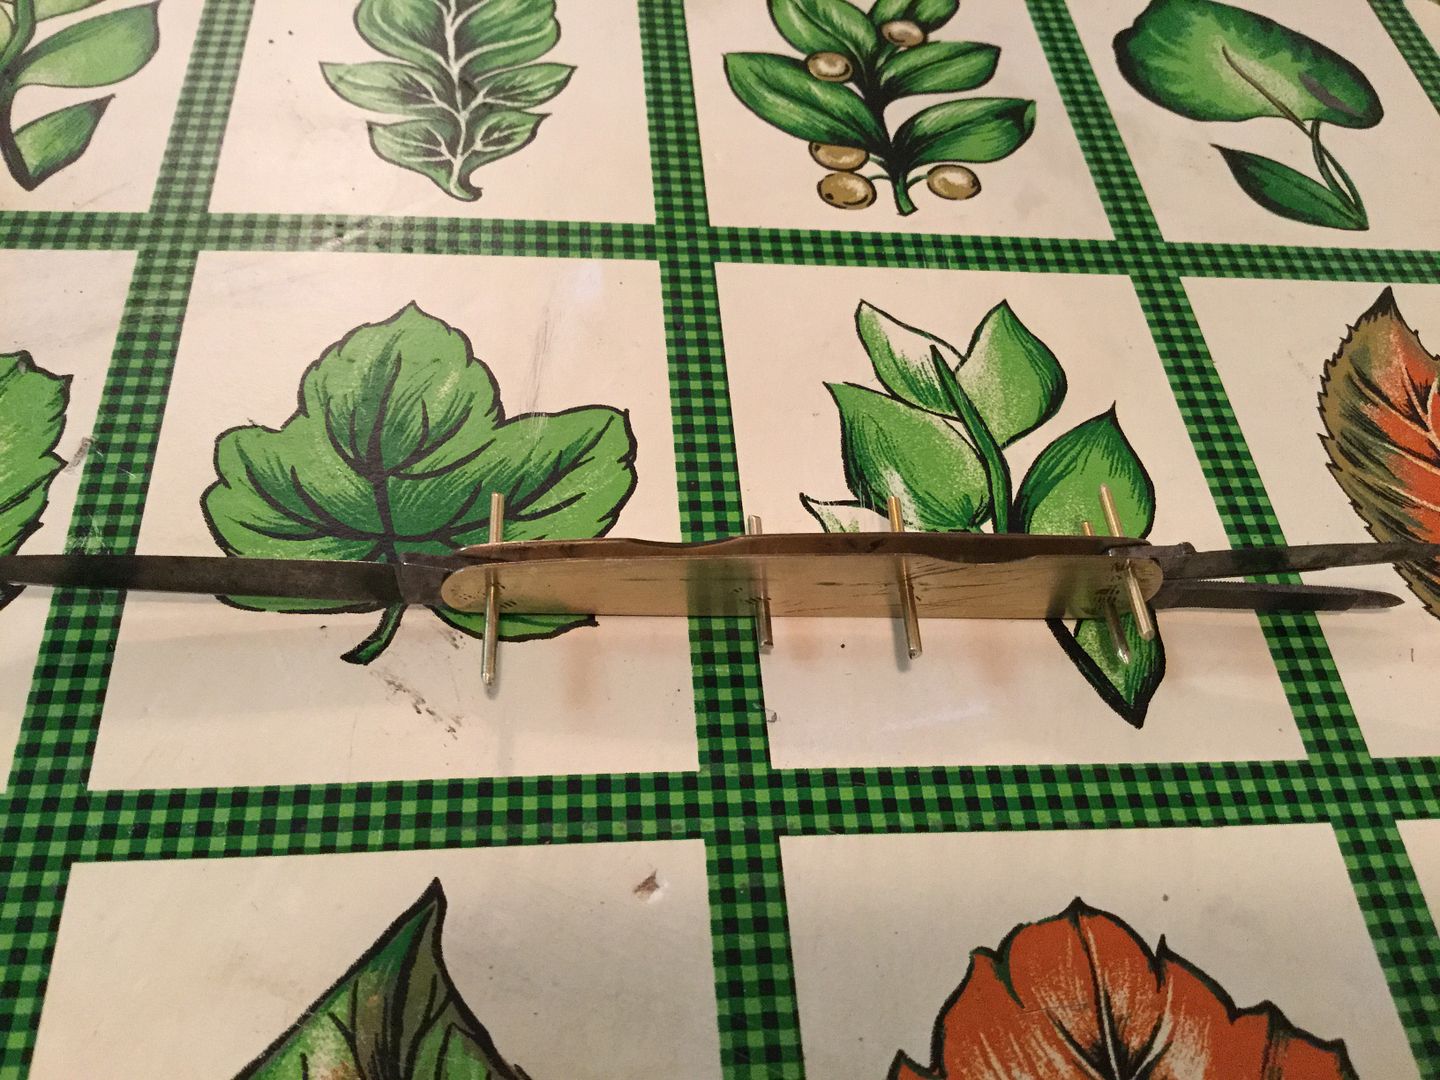
These are the parts broken down, I found the spring fasinating- the pen blade end is actually split!

I forgot to take a picture of the parts cleaned up, but I went with just rust and grime removal with a wire brush and left the patina intact on the blades and spring. I sanded the liners to 1200 grit but didn't go below the majority edge because I didn't want to make them any thinner.
Here it is together! It was kind of difficult to get lined up, but we got there after some harsh words were exchangd
I will start on the covers tomorrow- I am trying to decide between wood or a layered micarta. At the rate I work, it will probably be Christmas before I finally get it into my carry rotation!

These are the parts broken down, I found the spring fasinating- the pen blade end is actually split!

I forgot to take a picture of the parts cleaned up, but I went with just rust and grime removal with a wire brush and left the patina intact on the blades and spring. I sanded the liners to 1200 grit but didn't go below the majority edge because I didn't want to make them any thinner.

Here it is together! It was kind of difficult to get lined up, but we got there after some harsh words were exchangd
I will start on the covers tomorrow- I am trying to decide between wood or a layered micarta. At the rate I work, it will probably be Christmas before I finally get it into my carry rotation!
Last edited:

 Fortunality I realized it before the glue fully set so I was able to save everything! It did teach me a valuable lesson in labeling
")


