- Joined
- Dec 27, 2010
- Messages
- 6,852
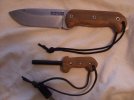
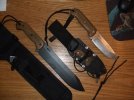
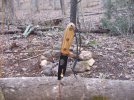
Made my first handle set about a month ago for the BK11. I figured since I got a BK2, it ought to have matching furniture. This is the third set of knife handles I've made, and it's definitely getting easier. Slipped a couple times on the sander as I was shaping it, so I got a bit of the coating off, but the shaping came off pretty well. I got the grooves for the pointer and pinky in and shaped the whole handle closely to the original handles, and it even still fits into the sheath quite nicely.
All work was done with a portable belt sander, sandpaper, a few files, a hand drill, some screwdrivers, and a hand saw, hence the lines that aren't quite straight.
I started out with a couple thin scraps of cocobolo wood. Then I cut them to a very rough shape, and did some basic 2D shaping with the belt sander. Then I drilled holes, using a clamp to hold the wood together, and one of the original handle scales as a template. I then used a knife I'm working on making, and a few sets of flat head screwdrivers to counter sink the hole, as the hand drill couldn't do big enough holes for the screw head and nut. I ended up getting slightly longer screws than stock, as the wood requires a bit more screw than the stock ones would allow.

After counter sinking the holes, I wedged the nuts into one side, making sure that they were flat, and correctly oriented. Then I screwed the new screws (they're 10x32 screws, 3/4" long) in, and assembled the handle. Oh boy was it rough! I finished the 2D shaping with a coarse belt on the belt sander, which is where it got its coating nicked. Then it was time for some 3D shaping, so I swapped to a finer grit sandpaper. I used the roller on the belt sander to sand in the grooves and do the 3D shaping, and then rounded all the edges, using the original handle as a visual guide.

I then switched to the 120 grit belt that was the finest I could find at Ace, and further refined my contouring. Once I was satisfied with the basic shape, it was time for the hand sand paper. I've done a bit of shaping with that so far, and am looking to fit the scales as closely to the tang as I can. The wood grain is really gorgeous; this cocobolo is really great stuff!


And, happily, it still fits cleanly into the sheath with good retention:

Pretty happy with how this has turned out so far. I'd love to see some other rehandling jobs besides the usual micarta ones.
All work was done with a portable belt sander, sandpaper, a few files, a hand drill, some screwdrivers, and a hand saw, hence the lines that aren't quite straight.
I started out with a couple thin scraps of cocobolo wood. Then I cut them to a very rough shape, and did some basic 2D shaping with the belt sander. Then I drilled holes, using a clamp to hold the wood together, and one of the original handle scales as a template. I then used a knife I'm working on making, and a few sets of flat head screwdrivers to counter sink the hole, as the hand drill couldn't do big enough holes for the screw head and nut. I ended up getting slightly longer screws than stock, as the wood requires a bit more screw than the stock ones would allow.

After counter sinking the holes, I wedged the nuts into one side, making sure that they were flat, and correctly oriented. Then I screwed the new screws (they're 10x32 screws, 3/4" long) in, and assembled the handle. Oh boy was it rough! I finished the 2D shaping with a coarse belt on the belt sander, which is where it got its coating nicked. Then it was time for some 3D shaping, so I swapped to a finer grit sandpaper. I used the roller on the belt sander to sand in the grooves and do the 3D shaping, and then rounded all the edges, using the original handle as a visual guide.

I then switched to the 120 grit belt that was the finest I could find at Ace, and further refined my contouring. Once I was satisfied with the basic shape, it was time for the hand sand paper. I've done a bit of shaping with that so far, and am looking to fit the scales as closely to the tang as I can. The wood grain is really gorgeous; this cocobolo is really great stuff!


And, happily, it still fits cleanly into the sheath with good retention:

Pretty happy with how this has turned out so far. I'd love to see some other rehandling jobs besides the usual micarta ones.


