My Very First Heat Treat

Joined
Feb 17, 2009
Messages
1,464
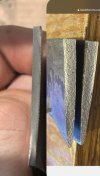
I finally got a small forge and a quench tank. I have some old discarded 1095 blades so I wanted to perform a test. I brought the forge up to around 1800 degrees and the blade was a little brighter than I thought it should be. I came down to 1500 and got a color I liked, checked for nonmagnetic and quenched in room temp canola oil.

Then I let it sit overnight. This morning I put it in a vise for destructive testing. Here are some pictures and a link to the video of me breaking the blade.

I was hoping to anneal the blade and test again, but it broke more than just the tip off...

I would like opinions on the grain structure if possible.


qoHQ7ny.jpg

tcRfYjU.jpg
 
Take the remnants of that blade with the horribly large grain and thermal cycle it several times to try and reduce it. Then re-harden between 1450 and 1500F and break it again.
Your excursion to 1800F made the grain grow huge.
 
The grain looks pretty coarse from the photos, typically you would not want to bring 1095 up to 1800 during the heat treating, you want it around 1475 then quench, a faster oil works better but canola can work with thin cross sections, I’d suggest picking up some 8670, or 1084 to start with they are a bit more forgiving to heat treat and can be quenched in canola with better results than 1095. On your next test make 3 coupons about 3” long, bring one up to exactly non magnetic then quench, the second one go a shade brighter then quench and the final one 2 shades brighter, snap all three the second sample should have the finest grain and the first sample should be hard to break the last sample will likely look like your current blade but that gives you three references in your shop and your lighting what color to shoot for, if all you have is a file to check hardness the three sample can be used to compare a soft blade(first sample) and a proper hardness (second sample) out of the quench. Keep practicing and make up a new coupon every 5 to 10 blades to see how you do at holding to colors if the sample has large grain you know it’s too hot. Keep practicing that way until you get really consistent samples. Other than that good job on getting your first heat treat done now just keep practicing and learning.
 
I finally got a small forge and a quench tank. I have some old discarded 1095 blades so I wanted to perform a test. I brought the forge up to around 1800 degrees and the blade was a little brighter than I thought it should be. I came down to 1500 and got a color I liked, checked for nonmagnetic and quenched in room temp canola oil.

Then I let it sit overnight. This morning I put it in a vise for destructive testing. Here are some pictures and a link to the video of me breaking the blade.

I was hoping to anneal the blade and test again, but it broke more than just the tip off...

I would like opinions on the grain structure if possible.


qoHQ7ny.jpg

tcRfYjU.jpg
Congrats on the first heat treatment

The fracture grains should not be visible, should just be a flat gray color.


You'll only get better if you keep at it.
 
Take the remnants of that blade with the horribly large grain and thermal cycle it several times to try and reduce it. Then re-harden between 1450 and 1500F and break it again.
Your excursion to 1800F made the grain grow huge.

I had no idea the grain was supposed to be so small you couldn't see it! Learning everyday.

The grain looks pretty coarse from the photos, typically you would not want to bring 1095 up to 1800 during the heat treating, you want it around 1475 then quench, a faster oil works better but canola can work with thin cross sections, I’d suggest picking up some 8670, or 1084 to start with they are a bit more forgiving to heat treat and can be quenched in canola with better results than 1095. On your next test make 3 coupons about 3” long, bring one up to exactly non magnetic then quench, the second one go a shade brighter then quench and the final one 2 shades brighter, snap all three the second sample should have the finest grain and the first sample should be hard to break the last sample will likely look like your current blade but that gives you three references in your shop and your lighting what color to shoot for, if all you have is a file to check hardness the three sample can be used to compare a soft blade(first sample) and a proper hardness (second sample) out of the quench. Keep practicing and make up a new coupon every 5 to 10 blades to see how you do at holding to colors if the sample has large grain you know it’s too hot. Keep practicing that way until you get really consistent samples. Other than that good job on getting your first heat treat done now just keep practicing and learning.

Will the grain get any better after annealing? I have quite a lot of 1095 to test on. I'm going to try the test you describe. Is it easy to break a 3" coupon...and what is a coupon?

I do have some 1080 in the shop, but I have a lot more 1095. I'll try some 1080 tomorrow.
 
Yep, that grain is massive. Like Deadboxhero mentioned it should look like a gray velvet with no discernible structure to the eye. Not sure why you took 1095 to 1800F unless you were going to forge it. Let's just call that a really solid normalizing heat! LOL!

You won't need to anneal the 1095, just thermal cycle it around 1450-1500 3 or 4 times and let it air cool each cycle. This is called "thermal cycling" and will refine the grain structure. Then re-harden as close to 1475F as you can.

A coupon is just a "sample" piece of steel. Usually you make several of them and vary the heat treat parameters (like your austenitizing/hardening temperature) to see which temperature gives you the best result.

Thanks again for the insight. I may be using the wrong terms, but I do need to normalize when complete at 400 degrees for an hour or two correct?
 
That would be tempering. And yes most simple carbon steels need to be tempered for two, two hour cycles after hardening.
But don't temper the coupons you're going to break, that will make it hard to discern the grain size. Break them after the quench once cooled down.
 
But don't temper the coupons you're going to break, that will make it hard to discern the grain size. Break them after the quench once cooled down.

Thanks. I didn't think you were supposed to temper anything when trying to judge the grain size.

Here is another I did today. You can't see hardly any grain at all with the naked eye. It just looks smooth and grey.
The picture is zoomed in with my phone camera. This one was brought to 1500 and quenched in room temp canola oil.

AV9Jq7E.jpg
 
That grain still looks really large. Here is a picture I’ve seen floating around on the web to give you an idea of what you’re shooting for.

fla3ic7.jpg

Thanks for the picture. I agree with you, but holding it in my hand and looking at it directly It looks very close to the 3xNormalization. It's consistent
all the way through the blade. None of that second layer look like in the picture you posted.

I'm going to heat treat some coupons tomorrow and keep very close attention to temps and colors. I plan to try what Joshua suggested in post #3.
 
If you have an old file laying around snap it in half and look at the grain, or go to a flea market and buy a few for a couple bucks. That’s what you’re shooting for. To me your last pic still looks huge.
 
If you have an old file laying around snap it in half and look at the grain, or go to a flea market and buy a few for a couple bucks. That’s what you’re shooting for. To me your last pic still looks huge.

Thanks. I will go to the local yard sales this coming Saturday and see what I can find. In the meantime I'll test on some 1095 coupons.

I think I may have some poorly ground 1080 blades to test on as well.
 
Thanks. I will go to the local yard sales this coming Saturday and see what I can find. In the meantime I'll test on some 1095 coupons.

I think I may have some poorly ground 1080 blades to test on as well.
Here is a side by side photo of the last test piece you did and a test piece I did a while back, had to search quite a way back on my phone to find it. Both are zoomed in photos but you can see the difference it’s like fine sand versus gravel, don’t take this the wrong way because everyone starts somewhere, to me if the grain is the size that you have it means one of two things either your quenching hotter than you think, I find turning off all lights really helps see when you have an even color and can help judge when you are ready to quench or the steel is not been properly processed to be ready to quench, this means you’ll need to do thermal cycles to refine the grain like suggested above do three cycles of about 1400-1500 try to do each cycle a bit colder than the last or at least that is what works well for me, let the blade or test piece cool to black between cycles then try bringing the test piece back up and quenching it and see if that improves your result. Taking a picture of the grain can be a better way to look at it critically, the phone picks up details the eyes might miss.26F20011-2629-4855-B663-3D2FB20EF87A.jpeg
 
That step is called Tempering. You are drawing the hardness down a bit, and making the steel less brittle.

Every steel has its own parameters for best heat treat for hardness and temper.

I'd suggest taking a gander at knifesteelnerds.com

Read up on the various steels you are using.
 
I find it easier to do all of my HT in the dark, because I use very primitive home made equipment (no evenheat temp controlled ovens) You might want to learn the old fashioned way. When it's dark it's much easier to make sure you don't over heat the steel, daylight can make it very difficult to catch when it goes over cherry red into orange and yellow. If your blade goes anywhere near bright orange/yellow it's way too hot and the grain will grow and expand.
Try doing your HT in the evening time so you can pay very close attention to the colour, I don't use magnets or thermometers or anything like that, I judge everything by eye and after practicing for a couple of years you just know when it's right.
 
Here is a side by side photo of the last test piece you did and a test piece I did a while back, had to search quite a way back on my phone to find it. Both are zoomed in photos but you can see the difference it’s like fine sand versus gravel, don’t take this the wrong way because everyone starts somewhere, to me if the grain is the size that you have it means one of two things either your quenching hotter than you think, I find turning off all lights really helps see when you have an even color and can help judge when you are ready to quench or the steel is not been properly processed to be ready to quench, this means you’ll need to do thermal cycles to refine the grain like suggested above do three cycles of about 1400-1500 try to do each cycle a bit colder than the last or at least that is what works well for me, let the blade or test piece cool to black between cycles then try bringing the test piece back up and quenching it and see if that improves your result. Taking a picture of the grain can be a better way to look at it critically, the phone picks up details the eyes might miss.View attachment 1541607

Thanks for the comparison and the advice! I'm here to learn and appreciate the honest opinion!

I didn't do any thermal cycles and I'm sure I had the steel to hot. I cut some coupons yesterday to practice on today.

I was surprised how hard it was to break that blade. even with that grain structure it was tough.
At the edge on a knife blade, it would be more prone to chipping, so it will be worth the effort to refine the work.
 
At the edge on a knife blade, it would be more prone to chipping, so it will be worth the effort to refine the work.

I am absolutely going to refine my process until I get it right. I was just surprised at the strength of the blade this being my very first heat treat and destructive test.
 
Back
Top