I have been making some non-sea life critters, and thought you guys might like a tutorial on how to do a simple spoon critter.
This is for a mouse/squirrel, but a small amount of shaping difference and it becomes a beaver, a platypus, a skunk, etc.
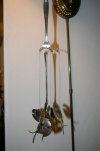
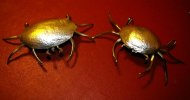
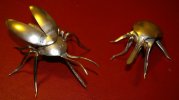
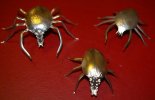
Please meet the famous spy fighting duo, "Mouse and Squirrel"...or was that Moose and squirrel????
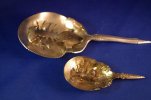
First - the spoon. Use a nickle silver or silver plate spoon ( unless you want to use sterling). Stainless won't work.
For these small critters, I use teaspoons. Use a thin ( thickness) spoon, as you will have to do some bending. Baby spoons, jelly/sugar/olive servers, and other thin spoons work great.
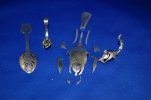
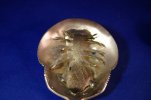
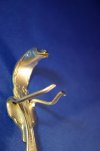
Mark the cut lines with a Sharpie, and change anything that is not looking right. You are basically drawing the shape of a road kill squirrel.
Make the face and body parts fatter than you think looks right until you get it down pat...you can always cut/file some off if it is too fat. You will bend the edges down to give some shaping to these areas, and they will end up thinner.
Tools - use a jewelers saw and a 4/0 blade. You will break a lot of them, but heavier blades won't turn for the curved cuts and reverses. TIPS - Go slow, use even strokes, take your time, hold the spoon firmly in contact with the cutting arm, lubricate the blade with some candle wax. Most important is DON'T saw Up and Down...saw down only. A jewelers saw has the teeth pointed toward the handle, and cuts on the down stroke. You will ruin the blade in seconds by sawing back and forth. Cut down with a nice even and smooth stroke.Then slightly back the blade off while lifting the saw back up for another down-cut.
You will also need two small jewelers needle nosed pliers with smooth jaws. A round nose or chain nose pliers is also nice to have.
Take a 6" piece of 3/8X1/2 maple and band saw a slot 3" down the center of the 1/2 side. Drill a hole on the unslotted end and screw it onto your work bench so that it sticks out. Use this to do your cutting on, with the saw blade riding in the slot, and the spoon on top of the board.
Procedure -
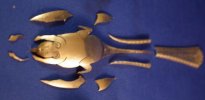
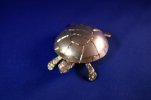
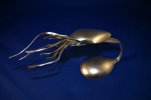
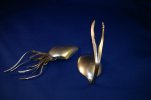
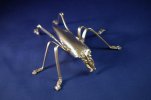
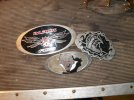
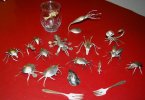
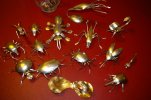
Make cuts from both sides going from front to back. Cut the teeth, then do on side of the face, then the other. Next, do one front leg, then the other. Do one back leg....the other. Cut out the"belly fat" between the legs, leaving the side flap. Cut the tail as desired - fat for a squirrel, thin for a mouse. You can see in the photos the shape drawn out, and then the pieces cut off. Notice that most of the body parts nest into each other and only the excess spoon is cut away.
Once all the cuts have been made, file any rough places or points with a fine barrette needle file.
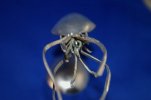
Lift the legs up a bit with the pliers, and bend the side flaps down and under the belly. This creates a 3-D effect of the squirrel having sides. Turn the front and back corners of the flap inward more than the sides to round it a bit.
Next, move the legs down a bit, and bend the ears up into position. Twist as needed to look right. Grab the cheeks with the pliers and bend the edges down to shape the face. If you have a punch, mark the eyes and nose.
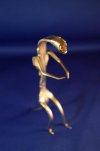
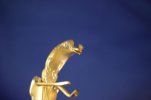
Now, bend the front legs down and turn inward to get a realistic look. Do the back legs the same. Bend the elbows of the front legs to make the arms position right, and bend the wrists to make the hands have some movement. Do the back legs as needed. Bend the tail up and curl it as needed to make the animal you want. For a mouse, file the tail into a round taper, for a squirrel, make it flat and widen toward the end.
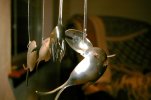
Once all the parts have been bent, position the legs/feet so the animal sits right. Keep adjusting things until you like the pose.
Lastly, bend the teeth down as needed to be a rodent. I took a piece of the cut off spoon and made a piece of cheese. I placed it in the mouse's hands and used a tiny bit of soft solder to hold it in place.
Give the critter a light sanding with paper or a cratex wheel to remove any tool marks, and then buff with a brass or nickle wire wheel to make a matte finish.
That's it...no magic, just some simple hand skills and a good eye for what looks realistic. Looking at some photos on the computer while drawing and shaping your critter will help a lot.
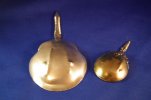
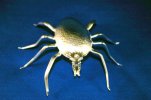
The horseshoe crabs are cut the same way from a ladle and a spoon for the claws and gills.


")