-
The BladeForums.com 2024 Traditional Knife is available! Price is $250 ea (shipped within CONUS).
Order here: https://www.bladeforums.com/help/2024-traditional/
You are using an out of date browser. It may not display this or other websites correctly.
You should upgrade or use an alternative browser.
You should upgrade or use an alternative browser.
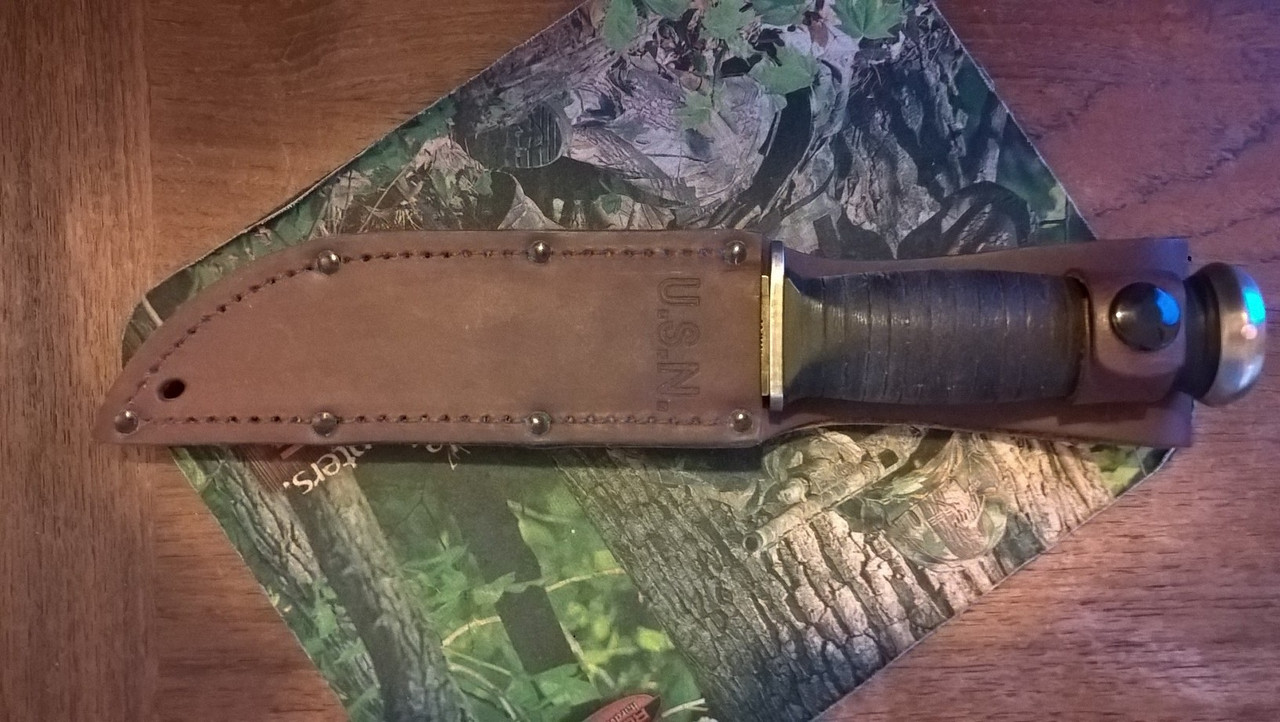
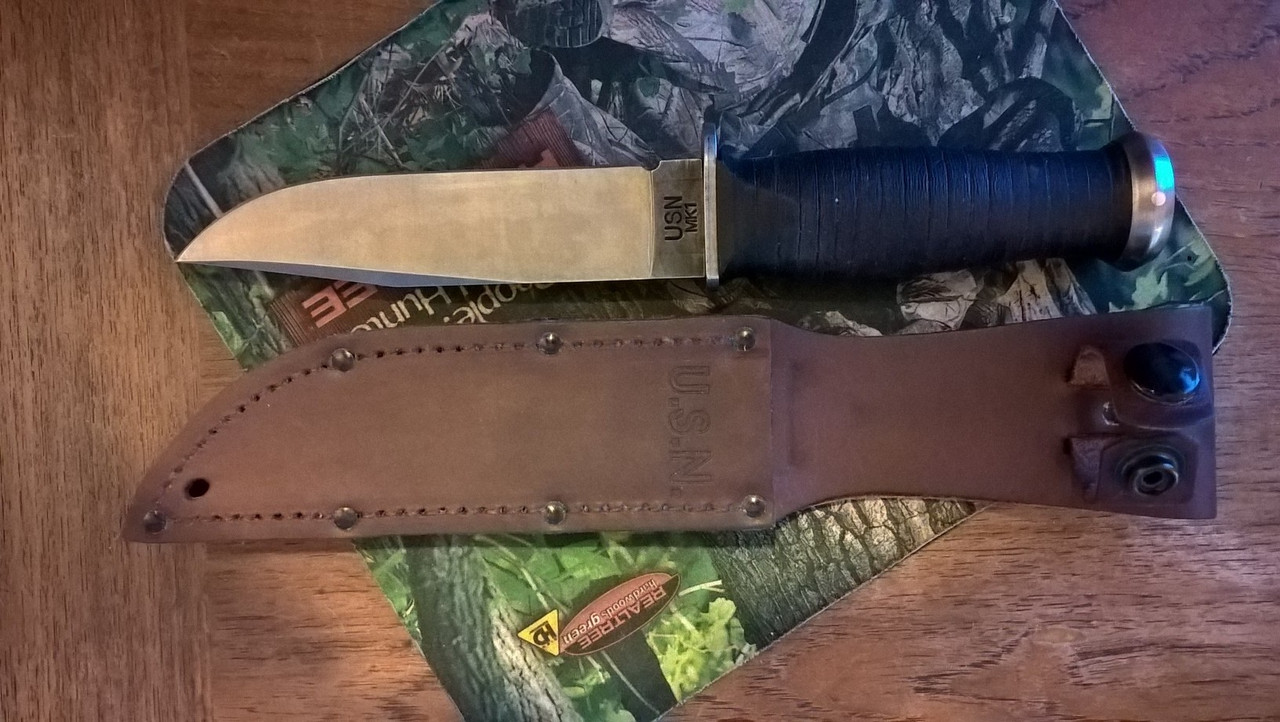
New to Me MK1
- Thread starter DunkEm
- Start date


")
- Joined
- Jan 26, 2015
- Messages
- 1,154

- Joined
- Dec 20, 2012
- Messages
- 2,734
Very nice, I like the FFG
- Joined
- Dec 9, 2013
- Messages
- 3,159
Nice! I love mine but it gets little use cuz its so perty...you got some hefty mitts there...it fits me great.
It's true, I am not among the small handed peoples of the world. It would make a lot of things more convenient if my hands were closer to average size, but I'd look pretty funny that way.
The Zieg
Gold Member
- Joined
- Jan 31, 2002
- Messages
- 5,092
Yeah, you got you some meat hooks. But with smaller hands than you, I also have some knives with smaller handles so I know how you feel when you pick it up. Give it a workout and if it doesn't work for you, hit me up. I'll buy it in a heartbeat. I love 'em.
Zieg
Zieg
- Joined
- Dec 20, 2011
- Messages
- 120
Grind the pommel down a bit.
It will improve both the grip and balance of the knife.
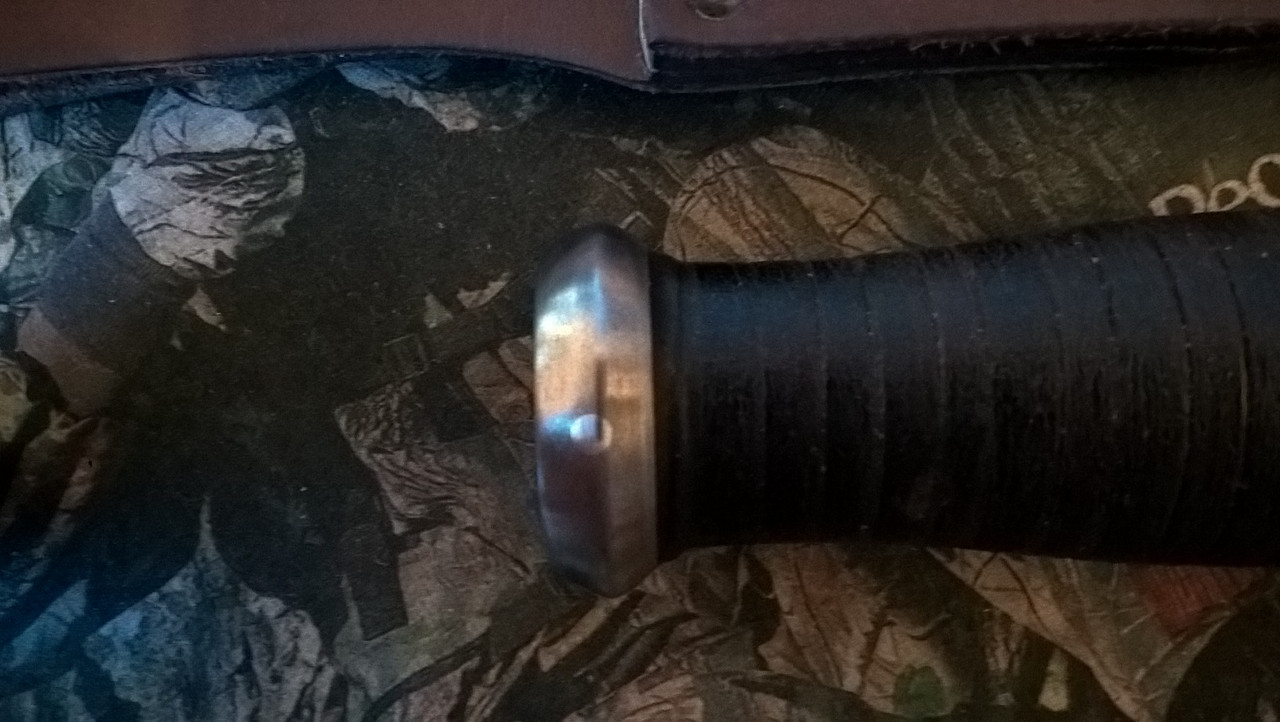
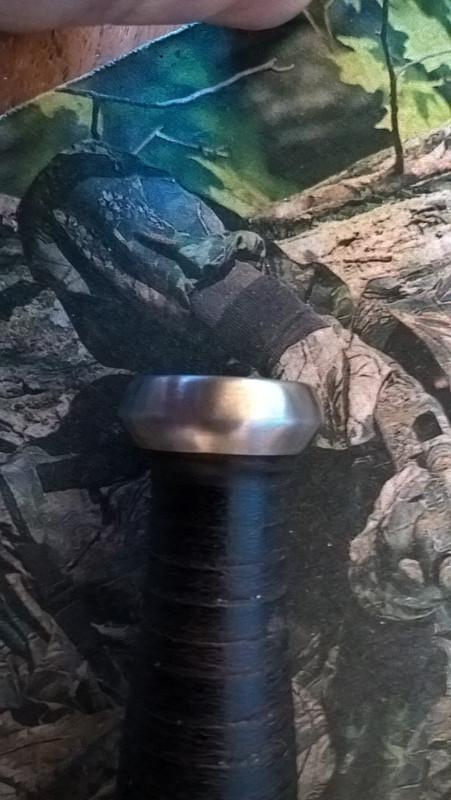
Did mine w/ a belt sander.
GR
It will improve both the grip and balance of the knife.
GR
Last edited:
- Joined
- Dec 9, 2013
- Messages
- 3,159
Gonna have to think about that. I hate to lose the black finish, but it sure would address the size issues. ...Grind the pommel down a bit.
It will improve both the grip and balance of the knife.


Did mine w/ a belt sander.
GR
- Joined
- Dec 20, 2011
- Messages
- 120
GR,
Really dig your work! Much inspiration. For what can be told from the best pics, very professionally done. Especially the re-grinded pommel. The mods give the knife a very authentic look, beautiful!
cheers!
Thanks.
The MkI Navy is a Great knife, but needs a little upgrade on account of the fact that the original had a smaller, lighter, aluminum pommel w/ a generous inner bevel... and KA-BAR buffs their leather handles swamp-log slick.
So...
The metal was citri-stripped and then White Vinegar etched for corrosion protection.
The Leather handle was wire-brushed until the washers grooved, and then I Sno-sealed'em over a low-flame kitchen range until it wouldn't take any more. The sheath was Sno-sealed the same way. The handle is now water-proof and very tactile.
As for the Pommel...?
It just takes One piece of high-tech equipment...


...and a little patience.
Note: Read these instructions through a few times, and do this work in your head, w/ the knife in hand, until you are sure you understand the procedure. That is really the hard part.
First, establish the bevel angle on the handle (in) side at the major (vertical) axis.
Once you get it set (I did it all free-hand from a rest) roll the knife both ways to reproduce (grind) that angle around to the minor (horizontal) axis along the inner plastic spacer. Do a little at a time and go slow (you can't put it back on ).
You will notice that the inner bevel now extends far out to the end of the pommel at the minor axis - That's OK (for now) because they will come back w/ the outer bevel grinding. When the inner bevel looks good and the lower edge follows the handle washer, move to the outside bevel.
The outer bevel grind starts out like the inner, on the major axis, except reversed. Instead of following the lower edge of the grind, like you did w/ the inner bevel along the washer, the outer bevel uses the top of the grind to re-establishment the pommel waist (equator) line, as the control. As you grind around to the minor axis, the waistline will begin to migrate back from the end of the pommel toward the center (equatorial) line.
When the waistline is straight around the pommel, centered between the Two grinds, the outside bevel is complete. Then just buff it a little w/ some emory-cloth a/o green scotch-brite pad.
Easy.
GR
Last edited:
")
Thanks.
The MkI Navy is a Great knife, but needs a little upgrade on account of the fact that the original had a smaller, lighter, aluminum pommel w/ a generous inner bevel... and KA-BAR buffs their leather handles swamp-log slick.
So...
The metal was citri-stripped and then White Vinegar etched for corrosion protection.
The Leather handle was wire-brushed until the washers grooved, and then I Sno-sealed'em over a low-flame kitchen range until it wouldn't take any more. The sheath was Sno-sealed the same way. The handle is now water-proof and very tactile.
As for the Pommel...?
It just takes One piece of high-tech equipment...
...and a little patience.
Note: Read these instructions through a few times, and do this work in your head, w/ the knife in hand, until you are sure you understand the procedure. That is really the hard part.
First, establish the bevel angle on the handle (in) side at the major (vertical) axis.
Once you get it set (I did it all free-hand from a rest) roll the knife both ways to reproduce (grind) that angle around to the minor (horizontal) axis along the inner plastic spacer. Do a little at a time and go slow (you can't put it back on ).
You will notice that the inner bevel now extends far out to the end of the pommel at the minor axis - That's OK (for now) because they will come back w/ the outer bevel grinding. When the inner bevel looks good and the lower edge follows the handle washer, move to the outside bevel.
The outer bevel grind starts out like the inner, on the major axis, except reversed. Instead of following the lower edge of the grind, like you did w/ the inner bevel along the washer, the outer bevel uses the top of the grind to re-establishment the pommel waist (equator) line, as the control. As you grind around to the minor axis, the waistline will begin to migrate back from the end of the pommel toward the center (equatorial) line.
When the waistline is straight around the pommel, centered between the Two grinds, the outside bevel is complete. Then just buff it a little w/ some emory-cloth a/o green scotch-brite pad.
Easy.
GR
Thanks for sharing. I am saving for a new belt sander at the local home depot. Looks nice. I have an old craftsman one that I picked up at an estate sale. If I had the right equipment readily available, there is no limit to what I could make. Wish I had a drill press and band saw.
Good stuff.Dunk 'em, nice pick up. I have a Kraton Mark1 that I am so happy I bought. They are great knives.
- Joined
- Dec 20, 2011
- Messages
- 120
Don't overlook the wire brush and Sno-Seal.
Really gives a good texture.

GR
Really gives a good texture.
GR