Newby Overheating Pins on Handles-Please Help

tsavickas36

Gold Member
Joined
Jan 14, 2025
Messages
20
Hello everyone I am extremely new to knife making, watched and read much more than knives made, but I am having a blast learning new styles, finishes and techniques.

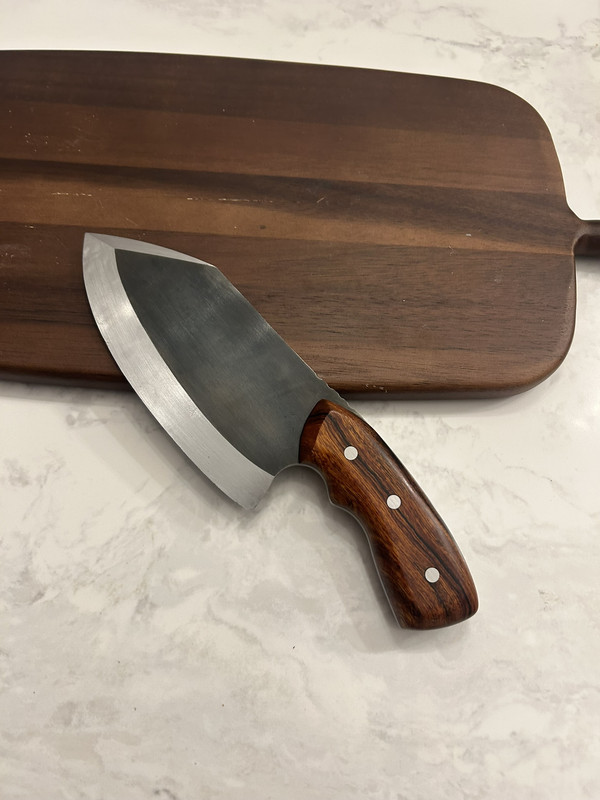
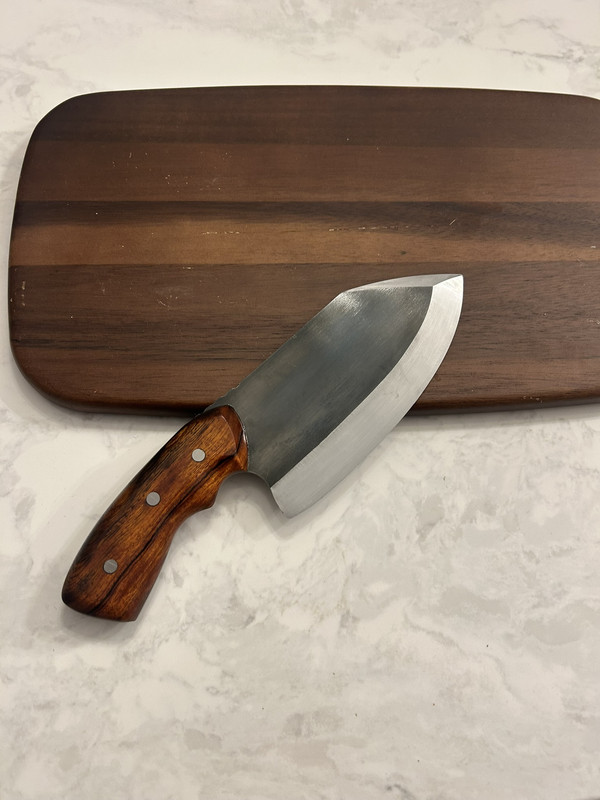
I have made a few knives with g10 pins and a few with steel and brass pins. I have a Grizzly 2x42 with brand new 36 grit belt running at 100% on for my rough shaping.

It seems each time I am overheating my pins and burning them or the epoxy holding it all together.

It bothers me and just doesnt look as good. I did Ironwood handles with black g10 pins and now I can't get the pins back to black because they keep burning.

I know this is probably very elementary fix to my problem but I am struggling to find out what I am doing wrong.

Thanks in advance for helping this newby out.
 
Might be helpful to post this under the knifemakers- questions and answers area. I am sure you will get good advice.
 
I had this problem too with the 2x42. since there is no (realistic) way to slow the grinder down, cut/file the pins as close to flush as possible. If you are going to use the sander to shape the handle use a light touch and dunk the handle in water after each pass, like you would a blade. Once you burn G10 pins, the fibers are burned a bit down, I recommend filing down until they look good.

Or shape it by hand with files and paper and forgo the sander.
 
I rarely glue my pins at the time I glue my handle. I use over length pins or drill bits, glue up the handle, clamp, then pull the pins/bits. Once the epoxy cures, I can shape the handle all I want without worrying about overheating the pins. Once its near where I want it and Im switching to hand sanding, I clean out any epoxy in the pin holes, a using pins that are pretty close to the length I need, glue them in and file/sand as required; depending if Im peining the pins or not. Then finish sanding and polishing.
 
I also cut the pins close to flush before shaping the handle on the grinder. I secure the handle in my vise and then hit each pin with my angle grinder using a thin cut off disc. One quick zip, and it's still cool to the touch.
 
I sometimes cut off my pins with the grinding disc on the Dremel. Doesn't overheat and is done in just a second.
 
The grizzly 2x42 hauls ass on full speed. Probably not fast like a full power 2*72 but it's plenty fast in my opinion. Not sure what your experience level is with a grinder but I've had mine for about 18 months and I'm pretty sure it's never been at full speed and I've made about 25 knives on it. When I'm doing handles I have it on like 6-10 with a 120g vsm J and it works just fine. I would imagine a 36 on full speed would just make a handle evaporate. Is the belt dull? I've def burnt hardwoods with worn belts. I always put on a new 120 for handle work. I cut my freshly glued pins with a bandsaw but I may give the foredom cut off wheel a try.
 
Lots of good advice on here. If you’re using metal pins I’d strongly recommend peening them. If you do that , you create a mechanical connection and it really doesn’t matter if there’s epoxy around the pin or not. In fact it will squeeze most of it out of the top portion of the pin hole. Also with metal pins (especially brass/bronze and copper) they transfer heat extremely fast. I keep my thumb on the backside of the pin while I’m grinding and stop if I feel a little heat.

I do my initial handle shaping with a fast 36 grit belt as well. The key to it is using a very light touch and don’t sit on one spot long. Get a rubber belt cleaning stick too. Once the belt starts to load up it’s going to burn your handle material a lot faster. Mist systems can help too but some material gums up badly when you add water which can be a bit problematic at times.
 
Wow thanks for all the great ideas I will definitely implement some of these recommendations for my next project.

Looking forward to sharing some advice someday soon.
 
Hey everyone just completed a knife last night and used your advice on cutting the pins tight and hand file/sanding out the flats to eliminate the overheating.

It came out beautiful. Definitely great advice by all so thank you.
 
Stacy sorry I haven't figure out how to post pictures on here yet, everytime I click to add a pic it says a URL. Dont really get why I cant just attach a picture form my computer.

Ill post when I get it figured out.
You have to be a paid member to post pictures
 
{img} www. url of your pics .com {/img}

replace { } with [ ]

I use free hosting from http://postimage.org/
Here is the one I "finished" this weekend. I still need to put the sharpened edge on and etch my makers mark in but I was pretty happy with how it came out.

IMG-1832.jpg
IMG-1833.jpg
 
Back
Top