O1 - Rockwell Hardness Test Coupons, Help Please

Joined
Oct 19, 2017
Messages
340
Hi,

I would like to make a few coupons to test the accuracy of my HT oven and tempering (kitchen) oven and nail down the best HT settings in order to get the best out of my HT process.

Here is what I was thinking.

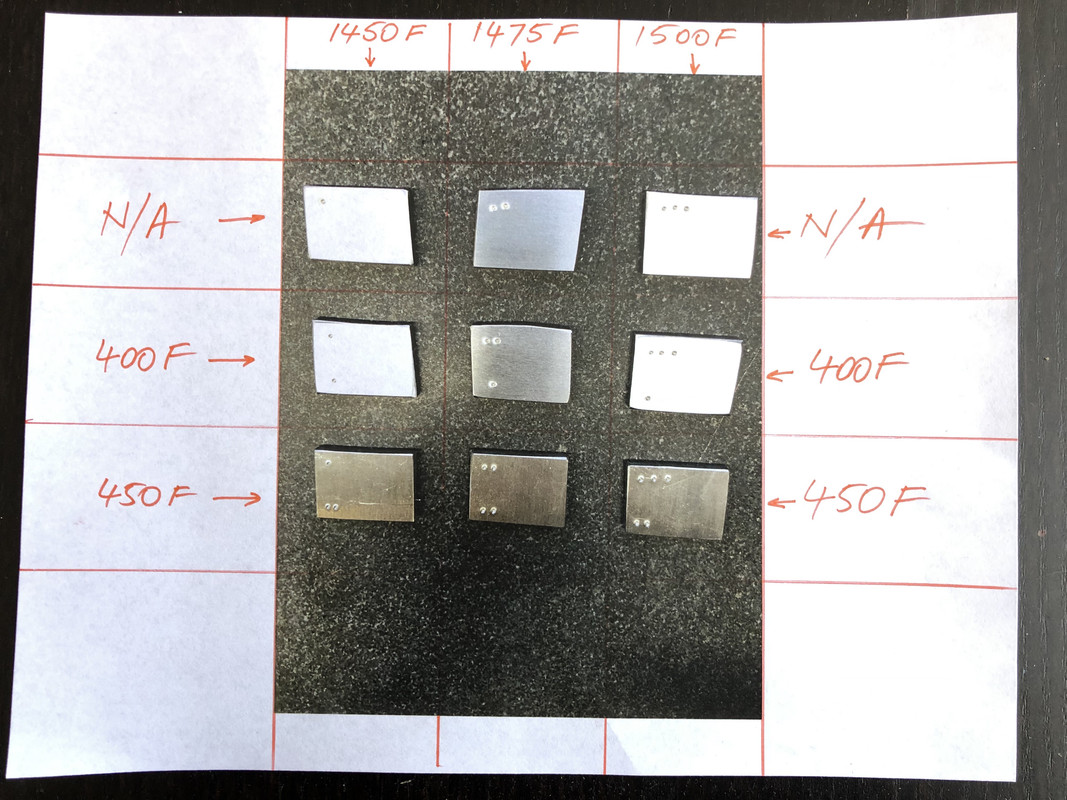
1. Make 3 coupons and HT them at 1450, 1475 and 1500 each, quench, no tempering.
This should tell us the best temp to achieve the max hardness out of this steel.

2. Choose one temperature above, say 1475. Make 3 coupons and temper them at 375, 400 and 425 for 2 hours, twice.
This should tell us how many points we lose for every 25 deg difference.


What do you think, is this reasonable to asses the HT accuracy with my equipment and conclude what the best settings should be ?


Now, I don’t have a Rockwell hardness tester to test with. If anybody would be so kind to also help me with the testing of the coupons, that would be immensely appreciated.
I’ll take care of the shipping charges back and forth and what not.

I’m located in Ottawa, Canada, in case someone is located closer to me, but it doesn't really matter if in USA.

Thanks in advance,
Constantin
 
I would suggest making nine coupons and do three at each parameter. This will give you much more accurate samples.

Another method would be to make nine coupons and harden three at each austenitization temp. Set one aside as-quenched from each group, temper one from each group at 400F, and the last at 450F.
This will give you as quenched hardness for each austenitization, and a basic guide to tempering that parameter.
 
Ok, thanks Stacey, makes sense. As you’ve mentioned, I’ll do one as quenched for each austenitization temps, 1450, 1475 and 1500 and two, 400 and 450 tempers for each, 9 in total.

So say, the difference between 400 and 450 tempers are 6 HRC. Would I be able to infer that at 425 there will be 3 HRC?

Thanks again,
Constantin
 
If your looking for someone to heat treat your coupons I can do that ;)

Thanks, I appreciate the offer, but the reason I’m doing the coupons is to verify my heat treat recipe and equipment. What I don’t have is a Rockwell tester to test the coupons afterwards in order to gain insight if my heat treat is correct and to learn what parameters affect the results and in what way, relative to my equipment.

Thanks again,
Constantin
 
Hi again,

Here are the coupons, almost ready for for heat treat, as per feedback received. I plan on covering them with ATP-641 before the HT, as I usually do with the blades, just to be consistent.

IMG-1816.jpg


Michael.Drinkwine Michael.Drinkwine , I’m posting this so perhaps other people would benefit from it. I’ll post my particular setup shortly, hoping some other folks use the same setup, or close to it. I hope this is ok. Please let me know if I make sense.

So, on the vertical axis in the picture, is the austenitization temperature. So the left top corner punch mark on the coupon represents just that, 1 punch mark = 1450 F, 2 punch marks = 1475, and 3 punch marks = 1500F.

The horizontal rows in the picture, are for 400F and 450F temper temps.

So, from a horizontal perspective in the picture, this shows the tempering temperatures and it’s marked on the left bottom corner of the coupon. One punch = 400F and 2 punches = 450F.

Please note, The first horizontal row is “Not applicable” because there is no tempering, just as out of the quench hardness baseline.

So as an example, a coupon marked as **/* as in * represents the punch mark and the forward slash delimits the "left top corner”/"left bottom corner” stands for at 1475F austenitization temp and tempering at 400F. Hope this makes sense, please let me know otherwise.

Thanks again,
Constantin
Makes perfect sense to me. For clarity you might include some additional information about your process, if you feel it is relevant. Stress relief cycles, put in a cold oven and ramped, put in a preheated aus temp oven, quench type used, cold treatment used, etc.

Michael
 
Back
Top