I've been looking at the Razor Sharp Edgemaking System on a couple of forums and YouTube videos and it looked like a great system. My question was whether it would work on my grinder/buffer. Some time ago, I had installed tapered spindles on it to facilitate the change out of cloth buffing wheels. It worked well for that purpose and so I sent an email to Steve Bottorff (www.sharpeningmadeeasy.com ) and asked him if he thought they might work for me. Steve said that he did not know and would contact the manufacturer to see if they had an answer.
Turns out that, apparently, no one had asked before and the manufacturer decided to send me a package to let me experiment. Very good guys (need I say it?).
Anyway here are the steps I used.
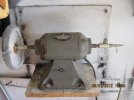
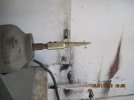
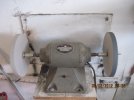
The problem. You can see the epoxy I used on the cloth buff in the photo.
1. Laid down wax paper to keep the centers from sticking to the table. I had planned to use the type of epoxy that you add x number of drops of hardener to for the centers. The thought being that I could use a little less hardener, extending the cure time and giving the resin a bit longer to penetrate into the disk. However, I found that my can of resin had dried out. I had on hand some Locktite 5 minute epoxy so that became plan B.
2.
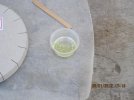
Just before I discovered my resin was dried out.
3.
Locktite 5 minute epoxy ready to be mixed.
4.
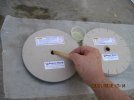
Applying the epoxy to the wheel centers. Be sure and press it against the edges. Allow to dry for 24 hours.
5.
As you can see, the wheels spun up and centered as I had hoped.
All in all, the idea worked well. In a perfect world, I would have had a separate grinder/buffer to use, but this certainly works and works well.
Many thanks to Steve Bottorff and the folks at Razor Sharp for their help and contribution to this little project.
Turns out that, apparently, no one had asked before and the manufacturer decided to send me a package to let me experiment. Very good guys (need I say it?).
Anyway here are the steps I used.


The problem. You can see the epoxy I used on the cloth buff in the photo.
1. Laid down wax paper to keep the centers from sticking to the table. I had planned to use the type of epoxy that you add x number of drops of hardener to for the centers. The thought being that I could use a little less hardener, extending the cure time and giving the resin a bit longer to penetrate into the disk. However, I found that my can of resin had dried out. I had on hand some Locktite 5 minute epoxy so that became plan B.
2.
Just before I discovered my resin was dried out.
3.
Locktite 5 minute epoxy ready to be mixed.
4.
Applying the epoxy to the wheel centers. Be sure and press it against the edges. Allow to dry for 24 hours.
5.
As you can see, the wheels spun up and centered as I had hoped.
All in all, the idea worked well. In a perfect world, I would have had a separate grinder/buffer to use, but this certainly works and works well.
Many thanks to Steve Bottorff and the folks at Razor Sharp for their help and contribution to this little project.
