Refreshing Marbles Woodcraft

oldmanwilly

Gold Member
Joined
Mar 7, 2014
Messages
3,414
I meant to start a thread on this years ago but never followed through. A recent thread popped up asking for advice on an old Woodcraft and I decided to finally get to it.

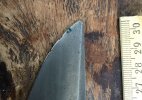
I bought this old Woodcraft off the exchange in 2020. As you can see, it was well used and needed a little attention.

A8969966-59AC-408F-A915-3E18D84F617B.jpeg
38811CF1-7057-4E2D-88D7-4134A96AC133.jpeg
14732408-2530-4657-8665-9239A327E95A.jpeg

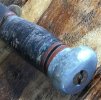
The leather handle had dried, compacted, and shrunk to the point that it had 1 or 2 solid pieces that would rattle together. The old washers had to go. I had to fashion a tool out of whatever this thing was (see below) in order to unscrew the pommel nut.


The original pommel nut was pretty badly damaged from previous attempts to (presumably) tighten it, and i basically had to destroy it in order to remove it (sorry, forgot to take pics at the time). I had to order another nut which had a diameter that was slightly too large. Being of limited means at the time I figured the only way I could evenly grind down the nut to fit was to fashion it to a customized drill bit (a bamboo chopstick) and spin it around a pice of sandpaper.


I was honestly shocked at how well it worked.

After removing the original washers I sanded down the tang to remove rust.

 
Last edited:
I tried to re-stack the plastic spacers but, for the life of me, I could not get them back in the proper order to fit evenly. So I ditched them, but I kept the brass spacers.


I bought a leather strap at Michael's and cut some new washers with a couple choice knives and a leather punch.


Then I sanded/polished the pommel to clean up some dents and scuffs. Not going for perfection, just freshening it up.

https://i.imgur.com/Q1zInRg.jpeg
 
Last edited:
I chose not to use any adhesives as I wanted to give myself the option to rework or replace the washers if needed. I punched the holes narrowly enough so that the washers fit tightly around the tang and needed to be shimmied down with a pair of pliers. I stacked the washers up until they partially covered the threads on the tang. Then i tightened down the nut as much as I could, really compressing the washers to make a tight fit.


Then I whittled and sanded the washers to fit.


The nut was a little proud of the pommel so I filed it down and polished it a little.


Finally, I immersed the new handle in hot beeswax until I stopped seeing bubbles come out.


Afterward I polished the handle a little bit with an old towel, then fixed the damage to the tip and edge.


The brass spacers peek through pretty well. I could have whittled down the leather more to show 100% of the spacers, but the handle fits well and I don't want to thin it out any more.


It's not the finest work, but it is comfortable, durable, and it allows me to use it well. It was a fun project, taking a fair amount of effort, but eminently doable for any tinkerer. This Woodcraft is now one of my favorite and finest working knives. Well worth the effort.


Any tips or anecdotes would be helpful for future projects.
 
Nice job..... Nothing like putting your stamp on it and making it yours!!! Awesome blade pattern for ages!!!
 
Nice job, I think the tool was originally a nail or tack puller.

You can restore a knife with a pinned pommel much the same but you will need a jig to compress it. (Mine is a little Rube Goldberg)

view


I use wood glue between the layers and power tools to sand it. Finished wish cordoba shoe polish.

view
 
Last edited:
Nice job, I think the tool was originally a nail or tack puller.

You can restore a knife with a pinned pommel much the same but you will need a jig to compress it. (Mine is a little Rube Goldberg)View attachment 2340213
I use wood glue between the layers and power tools to sand it. Finished wish cordoba shoe polish.
View attachment 2340214
Does your jig put pressure only on the washers, or is there also pressure applied to the pommel and the tip? If not then how do you ensure a tight fit between the guard and ricasso?

I've been looking at your jig throughout the day and still can't tell.
 
It just pushes the guard into the pommel. The guard is JB Welded to the tang. After compressing once I had to disassemble and add washers. With the correct number of washers when the jig is released the washers put pressure on the guard. For a tight fit.

Most tutorials showed a carpenters wooden clamp. With a slot in one clamp for the blade to pass thru. I don’t have that clamp. So I tried to mimic it with what I had.

But they also just compress the the washers by pressing the guard into the pommel.
 
Last edited:
Both of your knives look good and it is neat the different ways the same project can be done.
Thanks! I may try to refurb an old Schrade/Craftsman knife with leather handles and a pinned aluminum pommel as well. I think that one will be more challenging and will probably require a compression jig like eveled eveled showed. I'm taking my time with that one.
 
That's beautiful I'm glad I inspired you to post this. What exactly did you do to the blade to fix it up? I am trying to figure out if I should grind mine down to remove the pitting or just polish it and leave the divots in there.
 
That's beautiful I'm glad I inspired you to post this. What exactly did you do to the blade to fix it up? I am trying to figure out if I should grind mine down to remove the pitting or just polish it and leave the divots in there.
Thanks!

Fortunately my blade wasn't pitted at all, just some old surface rust and a decent patina. I just ground the edge against my Norton India stone until the tip was restored and the chips were removed (see third pic in the first post). Then I sharpened the blade like I normally would until the edge was fully restored.

These old Marbles knives were ground into a very subtle convex edge, gradually sloping from the spine to the edge. I did as little grinding as possible to preserve that convex grind and intend to do so going forward. They really don't make them like they used to.

If I were you I'd scratch away any active rust, then just be diligent in keeping it oiled to prevent further pitting. I wouldn't want to grind down an old blade and totally change its character. But it's up to you.
 
Back
Top