Sharpening system modifications

Joined
Nov 30, 2020
Messages
105
A thread to discuss any modifications you've made (practical or cosmetic) to your knife sharpening systems.

I use the Edge Pro system so am primarily interested in this but am open to all - I might learn something!

I have purchased a number of extras for it, but also made some unofficial modifications people might find useful. I'm finishing one up now and will post pictures and descriptions when it's done.
Please do, i like seeing other peoples modifications, there are some very creative people out there. And as you say, seeing what other people are doing we can all learn something. I am in the very process of making my own guided sharpener on the Edge Pro principle.
 
I built a hex shaped slider for the work sharp precision that allows me to put 6 different PSA lapping films on it...for a lot more options than the stock options.
 
I built a hex shaped slider for the work sharp precision that allows me to put 6 different PSA lapping films on it...for a lot more options than the stock options.
Sounds interesting, anything like what you have done saves you money, all the add on's with these sharpening units add up to a small fortune. Any thing you can do that makes using your own lapping films/sandpapers an option is the way to go. :thumbsup: :thumbsup: :thumbsup:
 
I built a hex shaped slider for the work sharp precision that allows me to put 6 different PSA lapping films on it...for a lot more options than the stock options.
Nice work - do you have any pictures of this? I'm curios to see your work.
 
To start with, here is a list of the standard upgrades I purchased and consider vital to improving my sharpening experience (i.e. ease of use and improved repeatability and precision):

1. Slide guide
2. Bench mount
3. Apex retractable magnet
4. Full Matrix diamond set

These items improve the outcomes I can achieve and wouldn't be without them.

Now onto the other items and modifications:

Items:

1. Acrylic panel: I use this on the surface I sharpen on as it (the surface) is not great for the suction cups - this solves that problem. It also protects the surface from the bench mount and G clamp.
2. Double sided tape: I use this to hold the acrylic firmly down to the table on the opposite side, to remove any flex in the acrylic. Not vital, but it's just another easy step to reduce variation.
3. Hapstone angle cube: gives me precision I just wouldn't be able to achieve without it; beats using a marker by itself and works even better in combination with one! This is especially useful if you have bent knives (looking at my Paramilitary 2 in Maxamet).

Modifications:

Basic mods:

- I polished the stone guide with 200k grit (0.1 Micron) diamond paste and lubed it up with a drop of KPL - runs smooth all the time. I've also used KPL on every other moving part of the system - vital? No. Increased smoothness in use? Of course.
- I spray painted black lots of hardware because I was bored and had a tin of paint laying about, it will chip over time but I had fun doing it.

Below is a picture for reference:

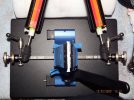
edge pro mods

I'll work from left to right:

1. Handle: You'll notice there is a black acrylic platform attached to a silver disc - this is so that I can place the angle cube in a repeatable manner (I included a slight lip, so that it can be put in the exact same place every time) onto a strong neodymium magnet and not worry about it falling off while I set the right angle (this happened lots and is what spurred me into wanting modifications); I can literally twist it 90 and the cube won't fall off now.

2. Blue arrow: I placed a washer between the height adjuster and stone guide's plastic interface (polished to 0.1 microns and oiled with KPL) - this is because I'd often find the far end of the stone guide would clip / catch on the black; adding this space means I keep it tightened satisfactorily and no longer experience this 'knock' every time.

3. Red circle: This is a Hapstone fine angle adjuster, a superb instrument that enables very fine angle adjustments in a comfortable manner and when used in combination with an angle cube I cut out all variation in my sharpening approach (This equals more precision than I'm likely to need but this is part of the fun for me in this hobby - chasing perfection) Oh, that is if you can fit it on your system! If you want to know more about this, read on, otherwise, you can stop reading about the mods here.

This item is advertised as compatible with Edge pro systems, which isn't incorrect if you class compatible as 'it will fit on the system but you can't use the red and black sharpening angles because it's too bloody big!'. Big problem for me. I was going to return this to the vendor when I 'discovered' this quirk, but I then realised how much I would enjoy this facility, if only it would fit.

So I got thinking, I considered many different ways to create the space to accommodate this item. Then Covid boredom hit me, so I decided to... file it. I don't have a lathe, or a clamp or any suitable tools, and so I sat and filed this damn thing with a hand file for (honestly) seven / eight hours over the course of a few days. I did as much as I could bear doing and tried it out - still way off! I was running out of angle adjuster to file (I didn't want it to be so small that I couldn't use it easily). So I got thinking about what else I could work with, which lead me to the:

4.Yellow Circle: This is the Edge Pro's inbuilt angle adjuster; I eventually decided to cut the adjuster housing off and file it down flat as it was no longer necessary - you do need this in the standard set up because you don't have anything beneath the adjuster to stop it from slipping downwards (I have the Hapstone fine angle adjuster so this isn't a factor for me). Doing this enabled me to remove a load of unnecessarily occupied space on the angle guide rod. I now use the same angle adjuster 'bolt' as a free floating item at the top, to stop the stone guide from slipping up.

All of this work has enabled me to do this:


It might look trivial, but it's made sharpening a lot more fun for me and being able to customise this system makes it feel like I really own it now - hope you enjoy.
 
Last edited:
It might look trivial, but it's made sharpening a lot more fun for me and being able to customise this system makes it feel like I really own it now - hope you enjoy.
Mate, not trivial at all, i love it. You have done a sensational job with that, much better than the original, and it is amazing what ideas we can come up with with a bit of creative thought. Well done. :thumbsup: :thumbsup: :thumbsup: :cool:.

I had the same thoughts as you and have just finished my sharpener which i made from parts i had, and a few things i purchased, i was in lockdown and getting bored out of my tiny brain and had the very same thought process as you, i reckon i can improve on the edge-pro. I'm also very happy with mine, but i really like what you have done.
Thanks mate, kind of you to say so; I'm intrigued to know what mods you made / ideas you had?
 
Thanks mate, kind of you to say so; I'm intrigued to know what mods you made / ideas you had?
I had the same ideas as you, just used a different base i found. I will post some photos and let you know when i post them. :)
 
Has anyone come up with a mod to make the Worksharp Precision Sharpener able to handle small traditional knives?
 
Has anyone come up with a mod to make the Worksharp Precision Sharpener able to handle small traditional knives?
I know quite a few people that would like the answer to that question, hope someone can help you.
 
R Realysm42 Got some photos for you look at. Bit of history, i have always freehand sharpened, but had a hand operation, can still freehand, but was looking for some help. Sharpeners and equipment and accessories expensive here, really expensive. Was looking at the edge pro for all the reasons you stated, still has your input which does not take away the freehand element completely. But did not want to commit till i tried one, so bought a cheap knock off to try the style and see if i liked, and i did, the cheap knock off did not last long, so i stripped it down and kept it for spare parts if i ever needed the. Was hunting around to get the best price i could for an edge pro when i stumbled across something on the net, looked it over best i could and thought i can use that to make my own sharpener. So with all the parts i already had, and the purchase of a few things and some scrounging around, got out of making one for about $100US, but that does include the small knife attachment which i purchased, but it cost a lot more than the whole sharpener put together, but was worth it. Mine, like yours, is just so user friendly, i have added many components that the edge pro does not have, or come at considerably more cost, i have been getting incredible edges with this, and as on now, have not gone past a 1200 grit stone finished with green compound on rough leather on some cheap strops i bought. Have not even gone near the higher grit stones or kangaroo leather strops i made with some diamond spray. It is amazing what you can come up with in lockdown to keep yourself amused. 🤣 🤣:thumbsup:.
These are list of it's inclusions, i cannot high light them like you did in your photo, beyond my capabilities.

Bolted to a wooden base with grooved bottom, so does not need any form of clamping.
All metal, which makes it such a solid unit.
Has 10 removable magnets in a holder i made, so knife sits solidly on the table because the magnets are under an all metal base.
Has a stone thickness adjuster for compensating different stone thickness's.
Has a fine angle tuning adjuster, which locks in at desired angle.
All metal guide rod bearing, no up and down or sideways play.
Adjustable stoppers to stop stone running off the bevel edge.
Magnetic base, so i can sit a digital angle cube right on the top of the bevel angle.
I made a mixture of powdered graphite and light oil, i rub some on the inside of the metal bearing with a Q tip, makes it whisper quite, can actually here the stones working.
Has a plate on the front which slides up and locks in to help a knife blade to be more stable if required.
I have made some different knife rests for different styles of knife blades and sizes.
Has a clamp that holds knife in place if you need to do a long re profile job, leaving both hands free.
rTwrBCn.jpg

NPL9aIJ.jpg

ACOMmdI.jpg

Id03fPz.jpg


These are the different knife rests the i have made for specific knives and blades.
s4IPmel.jpg
 
cudgee cudgee Thanks for taking the time to share - I'm at work right now so will read it and comment later today.

One quick observation that made me laugh is we use the same angle cube and have both applied the 'tape' mod to it, to stop the dodgy battery cover falling off 😂
 
Okay I read your post fully - great work you've done there, very creative!

It is interesting to me that (as you stated) we've essentially tackled the same issues; enabled fine grain adjustments, angle cube ease of use and improved stability of the unit.
 
"Here ya go.
It does change the angle from stock slider, but I’ve been able to get good results!"

Looks 3D printed, are file/s online?
 
I use a Wicked Edge WE130 mostly. I haven't made any modifications to it but I have added some aftermarket things to enhance it. I added the black stone covers, the white & green stone stops, and the stainless steel Micro-Adjuster Conversion Kit with SS knurled thumb wheel knobs and SS lock arms. And I added the dust boots that keep gunk from getting on the ball joints. I also tape the vise up with blue painters tape to help keep gunk from getting into the vise internals.

WE130-4a.jpg
 
I finally got around to using my modified system again and noticed another issue, which I discovered quite by accident; the hapstone fine angle adjuster would grip the edgepro height adjuster plastic with enough grip for it to cause my sharpening movements to change the height as I sharpened, which is unacceptable.

Tbh, the amount it moves is tiny and likely doesn't impact the outcome of my efforts (to any noticeable degree) but given my aim is best attainable precision, I had to eradicate this!

I only noticed the unwelcome 'dynamic adjustment' because I'd painted the angle adjuster and scratched a bit of the paint off, so I could see the silver mark moving. This is good learning for me, having reference marks in critical areas helps to highlight issues.

Anyway, the first thing I tried to do was fix the issue with what I had on hand - abrasives. I wanted to knock of the likely rough and grippy black spray paint where the angle adjuster interfaces with the height adjuster plastic and polish it to be as smooth as possible. 400 grit sand paper all the way up to 200k diamond paste left me with a mirror edge there. I then sanded the height adjuster, which being some sort of plastic didn't take the same shine. I added a tiny drop of oil between the surfaces and...

It was better but there was still drift. Okay, onto other ideas.

I ordered a pot of high viscosity grease (nlgi 2) and dropped that into the angle adjuster - this has now removed all drift and added pleasing tactility to the adjuster, slowing it all down a touch - happy days!
 
Back
Top