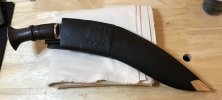
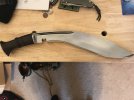
...So, here's how I go about it. Understand there's many different ways to skin a cat, so feel free to experiment. "Thinking outside the box" is nothing new in handicrafts, it's another way of saying "creativity".
1. Remove frog. No big deal, it should slide right off.
2. Remove chape, but only if you want to. A lot of folks do 'cause they don't like getting jabbed by 'em. *Point to ponder; if you're careful not to damage the chape when removing it, you can always re-attach it later if you change your mind (Bruise Leee calls 'em "finger puppets")
3. Don't remove the original leather, and don't glue the material you're using for your outer cover to it. There's a reason for this that I'll explain later.
4. Select your material. It should be thin, and slightly stretchy, so it will conform well to the shape of the scabbard without adding a lot of bulk. My preference is buckskin because it's attractive, velvety soft, but wears like iron. Canvas is good (The Sarki Shop makes some excellent canvas covers), denim from an old blue jean pants leg is good for "Urban camo" on a small carry khuk, and garment leather of all sorts can be cheaply obtained by browsing thrift shops for old leather jackets.
5. Lay out your material;
-- Make sure the top edge of your material is cut in a straight line
-- Lay it outer side down on your work surface and fold over about two inches of the top edge, glueing it down with a thin smear of Duco or Barge cement. This is going to form a cuff, of sorts, at the top of your scabbard cover (throat of the scabbard) that'll present a nice clean rolled edge at the top. It also serves to stiffen the top of your scabbard cover so it stays put better.
-- Lay the material on top of the scabbard, centering it on the scabbard and lining up the top edge of the "cuff" with the top edge of the scabbard throat.
-- Wrap the material around the scabbard until it meets at back center. Here's where you're going to need some sort of clamps if this is the first time you're trying this. Spring clamps can be obtained at stores like Tandy Leather, or maybe hardware stores, or in a pinch you can use spring type wooden clothespins. Clamp the material with as many clamps as you need, in a line down the back center of the scabbard (follow the seam of the original leather)
6. Sew
-- A saddle stitch is best, it's stong and provides a straight, flat seam.
-- On fabrics like canvas and denim you can just use needles and thread and have at it, on leather you'll need a sharp awl/icepick to punch your holes, and saddlemaker's needles (the points are slightly blunt so they follow the punched holes instead of trying to make their own)
-- Start sewing from the top, pinch the fabric together tight as you do and your stitches pull the material snug around the scabbard as you go along (now you know why I said thin, slightly stretchy, material

) Remove clamps as you go
7. Trim off excess material
-- Cut away excess material close to the seam you just made
-- You can easily slip with a sharp knife and ruin your work, use a good pair of sharp scissors.
8. Reinstall frog. It may be too tight to slide on properly. That's not a problem, just loosen the front lacing a bit until you get a proper fit.
9. Clean up your mess. Wives, moms, and girlfriends will love me for that one. Not a word out of you Quackipuss

10. Go out and enjoy, show off your handiwork, chicks will dig you, men will want to be you (or something like that)
Now, why be careful not to damage the chape when removing it? Why leave the original leather intact and not glue anything to it? Because, should you ever decide to, you can restore it to "original" lickety split. Also, if your khuk sees a lot of wear and tear, and your scabbard cover starts looking "dogged out", you can just peel it off like an old sock and make a new one. Good luck, have fun.

Sarge

 Thanks! I’ll post some pictures this evening or tomorrow.

