Small Knife

Joined
Apr 8, 2020
Messages
2,099
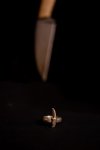
Really small.
So I finally got back into my room and I decided to declare my love of knives for all to see.
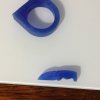
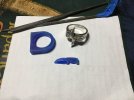
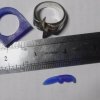
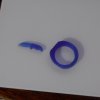
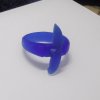
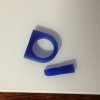
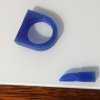
Got me some wax and started shaping:
IMG_1058.jpg

IMG_1059.jpg

IMG_1060.jpg IMG_1061.jpg

DSCF4978.jpg

That's probably pretty close to what I'll be using. Usually I work in twos, you know, just in case something happens to the first one. Blue wax is not exactly the best as it's the softest so it's kinda hard to get details in there. I think I need to work the handle a bit.
The thing here is to get everything in the wax, that way you don't have to mess with the metal after it's cast.
I also still need to work the ring.
I work in lost wax silver casting so the little wharnie with be attached to the wax ring, plastered up and then burned out. The plaster mold goes into a centrifuge where silver is injected to mold.
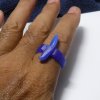
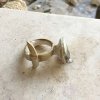
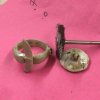
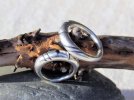
That's my lightning bolt ring for scale. I cast that oh about four years ago.
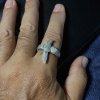
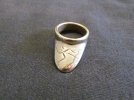
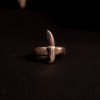
My knife ring will look the same; it's sized for my middle finger though it'll work on index too.
Hopefully I'll be done by Thursday.
Stay tuned!
I also have another wrap around design in mind.
 
I hope I don't blow the cast!
Normally I got a more than a few hours into this stuff:

DSCF4981.jpg

DSCF4983.jpg

Probably going to countersink the knife into the barrel a bit.
Can't go too close to the finger for it'll start to bite.
Undecided on whether or not I'm going to decorate or just leave it plain.
Sweep the whole thing one last time and tomorrow I'll make the investment.
Better to do the wax as best you can to save working the metal, in this case fine silver.
More later.
 
Investment

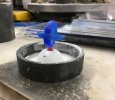
Here it is ready for the plaster:

IMG_1065.jpg

The red wax is where the pour hole is going to be; its called a sprue.
The mold thingy is a flask:

IMG_1066.jpg

You figure out the volume of the flask then mix your plaster accordingly.
You should use only investment plaster or you'll never get your work out. The special plaster boils out after the cast and makes retrieval easy.

IMG_1071.jpg

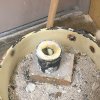
The mold/flask showing the cup and pour hole.
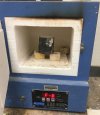
Well, the pour hole isn't there yet, I gotta burn the wax out now:

IMG_1072.jpg

I think I programmed three ramps: one to 300F., then to 800F., finally to 1200F.
I think the wax flashes at around 700F so going to 1200F is just to make sure there is no residue.
I may go back tonight to cast it, it not tomorrow.

The reason I decided to post this up is that most of you maker folks got all the stuff you need to do what I'm doing.
The little kiln looks to be just like a tempering kiln; I don't know how hot mine can go to, but I take it regularly to 1450F. when I teach the kids enamels.
Unfortunately my kiln is not that deep, maybe only eight inches or so.
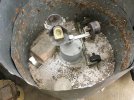
This is the centrifuge:

IMG_1075.jpg

It's actually a dental centrifuge I got on eBay (public school no more money!) for a couple hunski.
The arm under it I got later, but I still had to have the center hub. The other arm can hold larger molds/flasks and crucibles. The one I'm using is only good for a two ounces or so.
Basically, you wind it up and peg it, melt your stuff and let it fly!
You can see all the bronze, copper and silver on the splash shield. It's all stuck to the galvanized metal.
You don't really need a centrifuge is your stuff is simple; you can just go with gravity.

Okay, I think the total burn out ramp is like six hours and I got a ways to go.
Maybe I'll take a nap and go back this evening.
Been thinking of doing some lanyard thingys out of cast bronze.
Stay tuned!
 
Casting

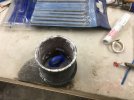
The crucible loaded up with silver:

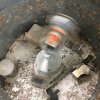
IMG_1078.jpg

whoa...thats a big crack! more on that later.
I should have used nice silver and not all that waste/used/scrap crap. I ended up peeling a ton of slag off the puddle and had put in another 10-15 grams of nice silver anyway.
I couldn't take pics cause it was only me.
Basically I use oxy/acetylene to melt the metal; I use a cutting tip for the most heat. Yeah, I need to get me one of them bloom tips!
I preheat the flask to about half the melting point of the metal; I only do bronze and silver so in this case about 900F.
You wind the arm before you start the melt (I use a carburized flame, I read that silver likes oxygen to better to keep it reduced) and once the puddle well, puddles, you let her fly!

IMG_1081.jpg

Let the flask cool until you don't see any color.
Remember, it's black hot!

IMG_1083.jpg

You can see the pool on top in the cup.
Plunge the whole thing in some water before it fully cools.
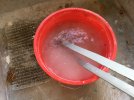
I usually wait a couple of minutes after the centrifuge stops and the button on top is back to normal color, then I plunge the whole thing into a bucket of water.

IMG_1088.jpg

It's still hot enough to boil!
That blows the plaster out of the flask and voila!

IMG_1089.jpg

Actually you hope and pray it's voila! for a lot can happen between then and how. See all the little BB like thingys? Air bubbles. Big air, big problems.
Silver can gas too so sometimes you get a bad or partial cast.
That thing hanging off the end is the button.

IMG_1092.jpg

Cut the button off (I got some leveraged side cutters) and hit it with some wire.

IMG_1100.jpg

Now comes the hard or easy part.
You can finish it however you want; just cast look to mirror polish.
The finish is sometimes determined by the composition. Too complicated and you won't be able to get into all the nooks and crannys so finish should be considered when you design.
I like a nice polish.
Fine silver won't tarnish exactly, but it will 'cloud,' something a little polish clears right up.
I may just polish the knife and antique the barrel, depends on how lazy and tired I am.
I usually go to #5000 or so, I do have some #7000 around here somewhere.
Pics of the finish later.
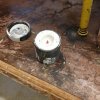
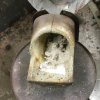
BTW, I did crack the crucible:

IMG_1085.jpg

It's been cracking for a while and I was just waiting...
Luckily it made it to the cast and it wasn't catastrophic! There was about 20gms of silver in there!
All that other crap in there is the flux; I use boron just like you guys.
In fact this was a really good casting considering I was posting up about it and all.
Ring came out near perfect!
 
Nice ... but it's a pretty complicated procedure. Have you ever worked with Art Clay (Silver) ?

Here are two examples which I made years ago ...

Partner rings (Sterling Silver)
PR001.JPG
Thumb ring for asian style archery (Bronze)
SR001.JPG
 
The odd thing is ceramics is my main gig and I've had that metal clay in my wish list for like forever but I keep forgetting to order some!
I think the cost was bit high for me as the lost wax process is kinda inexpensive once you get all the stuff together. The cost of raw silver per ounce is less expensive vs. metal clay. One day.
Lost wax was the way I learned. My degree is actually in sculpture, but ceramics was always my main thing.
I also rather teach the kids the 'hard' way before taking any 'short cuts.'
Now that you mention it though, I'll have to get some next time I do a personal order.
Nice work by the way!
 
The finish

Which is up to you; how far you want to take it.
I polished out the knife part and cleaned up the barrel. Not sure where I'm going with that yet. Maybe just leave it satin to contrast the mirror or give some antique look.

DSC_2931.jpg

This is a couple hours work.
Taking it up to polish brings out all the flaws so you go back down to #400, work them out and work your way back up.
The last I used was #5000.
The cast wasn't as great as I thought it was as the barrel was kinda raw.
Still needs some work depending again on what I'm going to do.
For now I'll just wear it and think about it!
 
Back
Top