- Joined
- Jan 27, 2006
- Messages
- 497
Not sure if this is the appropriate forum for a recent project I took on, but thought the "Snap-On" (Model BF 608) Auto Body Hammer holds a lot of promise for several different style conversions to use as a pretty serious cane handle. (including making a mini hatchet with spike pole)
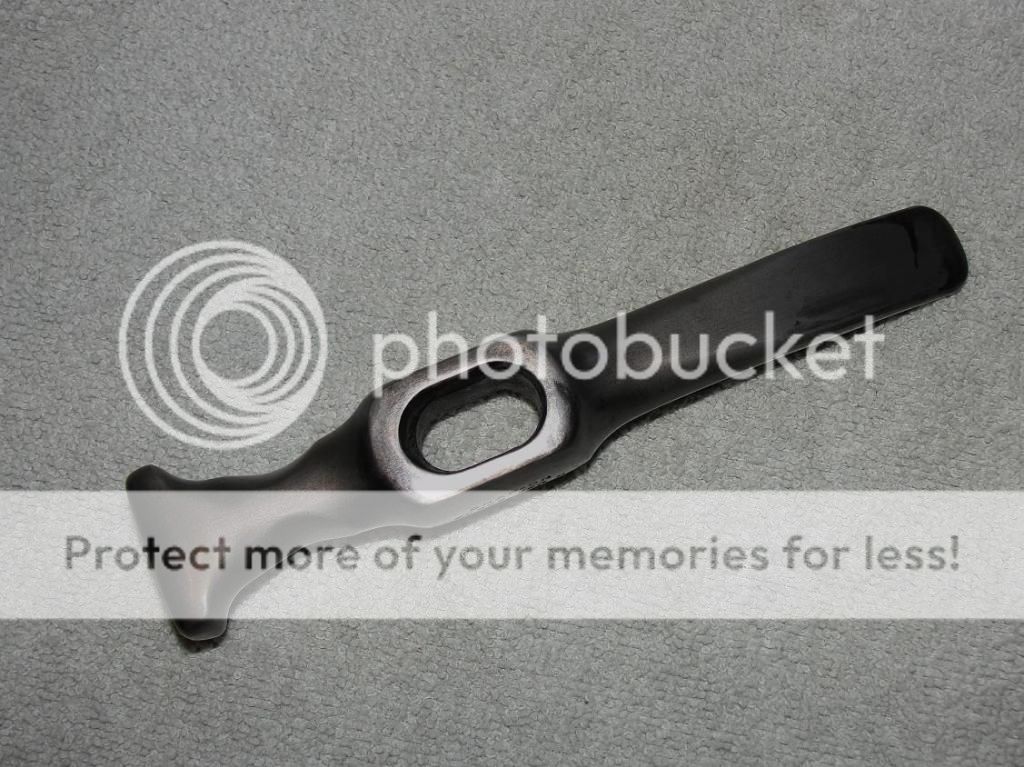
I was at first tempted to convert this into a mini hatchet on the hammer side, (short depth "blade" oriented in the same plane as the spike), and with a full pointed spike on the other. But living in New York State you have to be a bit more "conservative" in what you intend to carry, so I compromised on the changes to make for a less fearsome cane handle.
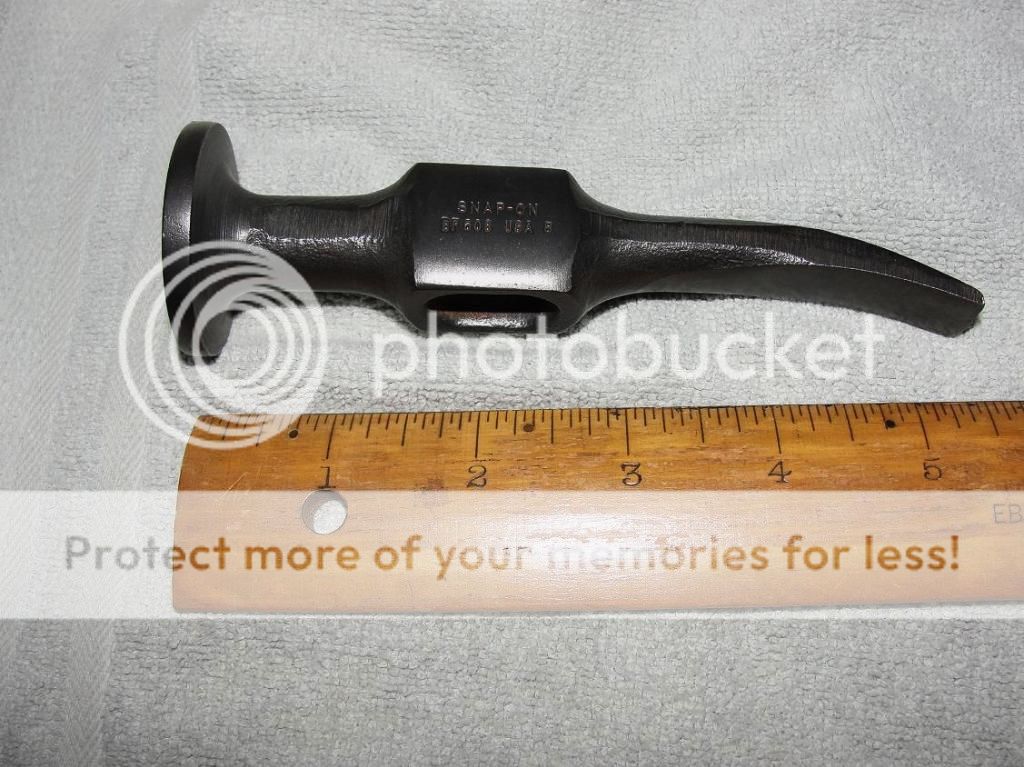
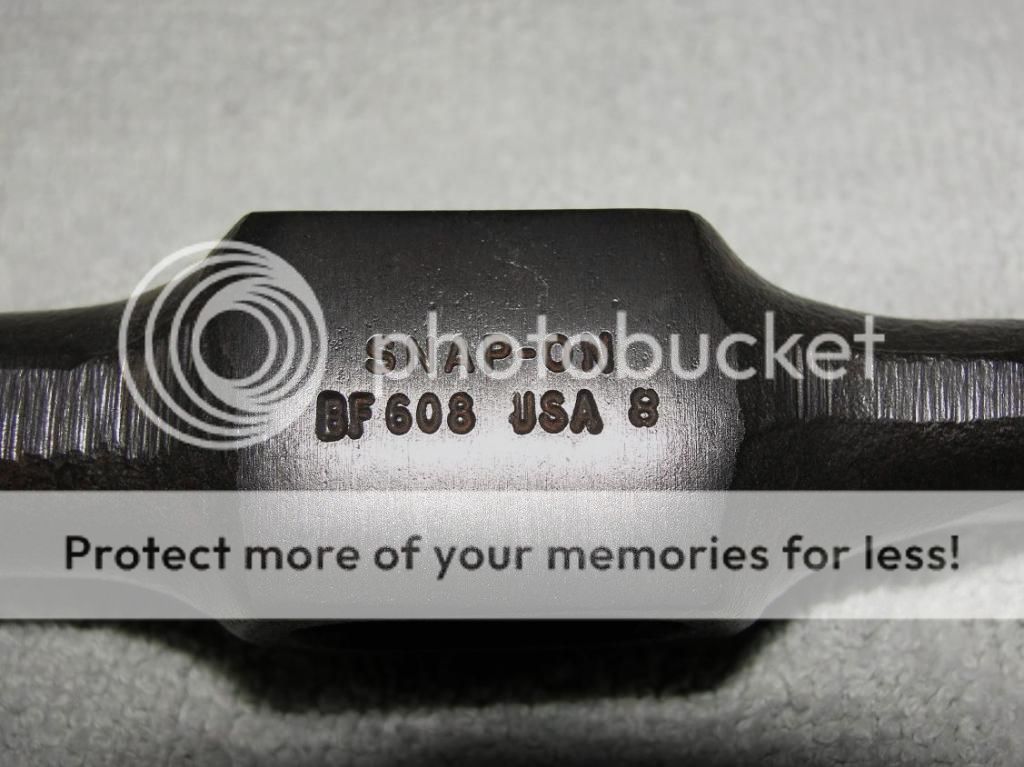
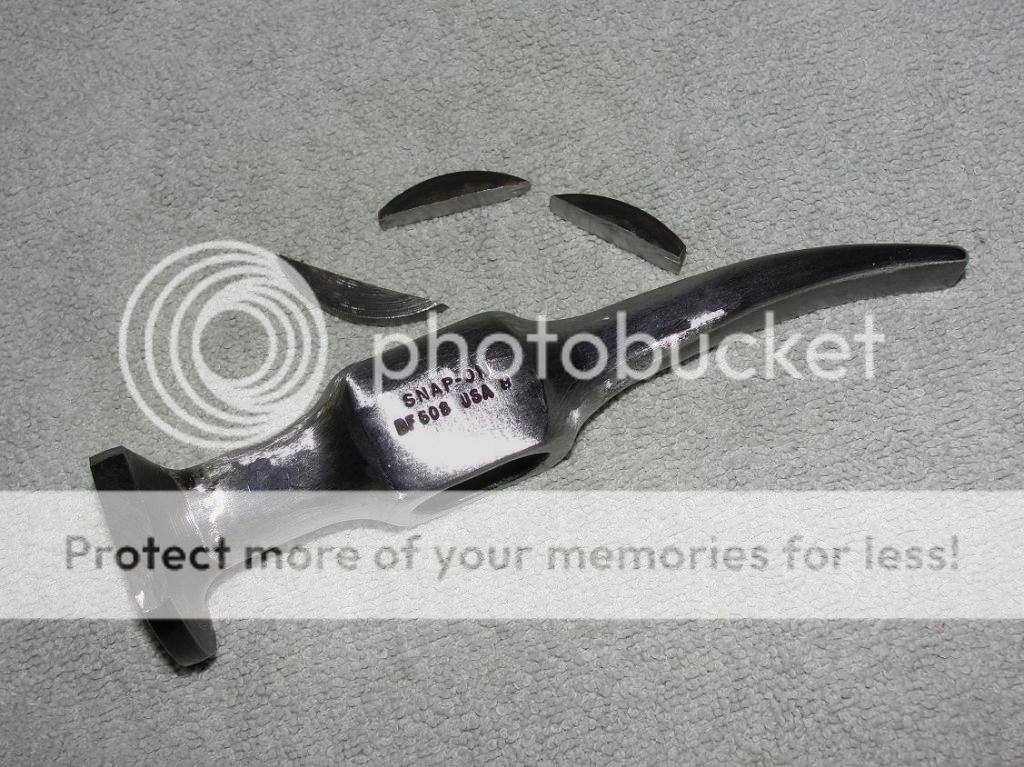
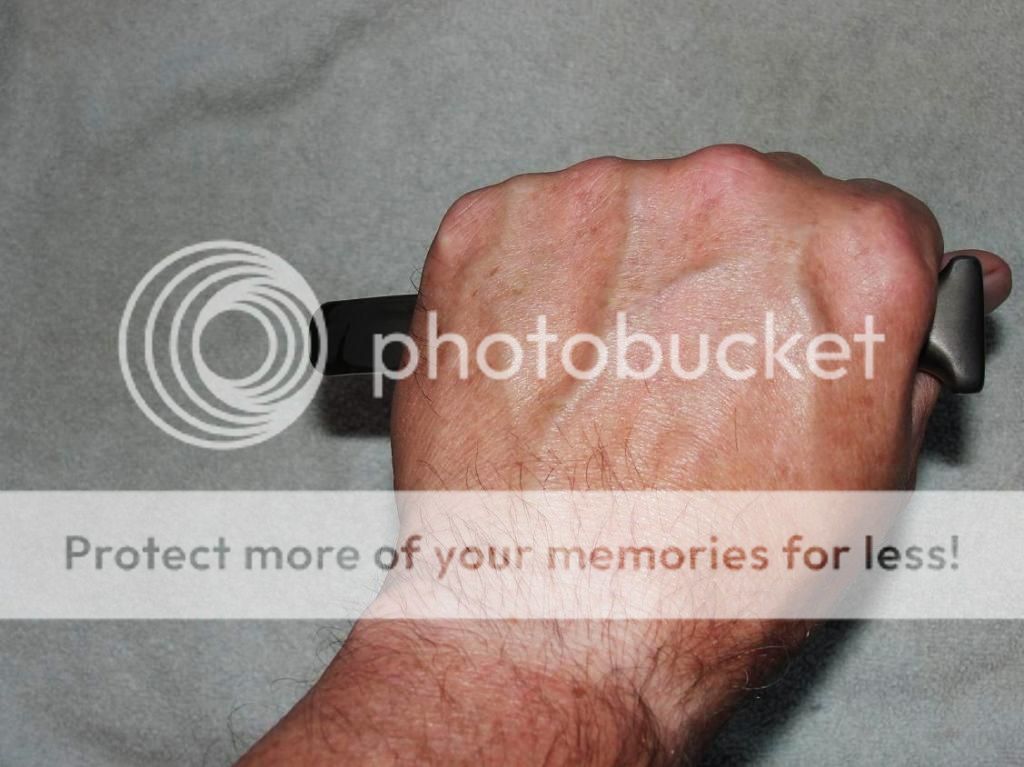
OK, so this is what I started with, a rather nice example but with the typical rough edges and utilitarian finish that I found uncomfortable in the hand as it came. But 5-1/2 inches of "possibilities".")
Pic #1
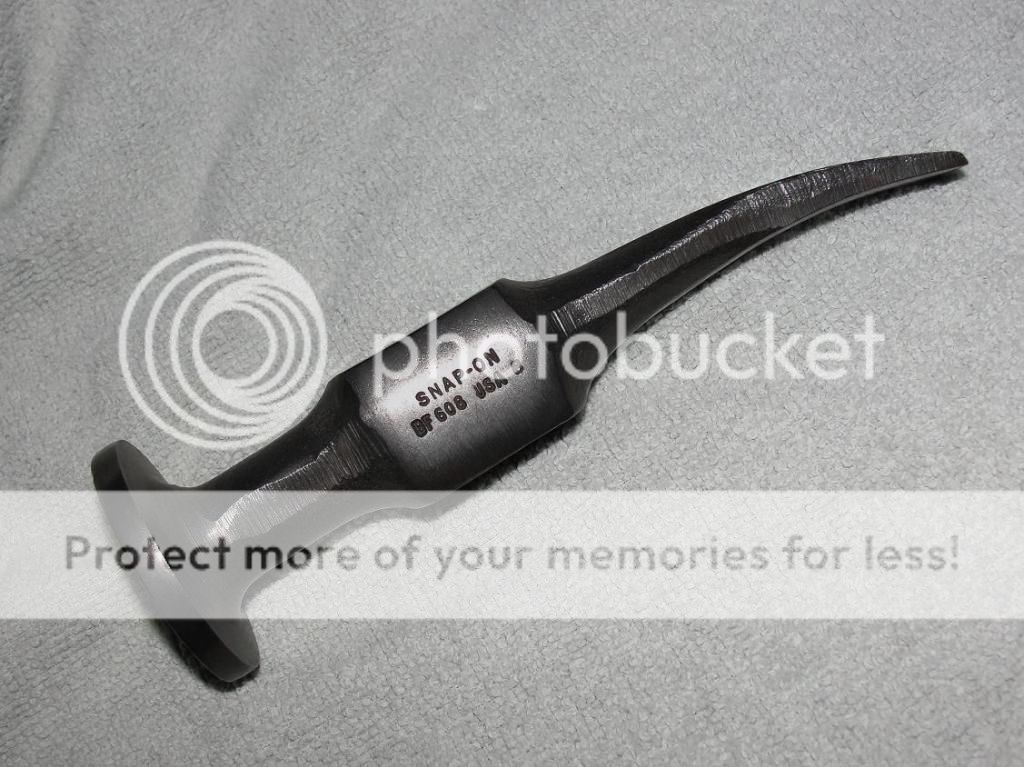
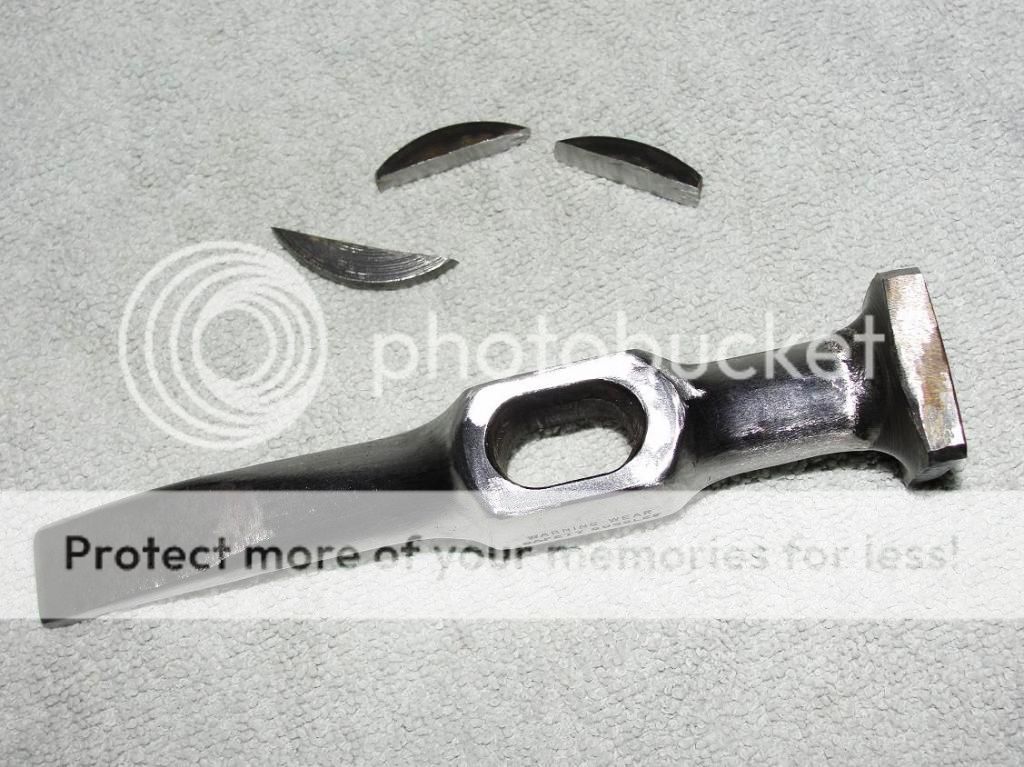
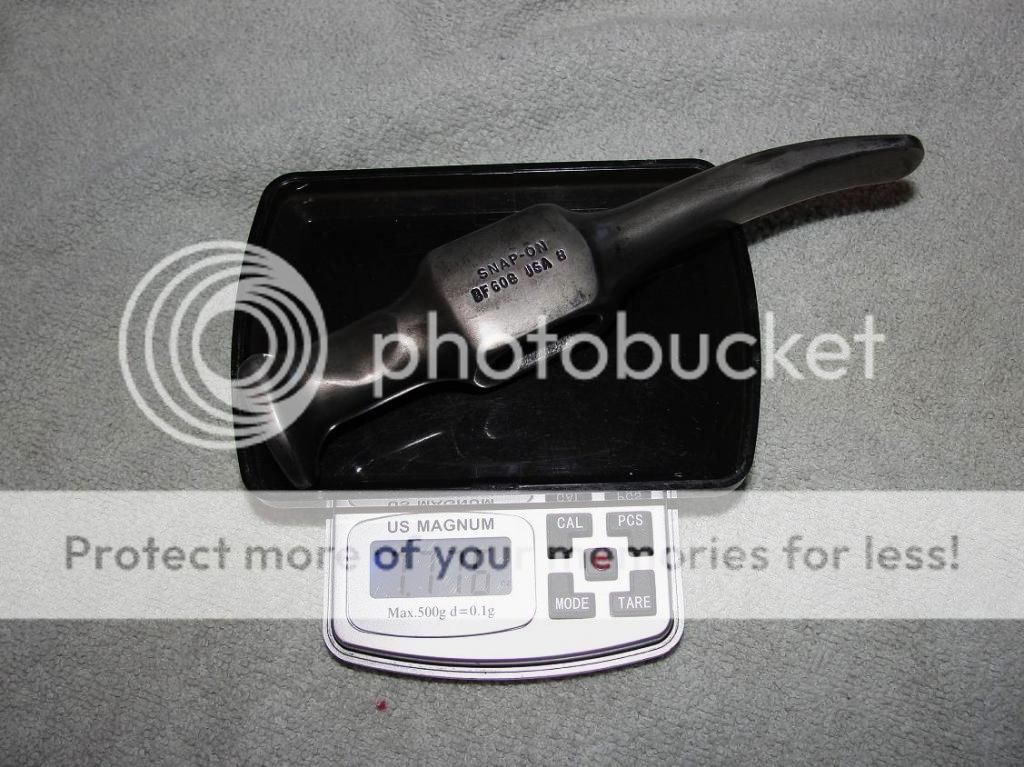
.....and weighing in at a noticeable 9.286 ounces:
Pic #2

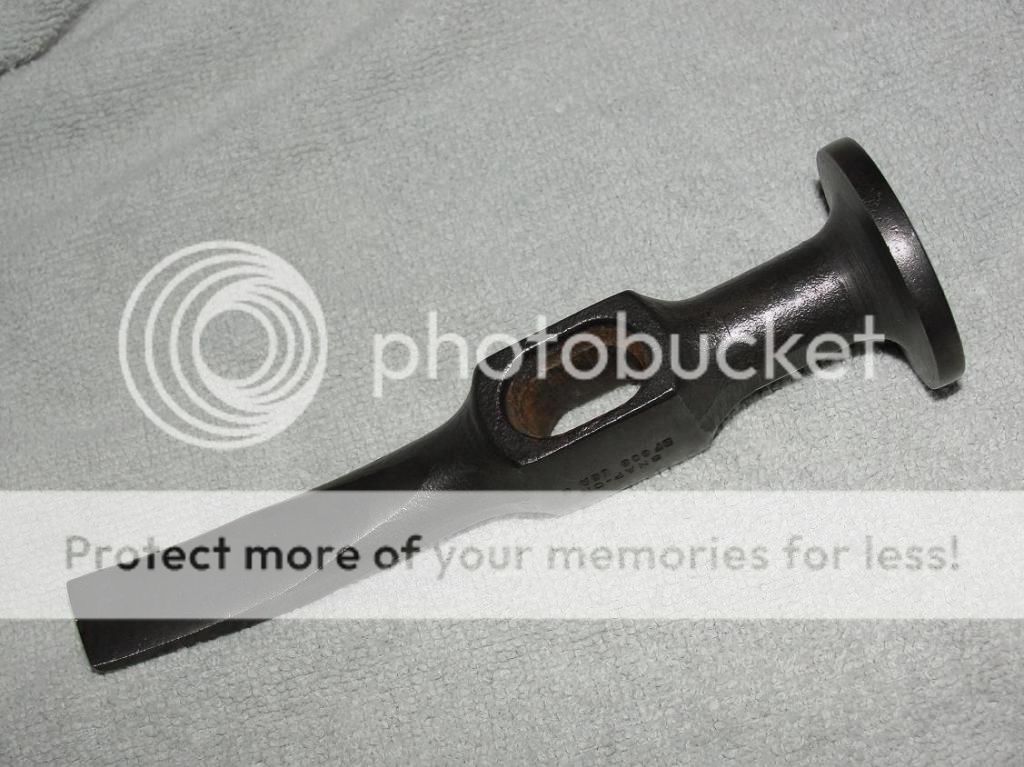
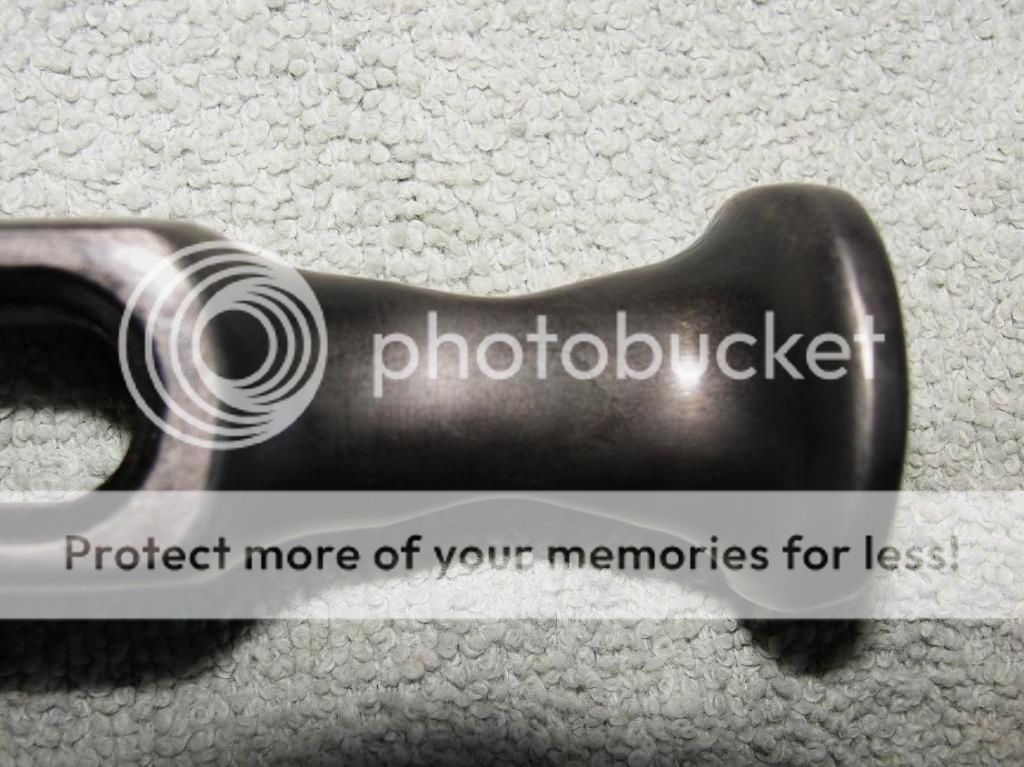
I'm pretty sure this is high carbon drop forged steel, and looks to be hardened a bit more at the hammer and spike areas. (as one would expect based on the quality standards "Snap-On" is known for). The very nice "ring" you hear when lightly striking this with a piece of steel also bears that out. Cast steel is dead sounding
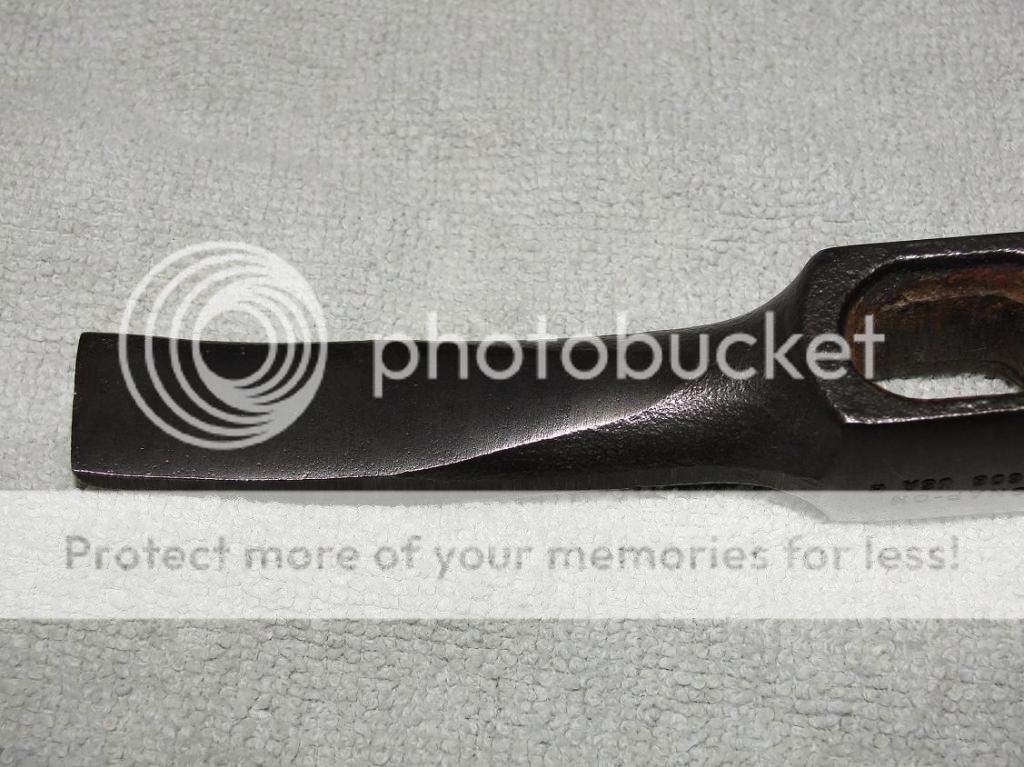
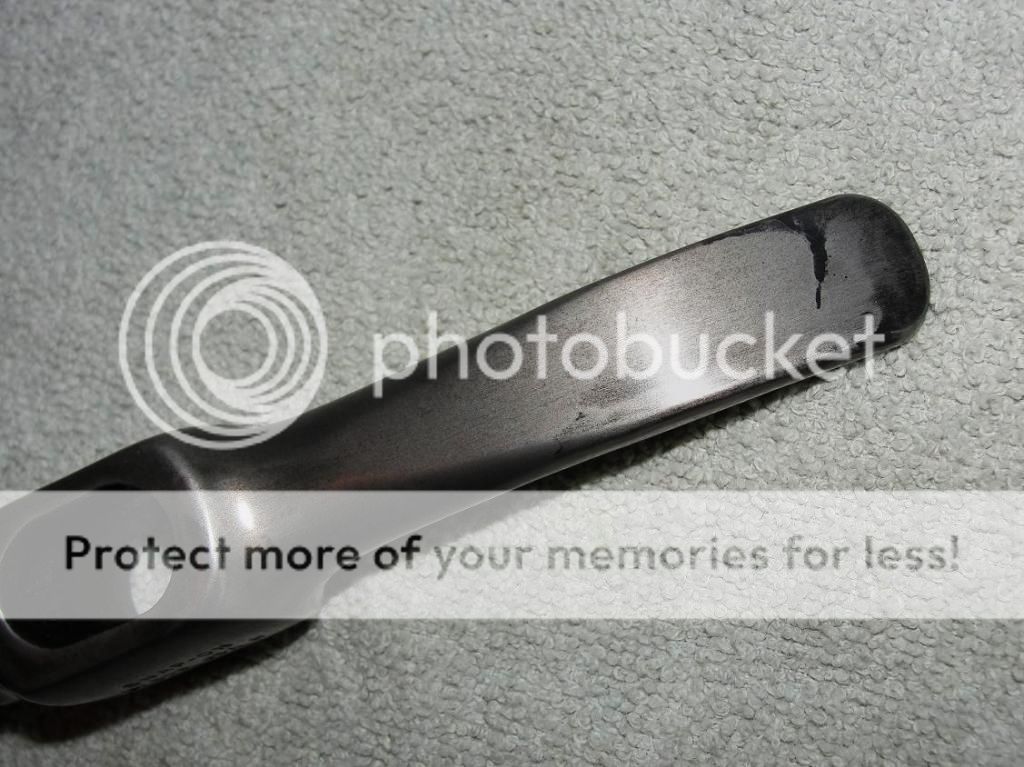
Here are some close up starting pics of the utilitarian finish in places where it doesn't matter for it's intended purpose. I took a lot of them so that others might get a better idea if one of these might work for a cane project they may be thinking of someday completing.
Pic #3
Pic#4

Pic #5
Pic #6

Pic #7
Pic #8

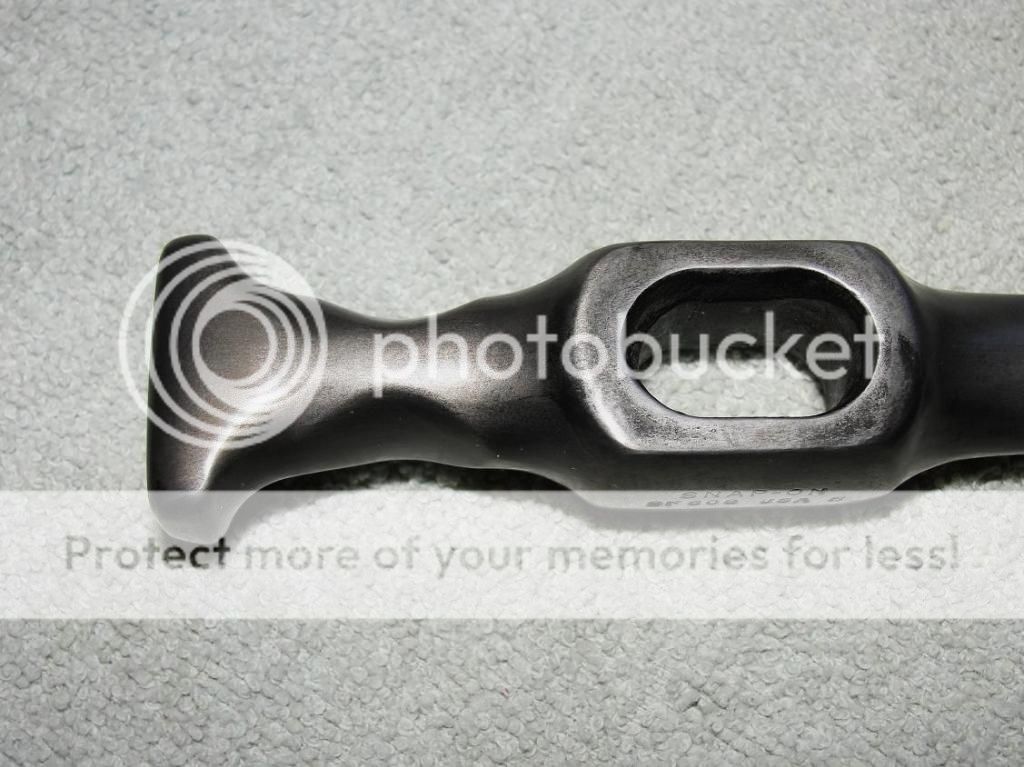
Pic #9 (1978 "Date Code" of Number "8" with splits separating down middle)
Pic #10 .....besides planning to eliminate a lot of the hammer face, ALL the back side sharp edges have a short shelf life!
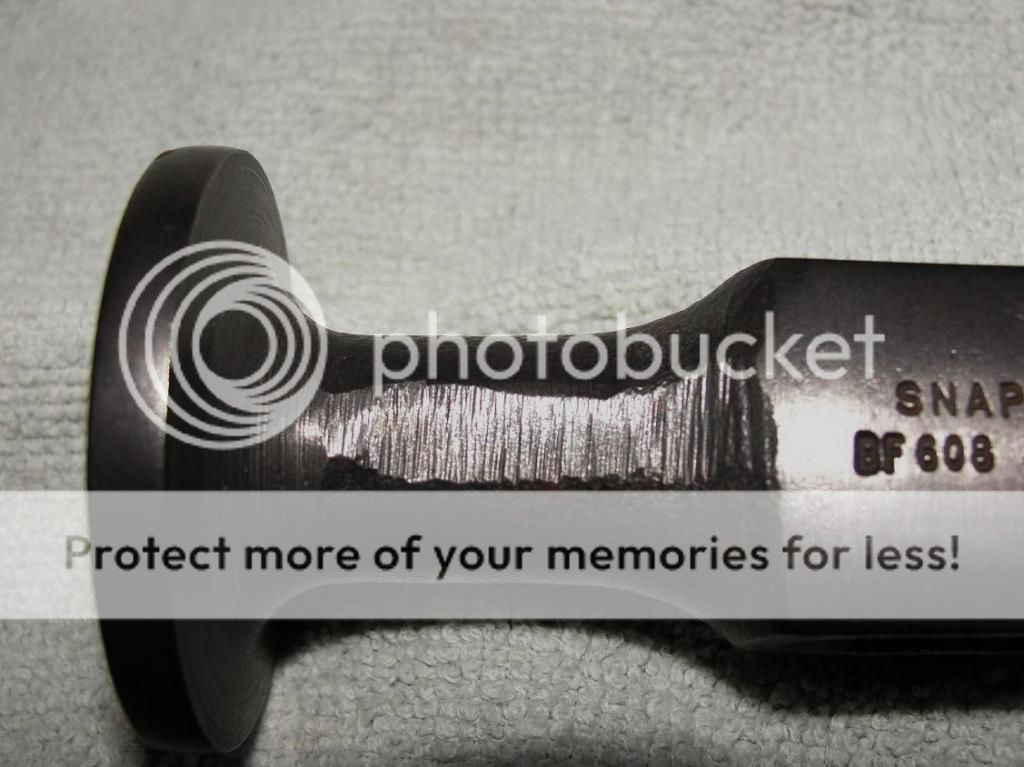
Those SHARP contours and edges, and unsightly grinding marks HAVE to GO!
Pic #11

Pic #12
Pic #13

Pic #14
OK,...so that's what we started with. My first decision was to remove the top and side sections of the hammer side, in order to make for a more comfortable handle. Much of the sanding has also been completed using 60 and 120 grit 1/2" sanding drums on my flex shaft machine. Later hand sanding to 600 grit followed.
Oh,...definitely high carbon and fairly hard. Cutting these pieces off with several stone cutoff discs took awhile, and the SPARKS were really flying! I kept an eye on my cotton shirt, in case I might discover a new way to start a fire, ME as kindling!
Pic #15
Pic #16
......and the still rough shape that I later decided to take down quite a bit more:
Pic #17

.....and after several hours of grinding and sanding, I ended up with this final configuration. (Compare to original in Pic #3)
Pic #18
The grooves I added behind the hammer are there to make for a much more comfortable carry, allowing the space between my index and middle finger to slide right in. The area behind the hammer face has been smoothed out to a high degree, as your hand makes contact with this area a lot while carrying. (Compare with original in Pic #10)
Pic #19

As you can see, ALL the rough areas have been smoothed and shaped to a fairly high level. At one time I actually mirror polished the entire handle, but found I didn't like the "slippery" in hand feel. A hand brushing with red scotch-brite pads gave me the finish I wanted, and super comfortable in hand.
Pic #20
Pic #21

Pic #22
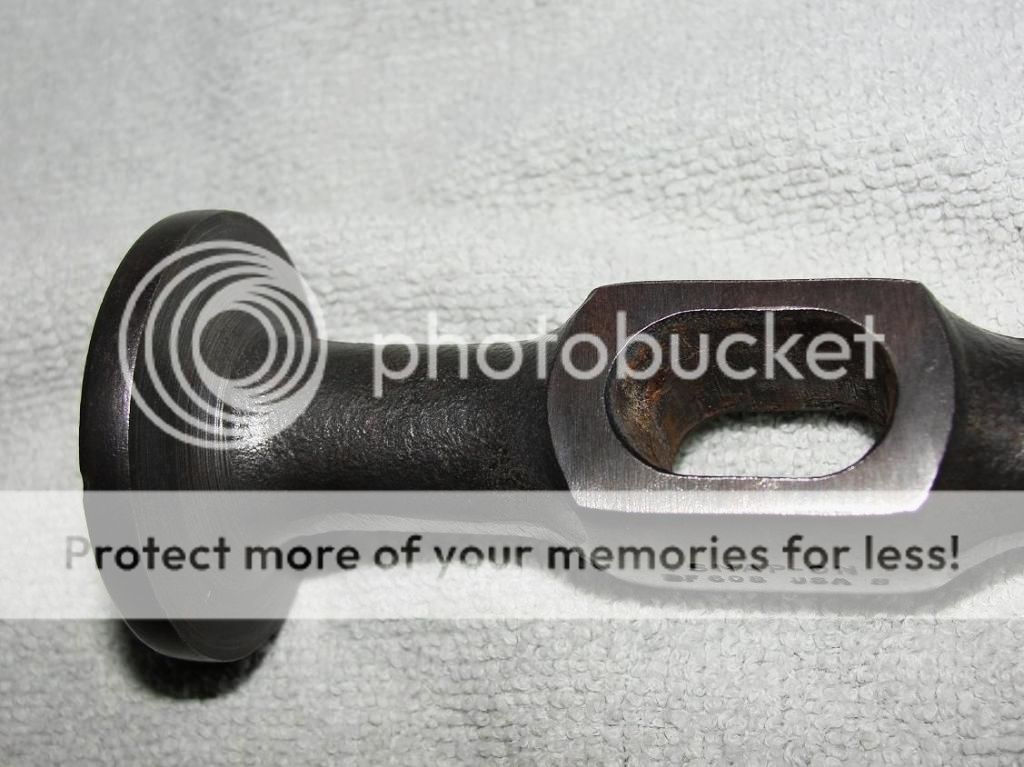
.....all the sharp corners around the shaft eye have been contoured and smoothed off to make for a comfortable surface for hand placement....... (Compare with original in Pic #12 previously)
Pic #23
.....for some reason, a few areas of the Apple Cider Vinager "blue" I gave the handle ended up with a darker streak, even though I spent some time really cleaning the steel prior to cider treatment. But in some ways, it gives the piece an aged look. The streak at the rounded spike the darkest......
Pic #24
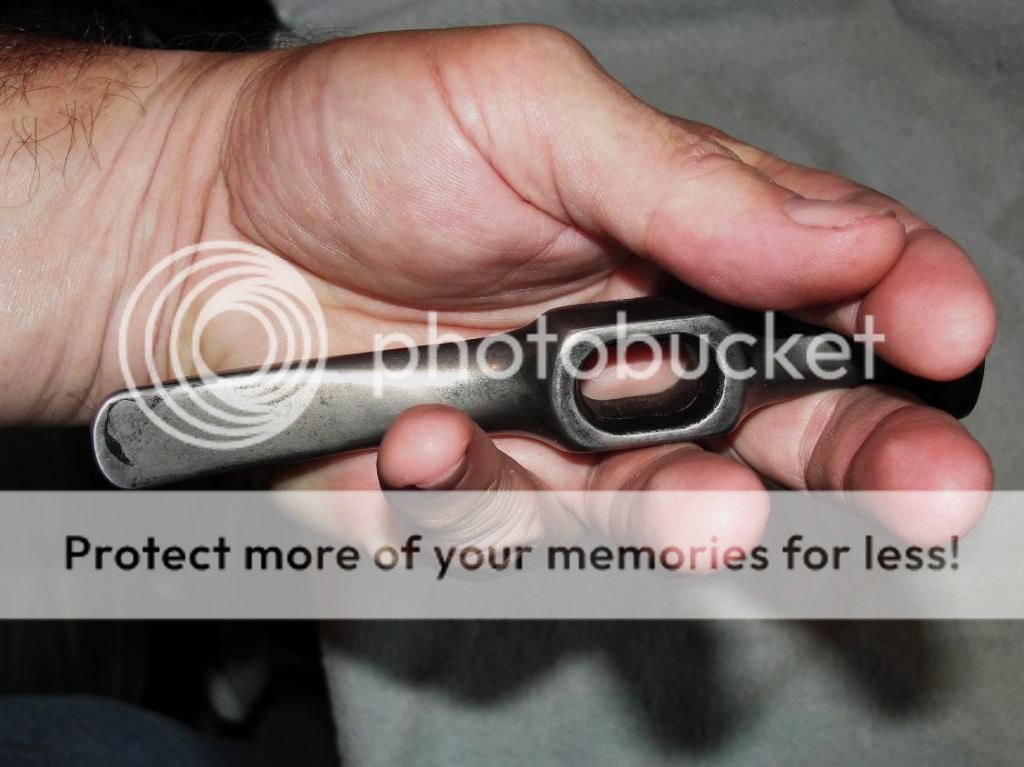
Here you can see one of the hand positions I can see me using regularly, once I find a cane shaft I like:
Pic #25
.....top view:
Pic #26

I found it also very comfortable to hold this way......
Pic #27

....top view....
Pic #28
Those finger grooves really feel great, especially smoothed off to this degree. I tapered the finger grooves deeper to the top, and that's how the space of the hand is shaped:
Pic #29

.....from the bottom side a less pronounced grooved cut.....
Pic #30
In the end, the handle lost 1-1/2 ounces in weight, and became what looks to be a cane I'll use frequently,.......ONCE I find a worthy shaft!
Pic #31
I was at first tempted to convert this into a mini hatchet on the hammer side, (short depth "blade" oriented in the same plane as the spike), and with a full pointed spike on the other. But living in New York State you have to be a bit more "conservative" in what you intend to carry, so I compromised on the changes to make for a less fearsome cane handle.
OK, so this is what I started with, a rather nice example but with the typical rough edges and utilitarian finish that I found uncomfortable in the hand as it came. But 5-1/2 inches of "possibilities".
Pic #1

.....and weighing in at a noticeable 9.286 ounces:
Pic #2

I'm pretty sure this is high carbon drop forged steel, and looks to be hardened a bit more at the hammer and spike areas. (as one would expect based on the quality standards "Snap-On" is known for). The very nice "ring" you hear when lightly striking this with a piece of steel also bears that out. Cast steel is dead sounding
Here are some close up starting pics of the utilitarian finish in places where it doesn't matter for it's intended purpose. I took a lot of them so that others might get a better idea if one of these might work for a cane project they may be thinking of someday completing.
Pic #3

Pic#4

Pic #5

Pic #6

Pic #7

Pic #8

Pic #9 (1978 "Date Code" of Number "8" with splits separating down middle)

Pic #10 .....besides planning to eliminate a lot of the hammer face, ALL the back side sharp edges have a short shelf life!

Those SHARP contours and edges, and unsightly grinding marks HAVE to GO!
Pic #11

Pic #12

Pic #13

Pic #14

OK,...so that's what we started with. My first decision was to remove the top and side sections of the hammer side, in order to make for a more comfortable handle. Much of the sanding has also been completed using 60 and 120 grit 1/2" sanding drums on my flex shaft machine. Later hand sanding to 600 grit followed.
Oh,...definitely high carbon and fairly hard. Cutting these pieces off with several stone cutoff discs took awhile, and the SPARKS were really flying! I kept an eye on my cotton shirt, in case I might discover a new way to start a fire, ME as kindling!
Pic #15

Pic #16

......and the still rough shape that I later decided to take down quite a bit more:
Pic #17

.....and after several hours of grinding and sanding, I ended up with this final configuration. (Compare to original in Pic #3)
Pic #18

The grooves I added behind the hammer are there to make for a much more comfortable carry, allowing the space between my index and middle finger to slide right in. The area behind the hammer face has been smoothed out to a high degree, as your hand makes contact with this area a lot while carrying. (Compare with original in Pic #10)
Pic #19

As you can see, ALL the rough areas have been smoothed and shaped to a fairly high level. At one time I actually mirror polished the entire handle, but found I didn't like the "slippery" in hand feel. A hand brushing with red scotch-brite pads gave me the finish I wanted, and super comfortable in hand.
Pic #20

Pic #21

Pic #22

.....all the sharp corners around the shaft eye have been contoured and smoothed off to make for a comfortable surface for hand placement....... (Compare with original in Pic #12 previously)
Pic #23

.....for some reason, a few areas of the Apple Cider Vinager "blue" I gave the handle ended up with a darker streak, even though I spent some time really cleaning the steel prior to cider treatment. But in some ways, it gives the piece an aged look. The streak at the rounded spike the darkest......
Pic #24

Here you can see one of the hand positions I can see me using regularly, once I find a cane shaft I like:
Pic #25

.....top view:
Pic #26

I found it also very comfortable to hold this way......
Pic #27

....top view....
Pic #28

Those finger grooves really feel great, especially smoothed off to this degree. I tapered the finger grooves deeper to the top, and that's how the space of the hand is shaped:
Pic #29

.....from the bottom side a less pronounced grooved cut.....
Pic #30

In the end, the handle lost 1-1/2 ounces in weight, and became what looks to be a cane I'll use frequently,.......ONCE I find a worthy shaft!
Pic #31

Last edited:


")


