The “how to make reasonable CRK pictures” thread – please post questions & experience

Joined
May 1, 2014
Messages
890
Quite frequently while posting pictures of CR knives here, people ask about my setup and about how I am doing my pictures. So I thought that this topic is maybe worth a separate thread so people can look at this whenever needed and even ask questions and share experience. Maybe we can make it a sticky.

Hope my English is good enough for this, as I am not a native speaker.

First. Let’s talk about a few let’s say “headlines”. Things people are always coming up with right away, when talking about good pictures. Let me try to evaluate them and to put them in the right order for you.

“You must have an expensive camera”
“Looking at your pictures it becomes obvious that I need to buy a new camera”


Yes. My camera and my equipment have been growing over the years and yes, it is quite expensive (not as expensive as some people’s CR collection …). But …… this alone doesn’t guarantee any good pictures. Period!

“It seems to be necessary to invest a lot of money into good equipment, before being able to take good pictures.”

Rule no. 1: First of all it is about having a good idea on how you want to take a picture of your knife. It is about the capability to imagine which picture composition, which view angle or which detail of the knife could make an interesting picture. No technique involved up to here. But people tend to forget about this simple first rule. No interesting picture composition = no good picture. Nevertheless how technically perfect it is. Nevertheless how expansive the equipment is.

Rule no. 2: Hope this German saying works in English: “a chain is only as strong as its weakest chain link”. Means we have a number of components influencing the results of taking pictures and it does not make sense to pay attention only to one component (for instance the camera). It doesn’t make much sense to buy an expensive camera, spending all your funds on it, having nothing left for the rest of the setup. So please make up your mind about your budget you are willing to spend and then take some time to consider how to spread your budget over the complete basic setup. Later on, having gained more experience, you will find out which individual component of your setup should be exchanged/improved in order to reach a higher level of your picture quality.

Now. Let’s assume you are going to start your setup from the beginning. Which are those above mentioned components you should consider (also for your budget) and which is the order of their importance for good results.

1. Camera

……………………….. No! That’s what everybody things first. But it is not no. 1.

1. Light conditions!
2. Desktop with photo background
3. Tripod (plus ideally a cable switch for the camera)
4. Camera

Why this order? Because you can invest into no. 4 (camera) whatever money you want. If nos 1 to 3 are not covered, your results will still be insufficient. It is as simple as that.
 
So let’s start with no. 1 “light conditions”.

There are 3 possible light conditions and I will try to lead you to the best one.

Daylight

Advantages: could look pretty, if everything works out fine.
Disadvantages: not predictable. Changing. Making you inflexible about when and where taking pictures. Cloudy sky can make pictures looking boring. Sunny sky can create reflections on blade and/or handle.

Flashlight

Advantages: …. Hm. Hardly any. Besides a very professional studio flashlight setup. But that is expensive and needs a lot of space/equipment. Maybe an advantage is that you could shoot the pictures by hand, without tripod. But that’s about it.
Disadvantages: Difficult to control. “Hard” light. Producing shadows which are almost impossible to control. Usually Flashlight is also brightening the background behind the knife, which we want to avoid because we want to have the knife in the light, but the surrounding less prominent and darker.
 
Last edited:
“Cold light”

Don’t really know where this name comes from. But we are talking about lamps with 5400 Kelvin light temperature bulbs.
Advantages: Controlled light conditions. Recommended to have 2 lamps in order to have light from 2 sides/2 directions at the knife. You can play with the lamps and see which light direction provides the best light at the knife, in order to see the details of the knife, but also creating an interesting picture composition. Light has a major influence on whether we find a picture interesting and well done. Permanent 5400K light allows you to work with long exposure time (using a tripod of course). So you do not have to worry about changing light conditions while having a long exposure running. Long exposure time allows you to choose a higher aperture number, which increases the depth of field.

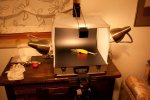
Two examples (sorry, old setup with Benchmade instead of CRK). Both pictures are JPEG, out of the camera, without software editing. The first picture shows the knife with normal room light plus a small office lamp on top of the studio.

Setup-Kunstlicht.jpg


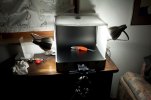
The second picture shows the same setup while using the two 5400K lamps left and right.

Setup-5400K-Licht.jpg

This should give you an idea about the importance of the correct light/light temperature.
 
Last edited:
2. Desktop and background

It is essential to have a little setup where you can place the knife, have the 5400K lamps installed and where you are able to establish a good comfortable working situation for the camera (and for yourself). Such kind of setup could be removable/temporary or permanent. Permanent of course has some advantages.

For the pictures we want a background which is not taking the attention away from the knife. Working with a kind of foil/sheet is recommended. Fabric may “produce” fluff, which you do not want on your knife while taking pictures. I am using a heavy vinyl foil which I did buy from an online photo background shop. Make sure that the foil is not causing too much reflections. If you are using a black foil, it should be darkest black as possible. Many foils tend to more dark grey instead of real black.

Colors can be nice. But depending upon the knife (inlayed handle, whatever) colors could mismatch with the rest of the knife. White background is okay, but gives a kind of “sterile” look. I am using black, as this fits with all knives. But it is not a large investment to have 1 or 2 optional foils besides black.
 
Last edited:
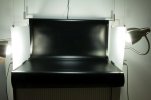
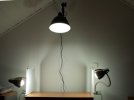
This is my "homemade" setup. I took a filing cabinet. Attached a wood plate on top, in order to extend the surface a bit. Bought that black vinyl foil from an online shop for photo background. Took an unused towel rail (don’t’ laugh …..) and mounted it to the ceiling. By doing this I was able to hang the vinyl foil in a way which provides a curve in the background in order to avoid a sharp edge/border in the background of the pics, which would be visible and disturbing. Two flexible lights with 5400 K bulbs. Two "milky" plastic shields in order to reduce reflections and to soften the light.

10911-9422717b.jpg
 
Last edited:
3. Tripod

For close up pictures and macros it is absolutely essential to avoid any movements and shaking of the camera. A tripod is a must! Tripods can vary in price, of course. The more heavy and well constructed, the more expensive. Very heavy is perfect for your little studio. But if you want to maintain an option going outside for taking pictures, too heavy isn’t nice to carry ….. On the other hand a very light tripod for travelling and maybe for trekking is less stable/firm/strong in terms of avoiding shaking. Depending upon your usage a compromise is maybe smart. The weight of the tripod should correspond with the weight of your camera. A large DSLR camera on a fragile trekking tripod might be not the best idea. On the other hand mounting a compact camera on a heavy duty studio tripod is over engineering …..

The tripod should have a ball coupling/ball hitch, for flexible adjustment of the camera position and angle.
 
Last edited:
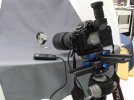
As mentioned above, we are going to take pictures with long exposure time. The moment you are pressing the release button of the camera, you will force vibrations into your camera/tripod setup, which will be visible at your pictures. Therefore I recommend to use a cable switch, as you can see at my equipment picture. If you want to avoid a cable switch, the self-release modus of the camera will help to provide a little time distance between touching the camera and the start of the exposure. But a cable switch is so much better and not that expensive. I highly recommend that.

This is my camera/tripod setup (with an old "light tent". Not recommended.):

Equipment3.jpg
 
Last edited:
4. Camera

Now we are coming to the item where most people think it is the one and only important item for making good pictures.

I don’t think cell phone pictures will do the job well. But it is not necessary to go to the other end of the range, similar to my camera. Of course, a DSLR will provide maximum flexibility in terms of an extensive lens range, particularly macro lenses. But also a zoom/bridge camera (one zoom lens incorporated into the body, not exchangeable) can do an good job if you observe the above advice, taking care for the right light, a suitable background, a tripod and maybe a cable switch.

Those bridge cameras can very often extend their macro capabilities by using some “glasses”, attached to the front glass of the lens.
 
Last edited:
If you are considering buying a new camera, you may want to pay attention to the formats, the camera is using for saving the pictures to the memory card. These days many cameras are offering both, JPEG and RAW format. Choosing a camera which is offering also the RAW format gives you the chance to edit the pictures at your computer, which is a huge benefit. Even if you are today not considering to do so, you may want to reserve that option for the future by choosing a camera offering RAW format. Many cameras even offer a kind of “dual saving” mode, where the camera is saving each picture in both formats, JPEG and RAW, to the memory card. That leaves you the option to use the picture saved as JPEG “ready to go”, if the quality is good enough for your purpose and without having the need to edit it via your computer. Whereas the additionally saved RAW picture can be improved via software if necessary.

Editing pictures via software like Adobe photoshop, lightroom and other products is a different chapter of making good pictures. We can explore this further if you like to. But for the first steps we should talk about the setup and the equipment.

I am always happy to help and to answer your questions. So please feel free to ask whatever questions are coming to your mind. Now its your turn. ;)

Stefan
 
Last edited:
Excellent. Thanks General. Read every sentence.Your English is fine. We generally say, "a chain is only as strong as its weakest link." The second "chain" is usually absent. Keep up the great work.
 
I really think this thread should be getting more traction. Beautifully written and spot on Stefan.

I am often complimented on my pics .... and I won't call them photographs, because I am not a photographer and consider myself a hack at photography. I have absolutely creative or artistic ability. Therefore, rather than trying to compose artistic pictures of my knives, I just try to make them look as closely to how they look to the naked eye as possible. To achieve this, often takes much trial and error (thank goodness we are in the digital age!!) First and foremost, learn as much about lighting and exposure as possible. Lighting (most often my nemesis) is, in my mind, far more important than any other aspect of capturing a good image of your knife. But understanding lighting (and exposure) is only half the battle ... the other half is being able to control it. I don't have a lot of space in which to take pictures .... so for me, controlling lighting involves a bunch of lights (not all used at any given time), many mirrors, and finally hand held light diffusers (to eliminate unwanted glare). The only place I would differ from Stephan in his top 4 list, is that I would place a (very sturdy) tripod as number two. My tripod is not nearly as sturdy as I would like it to be .... but I don't really take enough pictures to justify (to myself) purchasing a new one! Would rather spend money on knives and vittles! And, another area where I totally agree with Stefan is that, while a good camera and lens can't hurt ... and can definitely help, it isn't as critical as other things. What is important, is that you know your camera/lens well and how to use it! My camera of choice is my Nikon D300S (a real workhorse) with a Nikon 105mm micro lens. Problem is, the 105 mm (in my opinion) really isn't suited perfectly for taking pictures of my knives. Prior to it, I used the Nikon 18-200. It was great, but I got tired of lens creep when taking some pictures where I had to have a free hand to hold a light diffuser!! So, I have had to learn how to properly use the camera in conjunction to the lens to take the best pictures I can (getting back to the part about learning your camera and lens!). Since, lighting the most important aspect ... the next post will show my particular lighting set-up (since it differs slightly from Stefan's).
 
Last edited:
Light box

After much trial and error and using ideas by sharpbycoop in the gallery forum, I finally built a light box I am happy with. I constructed it from some wood, white board, and translucent bed linen. Here are some pictures of it as I was making the box:

T8xbqFw.jpg


pkfy8PA.jpg


GShAmFy.jpg


As for lighting, I use a total of 7 hot lights - 85W 5500K bulbs. Three from the top and two on each side. The bulbs on top bounce off a piece of white board down through the bed linen into the box. Whether I have all of the lights on or just specific ones depends on the particular knife I am trying to photograph (excuse me, take a picture of!!). I also use a bunch of mirrors to direct the lighting onto specific areas of the knife as well as a large hand held diffuser (made from a small white board frame with vellum as the diffuser). I keep moving the mirrors and diffuser until I think I have acceptable lighting on the knife. I then take a few (or, most often, quite a bit more than a few) pics in hope that some of them are satisfactory!! Here are a couple shots of how the box is set up to use:

BfFsVRI.jpg


with the whiteboard on top to bounce lighting from the top:

OkvpOvo.jpg


Hope others share their set-up and techniques here.

Thanks for starting this Stefan!
 
Last edited:
Hey Dennis!

Thanks for joining in. Looking at your setup I am wondering about the number of lights, plus the mirrors you are using. A lot of stuff to handle.

As you can see from the attached picture, I have also installed a top light with the same 5400K bulb.

10732-f680be58-medium.jpg

After gaining some experience with this setup I figured out that for the pics showing the complete knife, using only the 2 side lights is creating the best result:

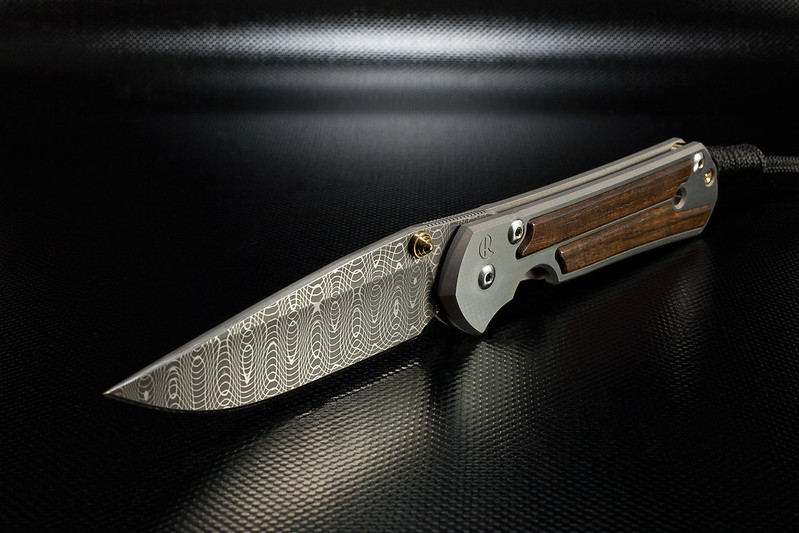
Regular, Annual, Spalted Maple, 05


Having the top light also switched on, I feel that there is too much light at the knife. Plus I have this reflection which you can see here in the back:

Macassar, Spirograph, 04

If I take the macro pics, I try both: switching the top light on. Taking a picture. Switching it off and taking another picture. Later I check on my computer which one I like better.

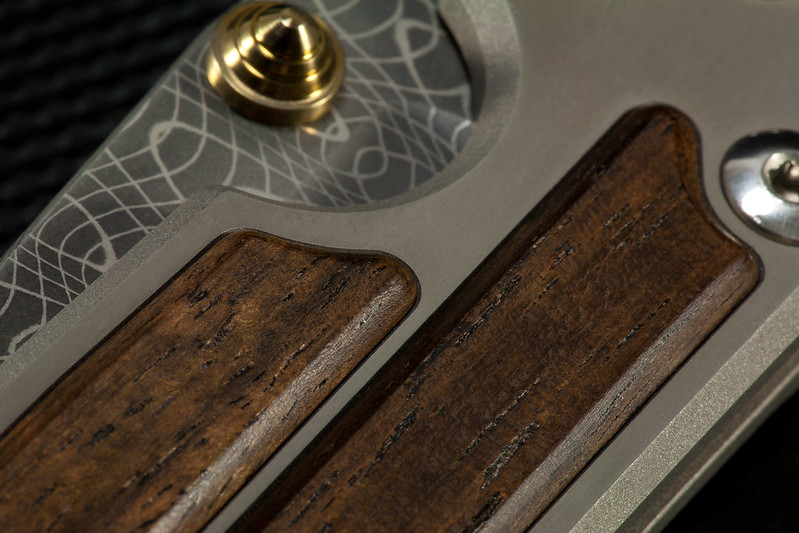
Regarding your lenses. Your 105mm macro lens should be great for the very close macro pics. I am using a 100mm macro lens for those:

Macassar, Spirograph, 11

What you see above is not a crop (cut out) of a regular pic. It is taken with the 100mm macro and this is how it comes out.

For the pics of the complete knife I have a 50mm macro lens. With these 2 lenses I am doing all my knife pics.

Best,
Stefan
 
Yes, I know the lighting is overkill ... but, as I said, not all are on at the same time. Also, with current tripod and without the benefit of a remote shutter release, I really can't do shots with long exposure times, nor do I want to crank up the ISO. For me, this works .... but like I said .... I'm a hack!!! Plain an simple! Do wish I could take good pictures with lower light ... but I don't really take enough pictures (that are not web quality) that I will ever progress to a higher level of proficiency.

For the pics of the complete knife I have a 50mm macro lens. With these 2 lenses I am doing all my knife pics.

And that is a good lens for this stuff ... which is why I liked the 18-200, as it gave me plenty of flexibility. But doing downward shots was virtually impossible without holding the lens to prevent lens creep. While the 105 I have is an exceptional lens (which is why I bought it ... having heard from many people how great it was) ... it is really (IMO) made for shots like these, which I took shortly after I got the lens, to test it out (not knives):

8on6Ews.jpg


QoJ1siy.jpg
 
Last edited:
Thank you for making this thread a Sticky... :D I swear, one of these days, I will finally put together a set-up worthy of these CRK knives... :)
 
Thank you for making this thread a Sticky... :D I swear, one of these days, I will finally put together a set-up worthy of these CRK knives... :)

:cool: :thumbup:
 
Yes, I know the lighting is overkill ... but, as I said, not all are on at the same time. Also, with current tripod and without the benefit of a remote shutter release, I really can't do shots with long exposure times, nor do I want to crank up the ISO.

Can you use a two-second shutter delay? I don't really benefit much from a remote shutter release since I generally step away from the lightbox before I capture my image as to limit reflection of my clothes / person.
 
Can you use a two-second shutter delay? I don't really benefit much from a remote shutter release since I generally step away from the lightbox before I capture my image as to limit reflection of my clothes / person.

Yes, I could .... but I tend to do what I am used to doing and what works for me. Since I don't have the innate ability to be creative or artistic ... I just go with realistic. And for that, the amount of lighting I use works for what I want it to do. I tend to shoot with my right hand holding down on the camera to help steady the tripod, my finger on the shutter release, and my left hand is most often holding a light diffuser. Here's a shot of a Mnandi I took recently. Many would say there is too much lighting. However, all I want this picture to do is represent (as accurately as possible) what this Mnandi looks like to the naked eye. Even with this amount of lighting, I am still able to see the blade grind fairly clearly and the contours and recesses of the clip.

Bf76M1J.jpg
 
Last edited:
Back
Top