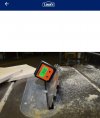
The Rail Height Adjuster for the Hapstone R2 is a big improvement!

Joined
Aug 9, 2021
Messages
1,439
The new Rail Height Adjuster for my Hapstone R2/V8 just arrived from Gritomatic. It makes setting the bevel angle very easy. It replaces the original vertical column and fine tuning adapter, which worked OK, but were rather fiddly. With the new Rail Height Adjuster, you just turn the orange knob at the top, and the pivot for the rail goes up or down very smoothly and stays in place, like on the Work Sharp Professional Precision Adjust. This makes the Hapstone easier than the TSProf Kadet for setting the angle, and almost as easy as the WSPPA or Kazak Model 100.

The Rail Height Adjuster is also more rigid than the original vertical column. And it has a new parking mechanism that I think is better than the old one.

There seems not to be a thickness compensator, but that's not really needed because it is so easy to reset the angle as desired.

I see no instructions for installing the Rail Height Adjuster. Look at the photo on the Gritomatic web site to see what it is supposed to look like. (Hapstone-USA does not have it on their web site yet.) The only tricky part is that you first have to unscrew the hex screw from the base of the Rail Height Adjuster, remove the base from the vertical column, screw the base onto the platform of the R2, put the vertical column back on the base, and replace the hex screw.
 
Does it have some sort of angle indicator on it? Because without that I don't see what makes it less fiddly. I would still have to ink the edge, make a test pass, and adjust till I matched the blade's angle. Major angle changes might even be slower.

O.B.
 
Can someone post a pick of the parking mechanism at work? For the life of me I can not figure out how that dang thing works. I do agree the rail height adjuster is awesome!
 
Can someone post a pick of the parking mechanism at work? For the life of me I can not figure out how that dang thing works. I do agree the rail height adjuster is awesome!
The photo at Gritomatic shows the parking mechanism in action. Just below the pivot, in front, is a slot. The new Spring-Assisted Stopper Ring (you have to remove the old Spring-Assisted Stopper Ring) has a rectangular protrusion that fits into the slot like ... well, this is a family-safe site, so I can't say that.
 
Does it have some sort of angle indicator on it? Because without that I don't see what makes it less fiddly. I would still have to ink the edge, make a test pass, and adjust till I matched the blade's angle. Major angle changes might even be slower.

There is no angle indicator. Even if there were one, it would not be accurate unless you calibrated it for the particular knife in a particular position with particular stones. You set whatever angle you want based on an angle gauge.

The old way, if you want to set the angle to, say, 20 degrees, you:
1) Loosen the knob that holds the fine-tuning adapter in place and lower it.
2) Loosen the knob that holds the pivot in place.
3) Slide the pivot up or down until the angle gauge reads close to 20 degrees, maybe 20 + or - 0.5 degrees.
4) Tighten the pivot knob.
5) Slide the fine-tuning adapter up until it touches the bottom of the pivot.
6) Tighten the fine-tuning knob.
7) Loosen the pivot knob.
8) Turn the striped ring on the fine-tuning adapter until the angle gauge reads 20 degrees exactly (or maybe 20 + or - 0.1 degrees, depending on the accuracy of the angle gauge).
9) Tighten the pivot knob.

With the new Rail Height Adjuster, you just turn the knob at the top of the column until the angle gauge reads what you want.
 
Gritomatic says there are only 2 left.

Just to be clear, the Rail Height Adjuster will not make your knives any sharper. It just makes it easier to get them sharp.
 
Can someone post a pick of the parking mechanism at work? For the life of me I can not figure out how that dang thing works. I do agree the rail height adjuster is awesome!

Helpful pics deleted due to BF not being an image hosting site.
 
Last edited:
There is no angle indicator. Even if there were one, it would not be accurate unless you calibrated it for the particular knife in a particular position with particular stones. You set whatever angle you want based on an angle gauge.

The old way, if you want to set the angle to, say, 20 degrees, you:
1) Loosen the knob that holds the fine-tuning adapter in place and lower it.
2) Loosen the knob that holds the pivot in place.
3) Slide the pivot up or down until the angle gauge reads close to 20 degrees, maybe 20 + or - 0.5 degrees.
4) Tighten the pivot knob.
5) Slide the fine-tuning adapter up until it touches the bottom of the pivot.
6) Tighten the fine-tuning knob.
7) Loosen the pivot knob.
8) Turn the striped ring on the fine-tuning adapter until the angle gauge reads 20 degrees exactly (or maybe 20 + or - 0.1 degrees, depending on the accuracy of the angle gauge).
9) Tighten the pivot knob.

With the new Rail Height Adjuster, you just turn the knob at the top of the column until the angle gauge reads what you want.
Thank you. That helps me understand what it can and can't do. It looks well made, but at this time I don't think it is a big enough improvement over stock, for me to spend the price. Especially since I am now retired, and need to learn to think a little more carefully about where I spend my money.

O.B.
 
Is there a "lock it down" type part/mechanism once you're at your desired angle?
Angle adjustment is done by a threaded rod. It does not slide up or down so therefore there is no "lock knob" to keep it from moving. You turn the gold knob at the top to adjust your angle. It will stay put until you turn the knob again. The above pictures show the threaded rod and the gold adjustment knob.
 
I just ordered mine yesterday...and hope to receive it by end of this week. I probably won't put it to use until after Christmas or New Year.

Anyone have a great recommendation to go with this setup regarding angle guides (digital or otherwise)?

I have seen the magnetic kind that people place on the rod and it gives the angle, like one in pic provided.

Thanks,
JTScreenshot_20231219_171913_Lowe's.jpg
 
Thanks for your comment, I think it will be available on our website www.hapstone-usa.com within a couple weeks.

Regarding installation, we were aiming for maximum stabilization and are still working on how to attach the tilt adjustment module to the base of the Hapstone R2 in a different or easier way.

If you have any additional questions, we'd be happy to answer them!
🎅Merry Christmas!
Team Hapstone!
 
Regarding installation, we were aiming for maximum stabilization and are still working on how to attach the tilt adjustment module to the base of the Hapstone R2 in a different or easier way.
I found that attachment of the new Rail Height Adjuster from Gritomatic to the R2 base to be simple and easy.

The Rail Height Adjuster is also more stable. With the old upright, I was getting slightly convex bevels. With the Rail Height Adjuster, I am getting bevels that are as close to a flat V shape as my laser goniometer can measure.

What bothers me is this:
https://www.bladeforums.com/threads...ter-for-the-hapstone-r2-can-fall-off.1964763/
Good afternoon, Dear Mr. Another Shepherd Another Shepherd
Thank you for your feedback about our old height adjuster module, please contact us so we can discuss the warranty case with you and replace the module.

Our e-mail is: info@hapstone.pro.

We will rectify the situation, as it is important to us that you are comfortable.

Sincerely, Hapstone Team
 
Back
Top