Stacy E. Apelt - Bladesmith
ilmarinen - MODERATOR
Moderator
Knifemaker / Craftsman / Service Provider
- Joined
- Aug 20, 2004
- Messages
- 38,409
I got a chance to take a few shots of two accessories I made for the grinder. These should work for most grinders. The one shown is a Reeder.
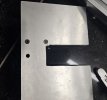
The tilt table is just a large flat plate with a slot slightly wider than the wheel/platen. I show it with a flat platen, but it really works great for hollow grinding on a large wheel.
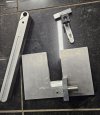
It attaches to the grinder with a standard tool arm and an attachment bar with a 3/4" round rod.
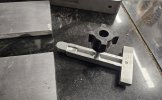
Construction is pretty much obvious on the tilt table. I took shots from various angles. The adjustable "T" rest reverses for single point rest or a straight ledge rest.
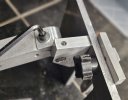
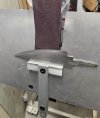
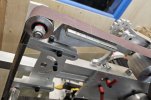
The sharpening platen is a short glass lined platen that attaches on the top of the platen arm and sits under the belt between the tracking and top idler wheel. It allows hand sharpening a blade or using a sharpening angle jig. It is shown with a Reeder sharpening attachment.
The sharpening platen is made from a piece of 3/8" thick aluminum angle I had in the metal bin. It didn't need to be this thick, but it was what I had in the right width. I cut down a glass platen with my diamond tile saw, sanded and rounded the ends and edges on the grinder, and glued it on with JB Weld. It attaches and adjusts with one bolt. In use it just barely lifts the belt for a perfect sharpening contact. When not needed it drops down just enough to clear the belt. Of course, it can be removed in seconds by taking out the one bolt. I run the belt in reverse and very slow when sharpening.
Tips:
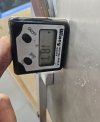
Use a Wixey angle meter to set any table or jig angle exactly. Reference it to the platen and then measure the jig or table angle . Wixey makes all sorts of very affordable digital readouts for measuring and adding to tools and equipment. I find the angle meter useful at least weekly, if not daily. Best less than $30 I ever spent. It is useful for lots more than setting a jig/fixture angle. I use it to set the table saw blade to exactly 22.5°, check the bandsaw blade/table alignment, check a board or shelf for level. set te drain angle when pouring concrete, etc.
Use what materials and work rests and arms you have. Anything works most of the time. Weld things up in steel, bolt up in aluminum, cut them with hand tools or machine them on a mill ... all will work with planning and determination. I make almost all my attachments by hand using saws, files, the grinder, drill press, hand taps, etc. I almost never need to machine a part. Most special parts, like the table attachment bar, are readily available from folks like Gereg Reeder or Contender. You may be able to repurpose parts from an old work rest to work just fine.
Sharpening platen
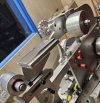
Sharpening platen
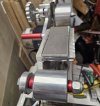
Tilt Table. Also, notice the small lift on the belt by the sharpening platen.
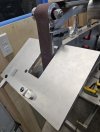
Wixey Angle Guage being zeroed on the platen
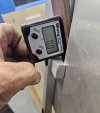
Wixey on the table reading the angle to the belt
Blade on the straight rest guide. This will grind the edge bevel at the set angle. Works well for hollow grinding with a wheel.
Blade in clamp on sharpening attachment. Zero the Wixey to the platen and then place on the blade ricasso (it is magnetic). Raise the fixture to the desired angle and that is what the edge will be. Flip attachment to do other side.
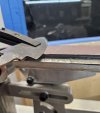
Attachment from another angle.
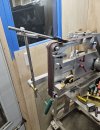
Sharpening platen - notice that it just barely raises the belt.
The tilt table is just a large flat plate with a slot slightly wider than the wheel/platen. I show it with a flat platen, but it really works great for hollow grinding on a large wheel.
It attaches to the grinder with a standard tool arm and an attachment bar with a 3/4" round rod.
Construction is pretty much obvious on the tilt table. I took shots from various angles. The adjustable "T" rest reverses for single point rest or a straight ledge rest.
The sharpening platen is a short glass lined platen that attaches on the top of the platen arm and sits under the belt between the tracking and top idler wheel. It allows hand sharpening a blade or using a sharpening angle jig. It is shown with a Reeder sharpening attachment.
The sharpening platen is made from a piece of 3/8" thick aluminum angle I had in the metal bin. It didn't need to be this thick, but it was what I had in the right width. I cut down a glass platen with my diamond tile saw, sanded and rounded the ends and edges on the grinder, and glued it on with JB Weld. It attaches and adjusts with one bolt. In use it just barely lifts the belt for a perfect sharpening contact. When not needed it drops down just enough to clear the belt. Of course, it can be removed in seconds by taking out the one bolt. I run the belt in reverse and very slow when sharpening.
Tips:
Use a Wixey angle meter to set any table or jig angle exactly. Reference it to the platen and then measure the jig or table angle . Wixey makes all sorts of very affordable digital readouts for measuring and adding to tools and equipment. I find the angle meter useful at least weekly, if not daily. Best less than $30 I ever spent. It is useful for lots more than setting a jig/fixture angle. I use it to set the table saw blade to exactly 22.5°, check the bandsaw blade/table alignment, check a board or shelf for level. set te drain angle when pouring concrete, etc.
Use what materials and work rests and arms you have. Anything works most of the time. Weld things up in steel, bolt up in aluminum, cut them with hand tools or machine them on a mill ... all will work with planning and determination. I make almost all my attachments by hand using saws, files, the grinder, drill press, hand taps, etc. I almost never need to machine a part. Most special parts, like the table attachment bar, are readily available from folks like Gereg Reeder or Contender. You may be able to repurpose parts from an old work rest to work just fine.
Sharpening platen

Sharpening platen

Tilt Table. Also, notice the small lift on the belt by the sharpening platen.

Wixey Angle Guage being zeroed on the platen

Wixey on the table reading the angle to the belt

Blade on the straight rest guide. This will grind the edge bevel at the set angle. Works well for hollow grinding with a wheel.

Blade in clamp on sharpening attachment. Zero the Wixey to the platen and then place on the blade ricasso (it is magnetic). Raise the fixture to the desired angle and that is what the edge will be. Flip attachment to do other side.

Attachment from another angle.

Sharpening platen - notice that it just barely raises the belt.

Last edited:

