- Joined
- May 29, 2004
- Messages
- 3,037
Hi Folks,
Like many of you, I have encountered many broken knife tips and am even responsible for one or two. A little chip off the tip is a pretty easy repair (see below), but when a larger chunk is lost things get a bit more complicated.
I’m happy to be known as the weird knife guy, and as a result I often get rusty, dull or broken knives from friends and co-workers to work on. I just finished re-tipping a knife and thought it would make a good case study.
I did a forum search btw and found a variety of advice but nothing that consolidated all of the good advice together, and that’s what I’d like to do here.
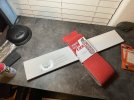
The knife in question is a very nice Spyderco Southard which belongs to one of my partners. Awhile back he sent me this photo and asked if I could help:
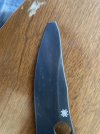
I said for sure, and a few weeks later the knife showed up on my desk with a note. The owner wanted suggestions as to how to shape the tip, but said he was “anti-tanto”. I cut a smooth curve in a piece of paper, layed it over the knife, and sent this picture back to him.
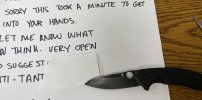
He liked the looks so l got started.
The key point to know is that if you overheat the knife blade during the repair process, you can ruin the heat treatment of the knife permanently. Much of what I’m sharing below is about avoiding that scenario.
I’ve probably fixed a dozen or more tips by now and have learned some good lessons.
Shape: It’s almost always going to be MUCH easier to grind the spine down to the edge, rather than vice-versa. So in other words, if my buddy HAD wanted a Tanto point, I’d have talked him out of it. In the case of this knife, the three reasonable choices were: A) the drop point I suggested, B) a straight clip point, and C) a trailing point clip. Note that A and B are exponentially easier to create than C, simply due to the geometry of trailing points.
Tools: Again, if you can avoid power tools, you completely avoid the overheating issue, so if you can tackle the grinding with a stone (ideally diamonds as they cut fastest) or some other abrasive, do that. Be aware that most regular files won’t work well on the hardened steel of most knives.
While many different tools can work, (I’ve used a Dremel successfully but it’s much harder to get a smooth curve/surface), a belt sander or low-speed belt grinder might be the best tool to use with a large tip break. Please watch this very short video:
Note that I’m carefully lining up each stroke and making them as consistent as possible. This is key in achieving a smooth curve (or straight spine).
Also note that I use light pressure and dip the knife in water after every pass. Dipping is easy to do with a belt sander/grinder - and more difficult with other tools.
I recommend AGAINST a grinding wheel. They spin very fast and therefore can generate friction heat very quickly. Also the wheels can fracture (causing injury) if exposed to water, which makes dipping less convenient.
Another key point: STOP with any power tools BEFORE you grind all the way to the edge. The very tip of the knife will be instantly overheated by high speed abrasives, you won’t be able to dip fast enough to protect the heat treatment.
So, this is where I stopped before moving to a diamond plate:

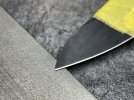
I’m using an inexpensive (~$8) double-sided diamond plate here and getting closer. I’m using essentially the same tip-trailing motion, and constantly checking the scratch pattern between passes. Look close and go slow:
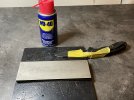
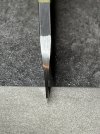
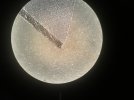
And done. Use magnification to confirm that you’re ACTUALLY at a point (sorry for the bad magnified pic):

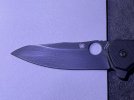
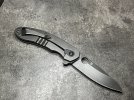
I still need to sharpen it up (which will refine the tip slightly) and lube the pivot and then back it goes.
Really sweet knife…
If you have any helpful tips/critiques to add or would like to show off a tip repair please feel free!
Like many of you, I have encountered many broken knife tips and am even responsible for one or two. A little chip off the tip is a pretty easy repair (see below), but when a larger chunk is lost things get a bit more complicated.
I’m happy to be known as the weird knife guy, and as a result I often get rusty, dull or broken knives from friends and co-workers to work on. I just finished re-tipping a knife and thought it would make a good case study.
I did a forum search btw and found a variety of advice but nothing that consolidated all of the good advice together, and that’s what I’d like to do here.
The knife in question is a very nice Spyderco Southard which belongs to one of my partners. Awhile back he sent me this photo and asked if I could help:

I said for sure, and a few weeks later the knife showed up on my desk with a note. The owner wanted suggestions as to how to shape the tip, but said he was “anti-tanto”. I cut a smooth curve in a piece of paper, layed it over the knife, and sent this picture back to him.

He liked the looks so l got started.
The key point to know is that if you overheat the knife blade during the repair process, you can ruin the heat treatment of the knife permanently. Much of what I’m sharing below is about avoiding that scenario.
I’ve probably fixed a dozen or more tips by now and have learned some good lessons.
Shape: It’s almost always going to be MUCH easier to grind the spine down to the edge, rather than vice-versa. So in other words, if my buddy HAD wanted a Tanto point, I’d have talked him out of it. In the case of this knife, the three reasonable choices were: A) the drop point I suggested, B) a straight clip point, and C) a trailing point clip. Note that A and B are exponentially easier to create than C, simply due to the geometry of trailing points.
Tools: Again, if you can avoid power tools, you completely avoid the overheating issue, so if you can tackle the grinding with a stone (ideally diamonds as they cut fastest) or some other abrasive, do that. Be aware that most regular files won’t work well on the hardened steel of most knives.
While many different tools can work, (I’ve used a Dremel successfully but it’s much harder to get a smooth curve/surface), a belt sander or low-speed belt grinder might be the best tool to use with a large tip break. Please watch this very short video:
Note that I’m carefully lining up each stroke and making them as consistent as possible. This is key in achieving a smooth curve (or straight spine).
Also note that I use light pressure and dip the knife in water after every pass. Dipping is easy to do with a belt sander/grinder - and more difficult with other tools.
I recommend AGAINST a grinding wheel. They spin very fast and therefore can generate friction heat very quickly. Also the wheels can fracture (causing injury) if exposed to water, which makes dipping less convenient.
Another key point: STOP with any power tools BEFORE you grind all the way to the edge. The very tip of the knife will be instantly overheated by high speed abrasives, you won’t be able to dip fast enough to protect the heat treatment.
So, this is where I stopped before moving to a diamond plate:

I’m using an inexpensive (~$8) double-sided diamond plate here and getting closer. I’m using essentially the same tip-trailing motion, and constantly checking the scratch pattern between passes. Look close and go slow:


And done. Use magnification to confirm that you’re ACTUALLY at a point (sorry for the bad magnified pic):


I still need to sharpen it up (which will refine the tip slightly) and lube the pivot and then back it goes.
Really sweet knife…
If you have any helpful tips/critiques to add or would like to show off a tip repair please feel free!
Last edited:


